Управление объектами свойств ресурса при использовании Windows PowerShell
ADResourcePropertyNew-ADResourcePropertySet-ADResourcePropertyRemove-ADResourcePropertyDepartNew-ADClaimTypeDescriptionDisplayName
- Прежде всего, это параметр –IsSecured, отвечающий за то, будет ли создаваемый объект свойств ресурса использоваться для авторизации. Естественно, значение $true считается истиной и позволяет использовать этот объект для авторизации, а значение $false, в свою очередь, создает объект исключительно для классификации;
- Параметр –ResourcePropertyValueType, при использовании которого вы можете определить тип значения для создаваемого объекта. В качестве значения этого параметра должно выступать различающееся имя объекта msDS-ValueType. Эти значения представляют собой логические типы данных, о которых шла речь ранее в этой статье, и для всего леса они размещаются в разделе конфигурации службы каталогов Active Directory, а если говорить точнее, то в CN=Value Types,CN=Claims Configuration,CN=Services. То есть, в моем случае это CN=MS-DS-SinglevaluedChoice,CN=Value Types,CN=Claims Configuration,CN=Services,CN=Configuration,DC=biopharmaceutic,DC=local. По умолчанию можно выбрать одно из следующих типов значений: MS-DS-DateTime, MS-DS-MultivaluedChoice, MS-DS-SinglevaluedChoice, MS-DS-MultivaluedText, MS-DS-Number, MS-DS-OrderedList, MS-DS-Text, а также MS-DS-YesNo. В принципе, их наименования в пользовательском интерфейсе очевидны, а о назначении я уже говорил несколькими разделами выше, поэтому повторяться просто нет смысла;
- А также параметр –SuggestedValues. Как и в случае с утверждениями, этот параметр отвечает за предложенные значения, в котором, собственно, даже синтаксис идентичен.
Рис. 5. Создание свойства ресурса при помощи Windows PowerShell
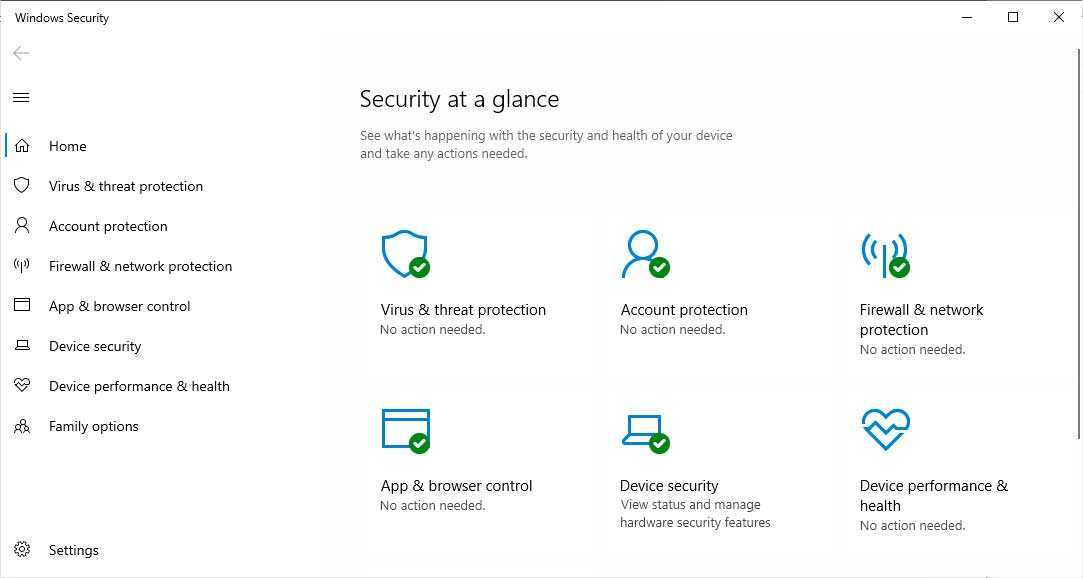
Gateway access role definitions
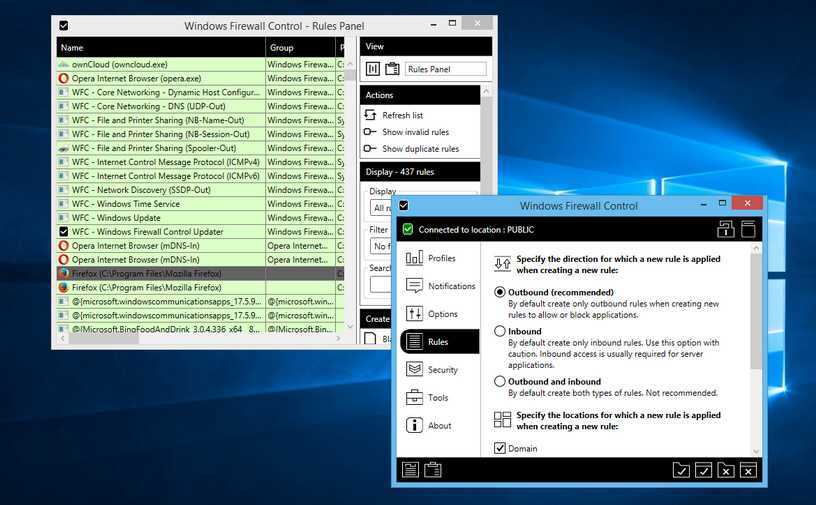
There are two roles for access to the Windows Admin Center gateway service:
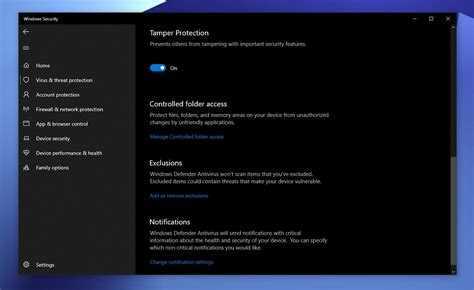
Gateway users can connect to the Windows Admin Center gateway service to manage servers through that gateway, but they can’t change access permissions nor the authentication mechanism used to authenticate to the gateway.
Gateway administrators can configure who gets access as well as how users authenticate to the gateway. Only gateway administrators can view and configure the Access settings in Windows Admin Center. Local administrators on the gateway machine are always administrators of the Windows Admin Center gateway service.
There is also an additional role specific to the management of CredSSP:
Windows Admin Center CredSSP Administrators are registered with the Windows Admin Center CredSSP endpoint and have permissions to perform predefined CredSSP operations. This group is especially useful for installations of Windows Admin Center in desktop mode, where only the user account which installed Windows Admin Center is given these permissions by default.
Note
Access to the gateway doesn’t imply access to managed servers visible by the gateway. To manage a target server, the connecting user must use credentials (either through their passed-through Windows credential or through credentials provided in the Windows Admin Center session using the Manage as action) that have administrative access to that target server.
Управление объектами свойств ресурса при использовании Windows PowerShell
Как в случае с типами утверждений, да и практически с любыми функциональными возможностями Windows Server 2012, управлять объектами свойств ресурса вы можете не только средствами центра администрирования Active Directory, но также для написания сценариев и автоматизации ваших действий можно использовать богатейшие возможности Windows PowerShell. Для управления свойствами ресурсов используются командлеты ADResourceProperty, то есть New-ADResourceProperty для их создания, Set-ADResourceProperty для изменения существующих объектов, а также Remove-ADResourceProperty, который отвечает за удаление последних.
Итак, сейчас попробуем создать объект свойство ресурса под названием Depart, где будут указаны различные должности (в этом примере Маркетинг, Бухгалтерия, Финансисты), которые должны фигурировать при изменении условного выражения. Значит, следует использовать такой командлет:
В принципе, структура этого командлета очень похожа на структуру командлета New-ADClaimType. То есть здесь можно обнаружить параметры Description и DisplayName, которые отвечают за отображаемое имя и описание
Однако здесь стоит обратить внимание на несколько следующих параметров:
- Прежде всего, это параметр –IsSecured, отвечающий за то, будет ли создаваемый объект свойств ресурса использоваться для авторизации. Естественно, значение $true считается истиной и позволяет использовать этот объект для авторизации, а значение $false, в свою очередь, создает объект исключительно для классификации;
- Параметр –ResourcePropertyValueType, при использовании которого вы можете определить тип значения для создаваемого объекта. В качестве значения этого параметра должно выступать различающееся имя объекта msDS-ValueType. Эти значения представляют собой логические типы данных, о которых шла речь ранее в этой статье, и для всего леса они размещаются в разделе конфигурации службы каталогов Active Directory, а если говорить точнее, то в CN=Value Types,CN=Claims Configuration,CN=Services. То есть, в моем случае это CN=MS-DS-SinglevaluedChoice,CN=Value Types,CN=Claims Configuration,CN=Services,CN=Configuration,DC=biopharmaceutic,DC=local. По умолчанию можно выбрать одно из следующих типов значений: MS-DS-DateTime, MS-DS-MultivaluedChoice, MS-DS-SinglevaluedChoice, MS-DS-MultivaluedText, MS-DS-Number, MS-DS-OrderedList, MS-DS-Text, а также MS-DS-YesNo. В принципе, их наименования в пользовательском интерфейсе очевидны, а о назначении я уже говорил несколькими разделами выше, поэтому повторяться просто нет смысла;
-
А также параметр –SuggestedValues. Как и в случае с утверждениями, этот параметр отвечает за предложенные значения, в котором, собственно, даже синтаксис идентичен.Процесс создания этого объекта изображен на следующей иллюстрации:
Рис. 5. Создание свойства ресурса при помощи Windows PowerShell
Собственно, на этом данная статья подходит к концу. Сегодня мы с вами рассмотрели свойства ресурсов: вы узнали о том, что собой представляют объекты этого типа, для чего они нужны, а также какие бывают типы свойств ресурсов. Помимо теоретической части вы также узнали о том, как можно создавать и управлять такими объектами при помощи пользовательского интерфейса, а именно средствами консоли «Центр администрирования Active Directory», а также используя богатые функциональные возможности Windows PowerShell.
В следующей, четвертой статье данного цикла я продолжу вас знакомить с возможностями динамического контроля доступа, а если говорить точнее, то речь уже пойдет о списках свойств ресурсов, а также о классификации файлов. Коллеги, а какие свойства ресурсов вы создавали в своей среде для реализации DAC?
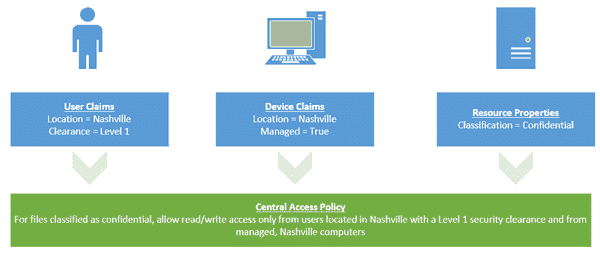
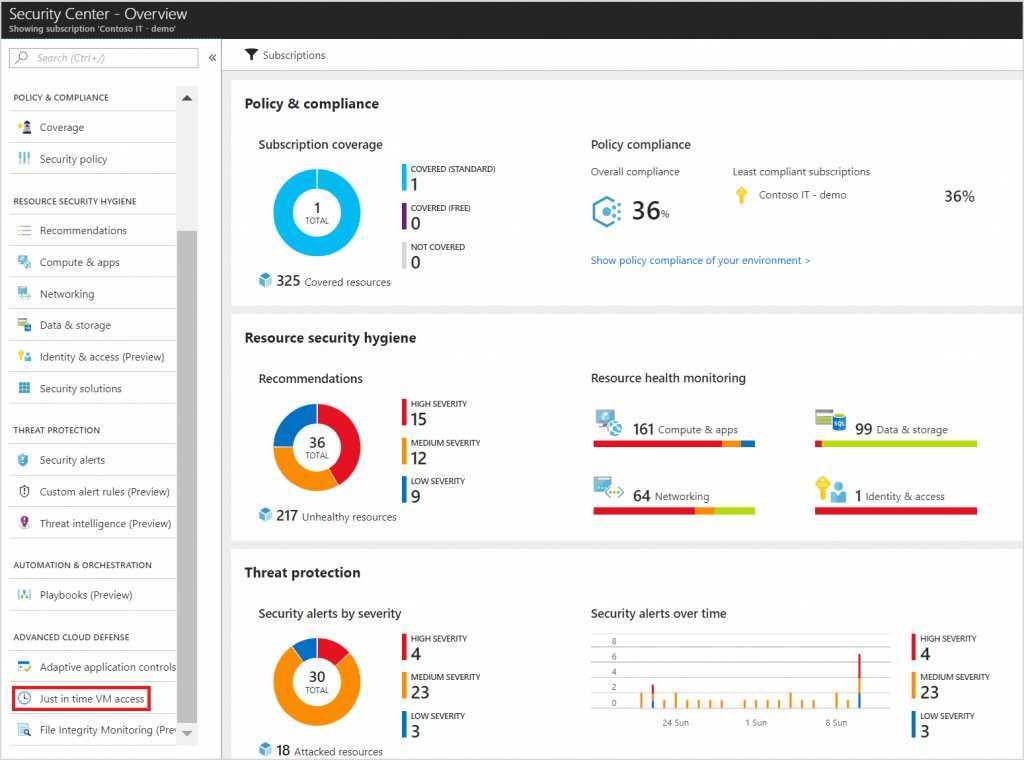
The “Bird’s eye” perspective of DAC operation ^
DAC operates on user/device claims and resource properties. Claims are user or computer attributes that are (a) based upon Active Directory schema attributes; and (b) extensions to a user or computer’s Kerberos security token. A new-ish technology called Kerbero Armoring is responsible for these account token extensions.
Thus, in our fictional example, we could create the following DAC claims:
- User: Location
- User: Security clearance
- Computer: Location
If the Active Directory schema doesn’t contain the property you need, remember that you can always extend the schema to accommodate the new property.
On the file server side of the fence, we create and deploy resource properties to add semantic meaning to our shared folders and files. Think of a resource property as a metadata tag that will eventually be associated with a user or computer property.
In our current example, we could define a resource property called Confidentiality that contains the following values: Low, Medium, High. We can then classify our folders (as well as individual files) by marking their confidentiality level.
In Windows Server 2012 file services, you can automatically classify file server resources by using the updated File Server Resource Manager (FSRM) console. For instance, you can schedule a scan of target folders that parses file contents for the presence of a string such as “Company Confidential.” Files that are picked up by the classification scan can be tagged and even encrypted with Active Directory Rights Management Services (RMS)> The FRSM console is shown in the following screenshot.
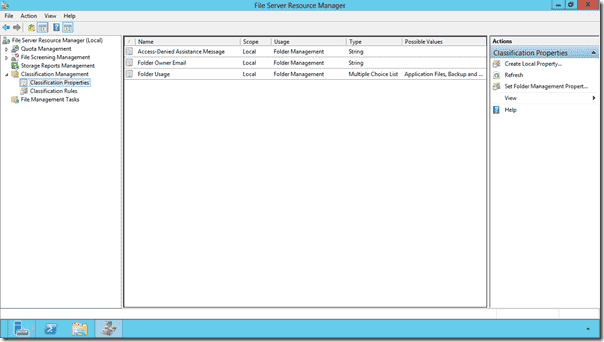
File Server Resource Manager — Classification Properties
We use PowerShell to deploy resource properties to your domain’s file servers.
The third side of the DAC pyramid is the Central Access Policy (CAP). A CAP consists of one or more Central Access Rules (CARs) that define resource access based upon conditional statements. These “If/then” arguments effectively link user/device claims with resource properties.
We use Group Policy to deploy our CAPs to the domain.
Of course, DAC setup requires several steps in addition to what I’ve defined here. Here is a Visio diagram that I whipped up to show you the relationship between claims, resource properties, and central access policies.
Dynamic Access Control schematic
A simple example ^
Consider this fictional but nonetheless real-world scenario:
Your company’s IT department is subject to various industry and governmental regulations that require you to track file server resource access as closely as possible.
For instance, you have a file server named XERXES that hosts a shared folder named CORP_DOCS. The confidential files in that folder should be accessible only to Nashville campus employees who possess a level 1 security clearance and are accessing the files from Nashville-based computers.

How in the world could you attain this goal by using shared folder and NTFS permissions? The short answer is that we can’t: traditional access methods in Windows are not flexible enough.
The good news is that DAC was built to address scenarios precisely like this one. We can even leverage the advanced auditing capabilities built into Windows Server 2012 to track the access per our compliance requirements.
How does DAC actually work? Let’s discuss that now.
Claim Types
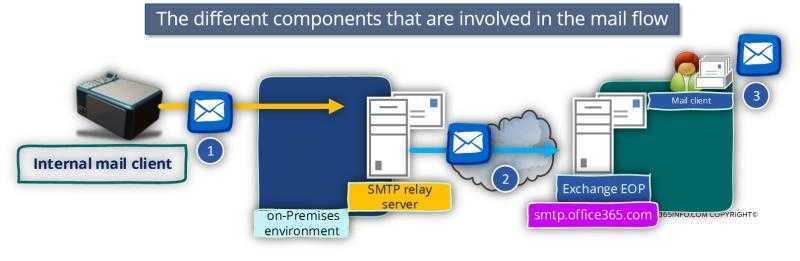
AD FS in Windows Server 2012 R2 provides request context information using the following claim types:
X-MS-Forwarded-Client-IP
Claim type:
This AD FS claim represents a “best attempt” at ascertaining the IP address of the user (for example, the Outlook client) making the request. This claim can contain multiple IP addresses, including the address of every proxy that forwarded the request. This claim is populated from an HTTP. The value of the claim can be one of the following:
A single IP address — The IP address of the client that is directly connected to Exchange Online
Note
The IP address of a client on the corporate network will appear as the external interface IP address of the organization’s outbound proxy or gateway.
-
One or more IP addresses
-
If Exchange Online cannot determine the IP address of the connecting client, it will set the value based on the value of the x-forwarded-for header, a non-standard header that can be included in HTTP based requests and is supported by many clients, load balancers, and proxies on the market.
-
Multiple IP addresses indicating the client IP address and the address of each proxy that passed the request will be separated by a comma.
-
Note
IP addresses related to Exchange Online infrastructure will not be present in the list.
Warning
Exchange Online currently supports only IPV4 addresses; it does not support IPV6 addresses.
X-MS-Client-Application
Claim type:
This AD FS claim represents the protocol used by the end client, which corresponds loosely to the application being used. This claim is populated from an HTTP header that is currently only set by Exchange Online, which populates the header when passing the authentication request to AD FS. Depending on the application, the value of this claim will be one of the following:
-
In the case of devices that use Exchange Active Sync, the value is Microsoft.Exchange.ActiveSync.
-
Use of the Microsoft Outlook client may result in any of the following values:
-
Microsoft.Exchange.Autodiscover
-
Microsoft.Exchange.OfflineAddressBook
-
Microsoft.Exchange.RPCMicrosoft.Exchange.WebServices
-
Microsoft.Exchange.RPCMicrosoft.Exchange.WebServices
-
-
Other possible values for this header include the following:
-
Microsoft.Exchange.Powershell
-
Microsoft.Exchange.SMTP
-
Microsoft.Exchange.Pop
-
Microsoft.Exchange.Imap
-
X-MS-Client-User-Agent
Claim type:
This AD FS claim provides a string to represent the device type that the client is using to access the service. This can be used when customers would like to prevent access for certain devices (such as particular types of smart phones). Example values for this claim include (but are not limited to) the values below.
The below are examples of what the x-ms-user-agent value might contain for a client whose x-ms-client-application is “Microsoft.Exchange.ActiveSync”
-
Vortex/1.0
-
Apple-iPad1C1/812.1
-
Apple-iPhone3C1/811.2
-
Apple-iPhone/704.11
-
Moto-DROID2/4.5.1
-
SAMSUNGSPHD700/100.202
-
Android/0.3
It is also possible that this value is empty.
X-MS-Proxy
Claim type:
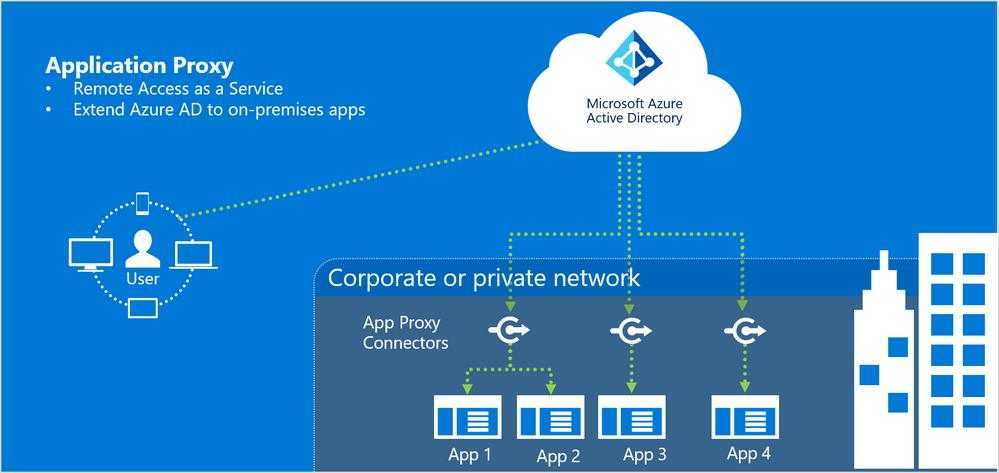
This AD FS claim indicates that the request has passed through the Web Application proxy. This claim is populated by the Web Application proxy, which populates the header when passing the authentication request to the back end Federation Service. AD FS then converts it to a claim.
The value of the claim is the DNS name of the Web Application proxy that passed the request.
InsideCorporateNetwork
Claim type:
Similar to the above x-ms-proxy claim type, this claim type indicates whether the request has passed through the web application proxy. Unlike x-ms-proxy, insidecorporatenetwork is a boolean value with True indicating a request directly to the federation service from inside the corporate network.
X-MS-Endpoint-Absolute-Path (Active vs Passive)
Claim type:
This claim type can be used for determining requests originating from “active” (rich) clients versus “passive” (web-browser-based) clients. This enables external requests from browser-based applications such as the Outlook Web Access, SharePoint Online, or the Office 365 portal to be allowed while requests originating from rich clients such as Microsoft Outlook are blocked.
The value of the claim is the name of the AD FS service that received the request.
Building the IP address range expression
The x-ms-forwarded-client-ip claim is populated from an HTTP header that is currently set only by Exchange Online, which populates the header when passing the authentication request to AD FS. The value of the claim may be one of the following:
Note
Exchange Online currently supports only IPV4 and not IPV6 addresses.
A single IP address: The IP address of the client that is directly connected to Exchange Online
Note
- The IP address of a client on the corporate network will appear as the external interface IP address of the organization’s outbound proxy or gateway.
- Clients that are connected to the corporate network by a VPN or by Microsoft DirectAccess (DA) may appear as internal corporate clients or as external clients depending upon the configuration of VPN or DA.
One or more IP addresses: When Exchange Online cannot determine the IP address of the connecting client, it will set the value based on the value of the x-forwarded-for header, a non-standard header that can be included in HTTP-based requests and is supported by many clients, load balancers, and proxies on the market.
Note
- Multiple IP addresses, indicating the client IP address and the address of each proxy that passed the request, will be separated by a comma.
- IP addresses related to Exchange Online infrastructure will not on the list.
Regular Expressions
When you have to match a range of IP addresses, it becomes necessary to construct a regular expression to perform the comparison. In the next series of steps, we will provide examples for how to construct such an expression to match the following address ranges (note that you will have to change these examples to match your public IP range):
-
192.168.1.1 – 192.168.1.25
-
10.0.0.1 – 10.0.0.14
First, the basic pattern that will match a single IP address is as follows: \b###\.###\.###\.###\b
Extending this, we can match two different IP addresses with an OR expression as follows: \b###\.###\.###\.###\b|\b###\.###\.###\.###\b
So, an example to match just two addresses (such as 192.168.1.1 or 10.0.0.1) would be: \b192\.168\.1\.1\b|\b10\.0\.0\.1\b
This gives you the technique by which you can enter any number of addresses. Where a range of address need to be allowed, for example 192.168.1.1 – 192.168.1.25, the matching must be done character by character: \b192\.168\.1\.(|1|2)\b
Please note the following:
-
-
The IP address is treated as string and not a number.
-
The rule is broken down as follows: \b192\.168\.1\.
-
This matches any value beginning with 192.168.1.
-
The following matches the ranges required for the portion of the address after the final decimal point:
-
( Matches addresses ending in 1-9
-
|1 Matches addresses ending in 10-19
-
|2) Matches addresses ending in 20-25
-
-
Note that the parentheses must be correctly positioned, so that you don’t start matching other portions of IP addresses.
-
With the 192 block matched, we can write a similar expression for the 10 block: \b10\.0\.0\.(|1)\b
-
And putting them together, the following expression should match all the addresses for “192.168.1.1~25” and “10.0.0.1~14”: \b192\.168\.1\.(|1|2)\b|\b10\.0\.0\.(|1)\b


Testing the Expression
Regex expressions can become quite tricky, so we highly recommend using a regex verification tool. If you do an internet search for “online regex expression builder”, you will find several good online utilities that will allow you to try out your expressions against sample data.
When testing the expression, it’s important that you understand what to expect to have to match. The Exchange online system may send many IP addresses, separated by commas. The expressions provided above will work for this. However, it’s important to think about this when testing your regex expressions. For example, one might use the following sample input to verify the examples above:
192.168.1.1, 192.168.1.2, 192.169.1.1. 192.168.12.1, 192.168.1.10, 192.168.1.25, 192.168.1.26, 192.168.1.30, 1192.168.1.20
10.0.0.1, 10.0.0.5, 10.0.0.10, 10.0.1.0, 10.0.1.1, 110.0.0.1, 10.0.0.14, 10.0.0.15, 10.0.0.10, 10,0.0.1
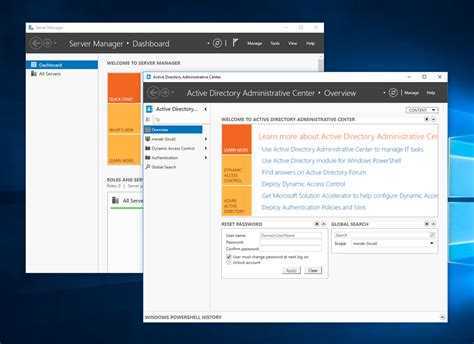
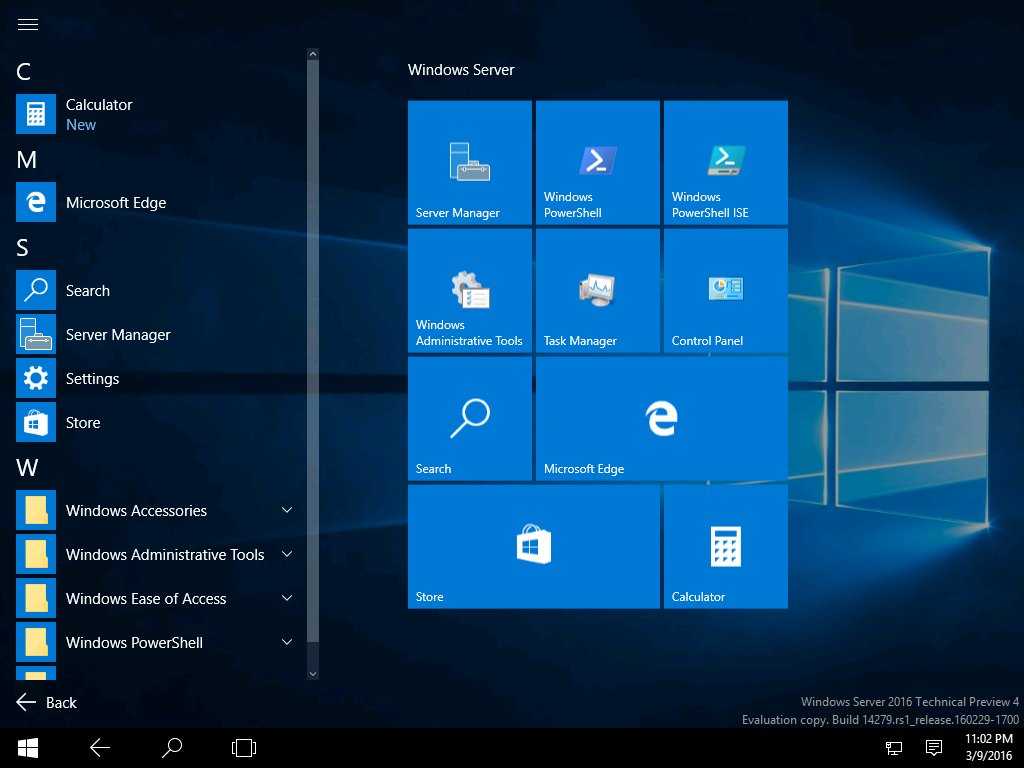
Windows PowerShell History Viewer
Windows PowerShell is a key technology in creating a consistent experience between the command-line and the graphical user interface. Windows PowerShell increases productivity, but also requires investment in learning how to use it.
To minimize the learning investment, Windows Server 2012 includes the new Windows PowerShell History Viewer. The benefits include:
-
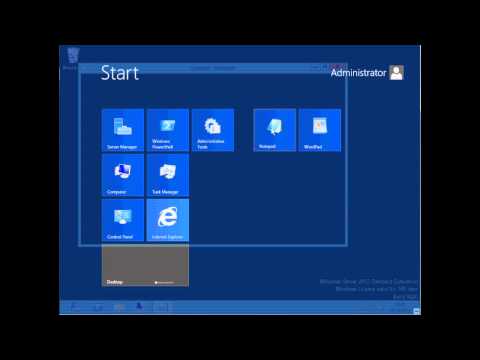
Allow administrators to view the Windows PowerShell commands executed when using the Active Directory Administrative Center. For example:
-
The administrator adds a user to a group
-
The UI displays the equivalent Windows PowerShell for Active Directory command
-
The administrator copies the resulting syntax and integrates it into a script
-
Reduces Windows PowerShell learning-curve
-
Increases confidence in scripting
-
Further enhances Windows PowerShell discoverability
-
Requirements
Windows Server 2012 Active Directory Administrative Center
For more information about the Windows PowerShell History Viewer, see Active Directory Administrative Center Enhancements.
Creating and deploying the Resource Property List ^
In DAC, the Resource Property List (RPL) is the deployable unit to our file servers. We can create any number of RPLs and deploy them selectively to our domain file servers.
Let’s do this! In the Dynamic Access Control node in ADAC, right-click Resource Property Lists and select New > Resource Property List.
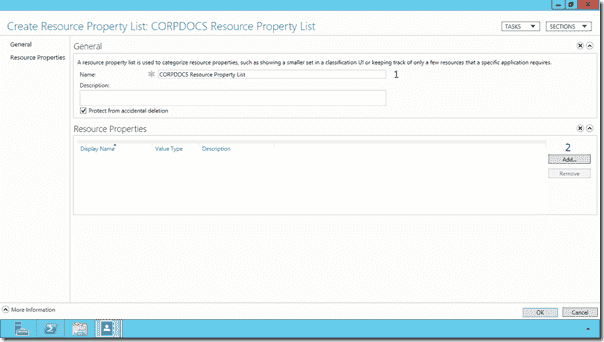
Defining a new Resource Property List
- Provide a meaningful name to your RPL. Feel free to document the purpose of the RPL in the Description field as well.
- Click Add to associate our previously created resource properties to the new RPL. The Select Resource Properties dialog box is shown in the following screenshot.
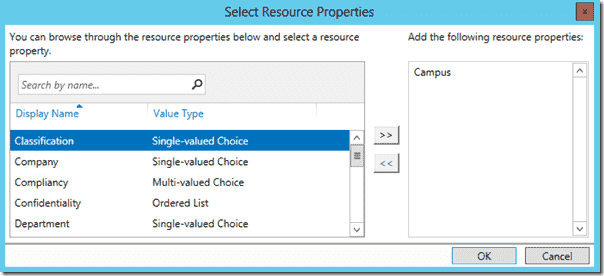
Adding our resource properties to our resource property list
Believe it or not, we are still not finished. We now need to deploy our RPL to our domain file servers. To do this, we need to open an administrative PowerShell session and issue the following cmdlet:
Update-FSRMClassificationPropertyDefinition
We are now ready to shift our attention from our domain controller to our Windows Server 2012 file server, MEMNUGGET, to classify the CORPDOCS folder.
Plan: Identify the need for policy and the configuration required for deployment
This section provides the high-level series of steps that aid in the planning phase of your deployment.
| Step # | Step | Example |
|---|---|---|
| 1.1 | Business determines that a central access policy is needed | To protect finance information that is stored on file servers, the finance department security operations is working with central information security to specify the need for a central access policy. |
| 1.2 | Express the access policy | Finance documents should only be read by members of the Finance department. Members of the Finance department should only access documents in their own country. Only Finance Administrators should have write-access. An exception will be allowed for members of the FinanceException group. This group will have Read access. |
| 1.3 | Express the access policy in Windows Server 2012 constructs | Targeting:
— Resource.Department Contains Finance Access rules: — Allow read User.Country=Resource.Country AND User.department = Resource.Department- Allow Full control User.MemberOf(FinanceAdmin) Exception: Allow read memberOf(FinanceException) |
| 1.4 | Determine the file properties required for the policy | Tag files with:
— Department- Country |
| 1.5 | Determine the claim types and groups required for the policy | Claim types:
— Country- Department User groups: — FinanceAdmin- FinanceException |
| 1.6 | Determine the servers on which to apply this policy | Apply the policy on all finance file servers. |
Распространение централизованных политик доступа
административных шаблоновGPSIсуществующие параметры«Конфигурация Windows»административные шаблоныпредпочтениями групповой политики«Динамический контроль доступа»
- Для начала нужно открыть оснастку «Управление групповой политикой» (Group Policy Management), где следует в подразделении с целевыми файловыми серверами создать новый объект групповой политики, скажем «Dynamic Access Control 01», а затем открыть для такого объекта редактор управления групповыми политиками;
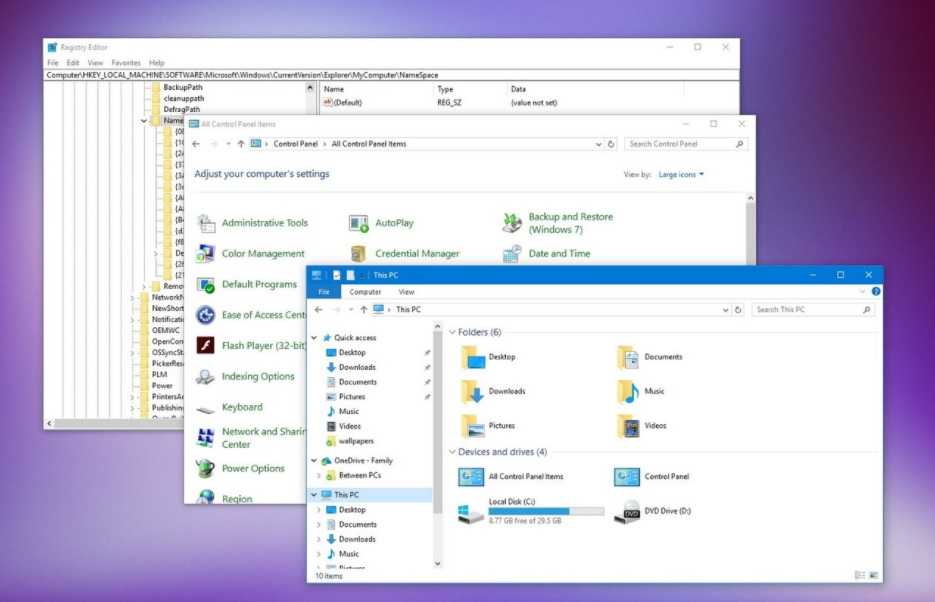
- В отобразившейся оснастке требуемое расширение CSE можно локализовать в параметрах безопасности. То есть следует перейти к узлу Конфигурация компьютера\Политики\Конфигурация Windows\Параметры безопасности\Файловая система (Computer Configuration\Policies\Windows Settings\Security Settings\File System). Как вы помните по предыдущим серверным операционным системам от Microsoft, в этом узле вы можете настроить разрешения доступа для пользователей или групп к объектам, расположенным на определенном компьютере, о чем уже шла речь в моей статье «Локальная политика безопасности. Часть 6: группы с ограниченным доступом, системные службы, реестр и файловая система». Сейчас же, начиная с Windows Server 2012, в данном узле можно обнаружить еще один вложенный узел, который называется «Централизованная политика доступа» (Central Access Policy) и который как раз предназначен для распространения созданных ранее централизованных политик доступа. Чтобы настроить параметр политики, вам нужно перейти к данному узлу, а затем, как показано на следующей иллюстрации, из контекстного меню выбрать команду «Управление централизованными политиками доступа» (Manage Central Access Policies…):Рис. 8. Создание параметра политики в редакторе GPME
- Должно отобразиться диалоговое окно «Конфигурация централизованных политик доступа» (Central Access Policies Configuration), благодаря которому вы и можете распространить сгенерированные заранее политики доступа на свои целевые файловые сервера. Для этого, как можно увидеть ниже, нужно из списка «Доступные центрованные политики доступа» (Available Central Access Policies) выбрать все распространяемые политики доступа (в случае необходимости, вы можете зажать клавишу CTRL и выбрать требуемые политики), а затем, по нажатию на кнопку «Добавить» (Add), переместить таковые в список «Примененные централизованные политики доступа» (Applicable Central Access Policies):Рис. 9. Конфигурация централизованных политик доступа
- После того как у вас будут добавлены все требуемые централизованные правила доступа, можете смело закрывать редактор управления групповыми политиками и выполнять на целевых серверах обновление параметров политики.
C:\Windows\SYSVOL\domain\Policies\{6DF180BA-22E3-4D52-A34F-158633E56956}\Machine\Microsoft\Windows NT\CapC:\Windows\SYSVOL\domain\Policies{6DF180BA-22E3-4D52-A34F-158633E56956}Machine\Microsoft\Windows NT\CapSignature=»$Windows NT$»«CN=Test CAP,CN=Central Access Policies,CN=Claims Configuration,CN=Services,CN=Configuration,DC=biopharmaceutic,DC=local»«CN=Маркетологи Лос-Анджелеса,CN=Central Access Policies,CN=Claims Configuration,CN=Services,CN=Configuration,DC=biopharmaceutic,DC=local»NameDescriptionРис. 10. Раздел реестра с определенными параметрами централизованных политик и правил доступа
Flexible Authentication Secure Tunneling (FAST)
Today, offline dictionary attack against password-based logons is possible. There is a relatively well-known concern around Kerberos errors being spoofed. Clients may:
-
Fallback to less-secure legacy protocols
-
Weaken their cryptographic key strength and/or ciphers
Kerberos in Windows Server 2012 supports Flexible Authentication Secure Tunneling (FAST)
-
Defined by RFC 6113
-
Sometimes referred to as Kerberos armoring
-
Provides a protected channel between a domain-joined client and DC
-
Protects pre-authentication data for user’s AS_REQs
-
Uses LSK (logon session key) from computer’s TGT as shared secret
-
Note that computer authentication is NOT armored
-
-
Allows DCs to return authenticated Kerberos errors thereby protecting them from spoofing
-
-
Once all Kerberos clients and DCs support FAST (the admin’s decision to make)
-
The domain can be configured to either require Kerberos armoring or use it upon request
-
Must first ensure all or enough DCs are running Windows Server 2012
-
Enable the appropriate policy
-
“Support CBAC and Kerberos armoring”
-
“All DCs can support CBAC and Require Kerberos armoring”
-
-
-
Requirements
-
Windows Server 2012 servers
-
Ensure that all domains the client uses including transited referral domains:
-
Enable the “Support CBAC and Kerberos armoring” policy for all Windows Server 2012 DCs
-
Have a sufficient number of Windows Server 2012 DCs to support FAST
-
-
Enable “Require FAST” policy on supported clients
-
RFC-compliant FAST interoperability requires Windows Server 2012 domain functional level
Configure Network Access Protection
This post is going to configure network access protection. If you don’t know the installation, read the below article about installation of NAP in Windows server 2012 R2.

Installing Network Policy Server (NPS) on Windows Server 2012 R2
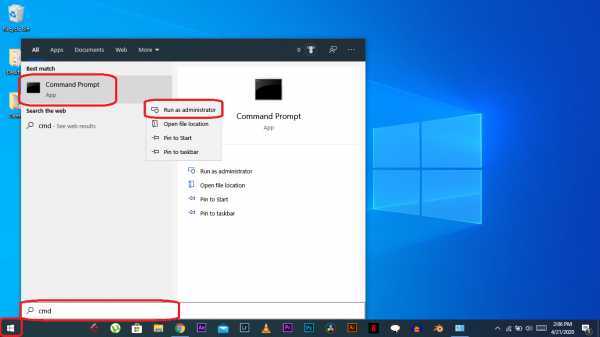
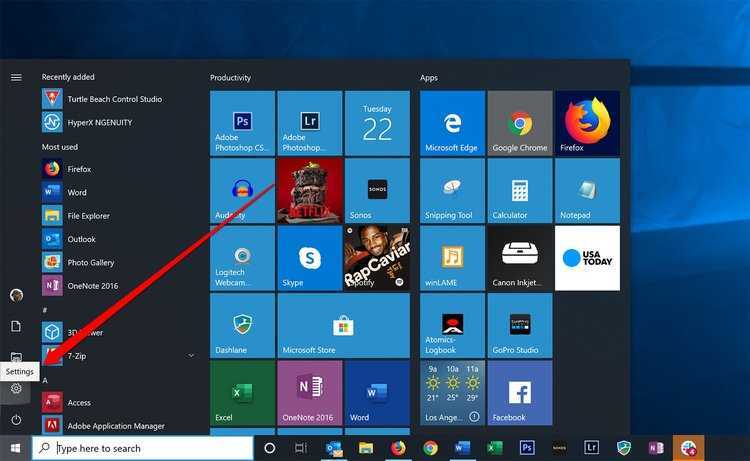
- To configure network access protection, open network policy server from server manager.
- On the network policy server page, from right side select NPS (Local) then select Network Access Protection (NAP) from Standard Configuration section and click Configure NAP link.
Configure Network Access Protection in Windows Server 2012 R2
3. On the network connection method for use with NAP page, select Dynamic Host Configuration Protocol (DHCP) from Network connection method section then click Next.
Dynamic Host Configuration Protocol (DHCP) with Network Access Proteciotn
4. On the Specify NAP Enforcement Server Running DHCP Server page, just click Next. Then click Next on the Specify DHCP Scopes page. Do click Next on Configure Machine Group also.
5. On the Specify a NAP Remediation Server Group and URL click New Group and type a meaningful name for Group Name. Then click Add to specify a name for Freindly name and name or IP address of Remediation server. When complete, click OK to close the pages.
NAP Remediation Server Group
6. Now type the help page url address on Troubleshooting URL and click Next.
Specify a NAP Remediation Server Group and URL
The Remediation Server Groups are the servers that will be made accessible to non-compliant clients. These servers can be used to patch clients to a compliant status.
7. Click Next on Define NAP Health Policy page.
Define NAP Health Policy
8. Finally click Finish to complete the NAP enforcement policy and RADIUS client configuration.
Completing NAP Enforcement Policy and RADIUS Client Configuration
9. Navigate to Network Policies and Health Polices to check whether the polices are ready for serving NAP.
Network Policies and Health Policies
So, everything good.