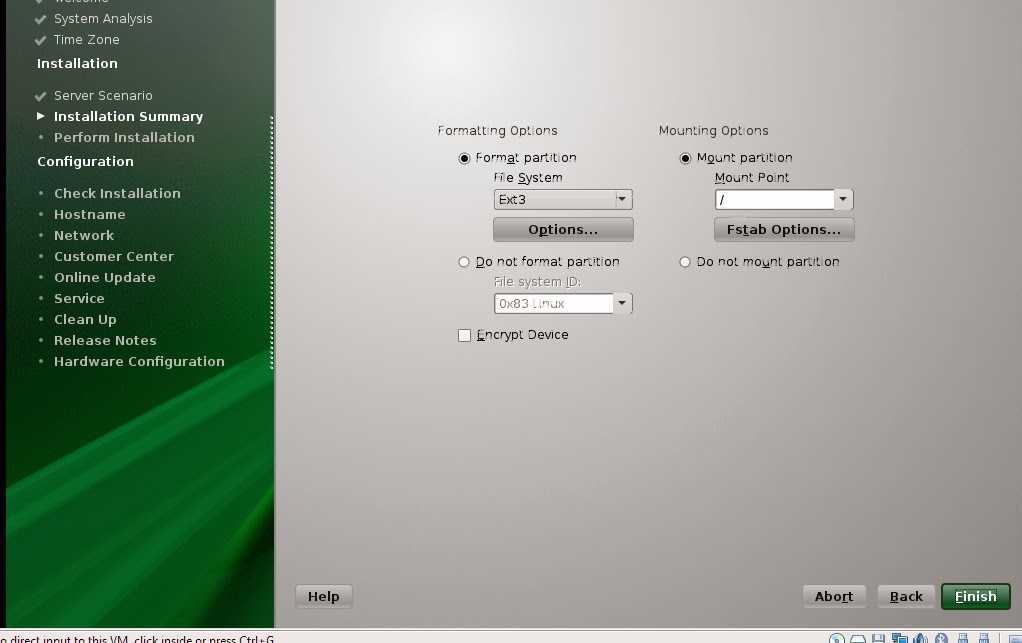
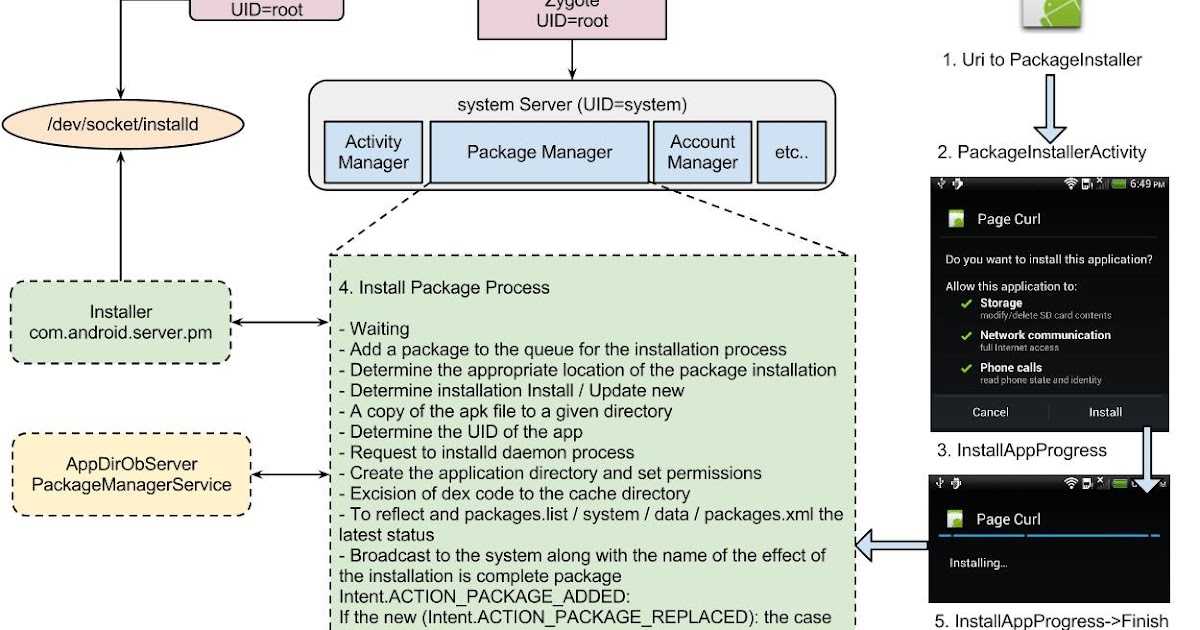
Build and install the kernel
After changes have been made to the kernel source and RPM SPEC file,
the kernel is ready to be compiled and packaged into an RPM.
The Clear Linux OS development tooling makes use of mock environments to
isolate building of packages in a sanitized workspace.
-
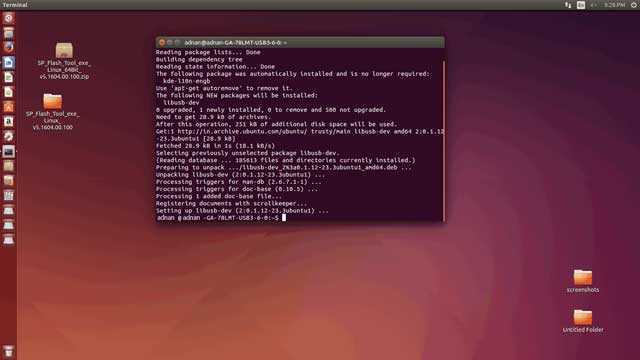
Start the compilation process by issuing the make build
command. This process is typically resource intensive and will take a
while.make build
Note
The mock plugin ccache can be enabled to help speed up any future
rebuilds of the kernel package by caching compiler outputs and reusing
them. -
The result will be multiple files in the
directory as output.ls rpms/
The kernel RPM will be named
-
The kernel RPM file can be input to the to create a
custom bundle and mix of Clear Linux OS.
Alternatively, the kernel RPM bundle can be installed manually on a local
machine for testing. This approach works well for individual development or
testing. For a more scalable and customizable approach, consider using the
to provide a custom kernel with updates.
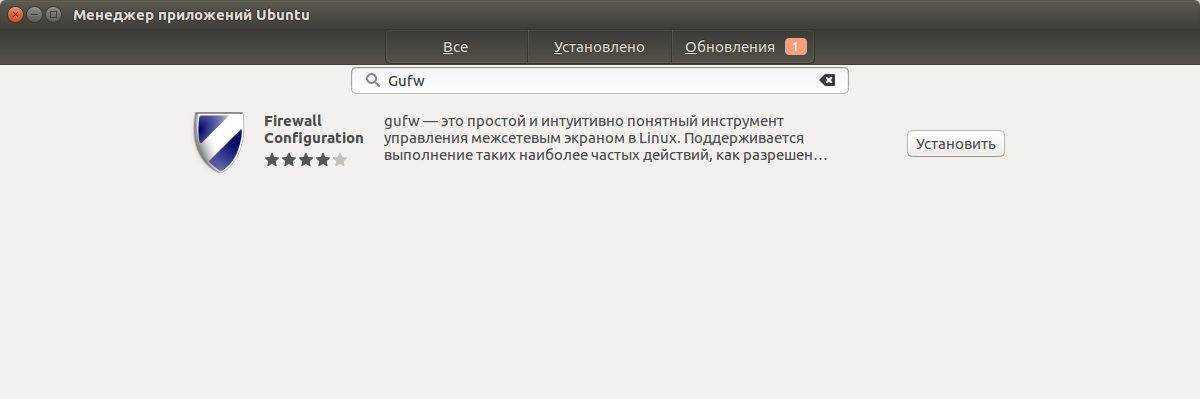
Менеджер приложений swupd
В Clear Linux используется менеджер приложений swupd. swupd позволяет обновлять компоненты системы, устанавливать и удалять бандлы, проверять обновления без их установки.
swupd работает с бандлами, а не с отдельными пакетами, как это делают, например, менеджеры APT и YUM.
При выполнении обновлений swupd оперирует не целыми пакетами, а позволяет выполнять обновления отдельными файлами (частями файлов), которые были изменены.
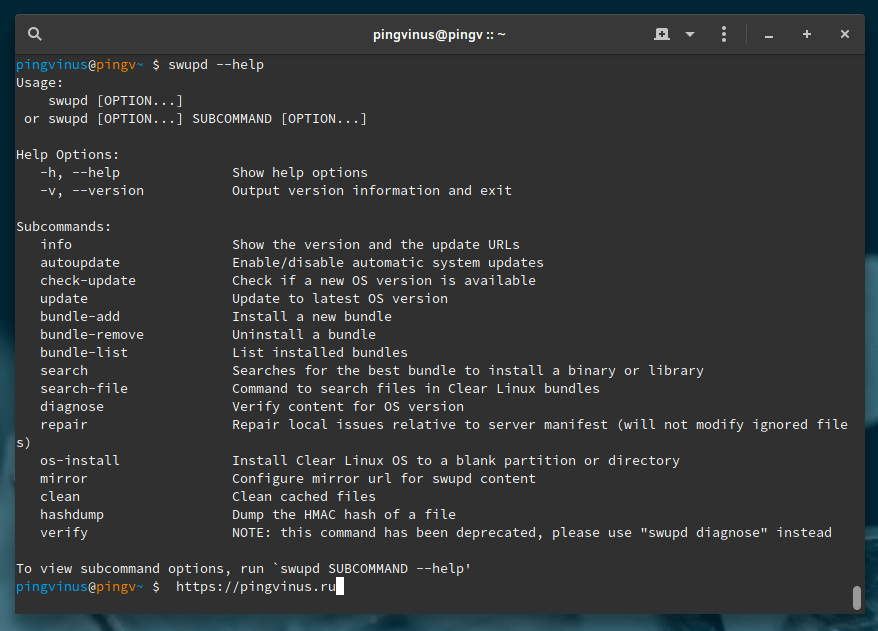
Некоторые команды swupd
Вывести список установленных бандлов:
Вывести список всех доступных бандлов:
Поиск бандлов по ключевому слову:
Установить бандл:
Using Network Manager
Desktop GUI (Graphical User Interface)
-
Click anywhere on the icons at the right side of the top of the screen to
bring up a menu and click on Wi-Fi Not Connected then choose
Select Network. -
Scroll through the list and select the network you’d like to connect to and
click Connect. -
Enter the password and click Connect.
-
The Wi-Fi icon should now show the signal strength of the connection.
-
If you are installing using the live image, resume the
now. Your Wi-Fi
configuration will automatically be included in the install.
CLI (Command Line Interface)
-
List the available Wi-Fi networks
nmcli device wifi list
IN-USE SSID MODE CHAN RATE SIGNAL BARS SECURITY 1st Network Infra 1 54 Mbit/s 65 ▂▄▆_ -- 2nd Network Infra 1 130 Mbit/s 52 ▂▄__ -- 3rd Network Infra 10 195 Mbit/s 29 ▂___ WPA2 -
Join the network.
nmcli device wifi connect $SSID password $password
Device 'wlp1s0' successfully activated with 'f2501e67-27a3-4cf2-a8d9-cce3d029b788'.
Note
To avoid having the Wi-Fi password stored in bash history, consider using the TUI.
Using wpa_supplicant
wpa_suppliant can be used directly, without NetworkManager, to associate a
wireless adapter with an access point. After association is established, an IP
address needs to be assigned or obtained.


Associate with a wireless access point
-
Make sure NetworkManager is stopped and disabled by masking the service.
sudo systemctl stop NetworkManager.service
sudo systemctl mask NetworkManager.service
-
Stop the wpa_supplicant.service, which may have been started by NetworkManager.
sudo systemctl stop wpa_supplicant.service
-
Create a configuration directory.
sudo mkdir -p /etc/wpa_supplicant
-
Determine your wireless interface name.
iw dev
Use the name following “Interface” on the first line (eg. wlp1s0)
 Interface wlp1s0
    ifindex 3
    wdev 0x1
    addr 00:xx:xx:38:34:7a
    type managed
    txpower 0.00 dBm
Set the $INTERFACE_NAME environment variable to take advantage of copying
and pasting commands.export INTERFACE_NAME=wlp1s0
-
Create a minimal configuration file called
and add the following:
sudo tee /etc/wpa_supplicant/wpa_supplicant-$INTERFACE_NAME.conf > /dev/null <<'EOF'
ctrl_interface_group=wheel
ctrl_interface=/run/wpa_supplicant
update_config=1
EOF
-
Start the wpa_supplicant service to complete the configuration process.
sudo systemctl start wpa_supplicant@$INTERFACE_NAME.service
-
Use wpa_cli (interactive mode) to scan for available networks.
In this example, our network is named Network1.sudo wpa_cli > scan OK <3>CTRL-EVENT-SCAN-STARTED <3>CTRL-EVENT-SCAN-RESULTS > scan_results bssid / frequency / signal level / flags / ssid 00:xx:xx:73:7b:46 5180 -55 WPA2-PSK-CCMP][ESS Network5
-
Set up your network connection replacing Network1 with your wireless
SSID name and Network1Password with the password for your network.> add_network > set_network ssid "Network1" OK > set_network psk "Network1Password" OK > enable_network OK <3>CTRL-EVENT-SCAN-STARTED <3>CTRL-EVENT-SCAN-RESULTS <3>SME: Trying to authenticate with 00:xx:xx:5d:d9:26 (SSID='Network1' freq=5180 MHz) <3>Trying to associate with 00:xx:xx:5d:d9:26 (SSID='Network1' freq=5180 MHz) <3>Associated with 00:xx:xx:5d:d9:26 <3>CTRL-EVENT-SUBNET-STATUS-UPDATE status= <3>WPA: Key negotiation completed with 00:xx:xx:5d:d9:26 PTK=CCMP GTK=CCMP <3>CTRL-EVENT-CONNECTED - Connection to 00:xx:xx:5d:d9:26 completed id= id_str=]
-
Save the configuration and quit out of wpa_cli.
> save_config
OK
> quit
Note
The network password is saved as plaintext in
. Use
for a more secure method.
Customize the Linux kernel source
After the kernel sources have been obtained, customizations to the kernel
configuration or source code can be made for inclusion with the kernel
build. These customizations are optional.
Modify kernel configuration
The kernel source has many configuration options available to pick support for
different hardware and software features.
These configuration values must be provided in the file at
compile time. You will need to make modifications to the
file, and include it in the kernel package.
-
Make sure you have followed the steps to
and are in the kernel source working directory. -
If you have an existing file from an old kernel, copy it
into the working directory as for comparison.
Otherwise, use the Clear Linux OS kernel configuration file as templatecp ~/clearlinux/packages/linux/config .config
-
Make any desired changes to the using a kernel
configuration tool. Below are some popular options:-
$EDITOR .config — the .config file can be directly edited
for simple changes with names that are already known. -
make config — a text-based tool that asks questions
one-by-one to decide configuration options. -
make menuconfig — a terminal user interface that provides
menus to decide configuration options. -
make xconfig — a graphical user interface that provides
tree views to decide configuration options.
More configuration tools can be found by looking at the make help:
make help | grep config -
-
Commit and save the changes to the file.
-
Copy the file from the kernel source directory into
the kernel package directory as for inclusion in the build.cp .config ../config
Modify kernel source code
Changes to kernel code are applied with patch files. Patch files are
formatted git commits that can be applied to the main source code.

You will need to obtain a copy of the source code,
make modifications, generate patch file(s), and add them to the RPM SPEC
file for inclusion during the kernel build.
If you have a large number of patches or a more complex workflow,
consider using a patch management tool in addition to Git such as
Quilt.
-
Make sure you have followed the steps to and
are in the kernel source working directory. -
Initialize the kernel source directory as a new git repo and create a
commit with all the existing source files to begin tracking changes.git init git add -A git commit -m "Initial commit of Linux kernel source"
-
Apply patches provided by the Clear Linux OS kernel package to the kernel source
in the working directory.git am ../*.patch
-
Make any of your desired code changes to the Linux source code files.
-
Track and commit your changes to the local git repo.
git add <FILENAME>
git commit -m "My patch for driver A" <FILENAME>
-
Generate a patch file based on your git commits.
<n> represents the number of local commits to create patch file.
See the git-format-patch documentation for detailed information
on using git format-patchgit format-patch -<n>
-
Copy the patch files from the patches directory in the linux
source tree to the RPM build directory.cp *.patch ~/clearlinux/packages/linux/
-
Navigate back to the RPM build directory.
cd ~/clearlinux/packages/linux/
-
Open the Linux kernel package RPM SPEC file in an editor.
$EDITOR linux.spec
-
Locate the section of the SPEC file that contains existing patch
variable definitions and append your patch file name. Ensure the
patch number does not collide with an existing patch.
In this example, the patch file is called1 2 3 4 5 6 7 8 9 10 11 12 13
#
# Small Clear Linux Tweaks
#
Patch0501 0501-zero-extra-registers.patch
Patch0502 0502-locking-rwsem-spin-faster.patch

#Serie1.name WireGuard
#Serie1.git  https://git.zx2c4.com/WireGuard
#Serie1.tag  00bf4f8c8c0ec006633a48fd9ee746b30bb9df17
Patch1001 1001-WireGuard-fast-modern-secure-kernel-VPN-tunnel.patch
#Serie1.end

Patch2001 2001-my-patch-for-driver-A.patch
-
Locate the section of the SPEC file further down that contains
patch application and append your patch file number used in the step above.
In this example, patch2001 is added.1 2 3 4 5 6 7 8 9 10 11
#
# Small tweaks
#
%patch0501 -p1
%patch0502 -p1

#Serie1.patch.start
%patch1001 -p1
#Serie1.patch.end

%patch2001 -p1
-
Commit and save the changes to the RPM SPEC file.
Очистить возможности Linux

- Intel Clear Containers: Intel Clear Containers — это внутренняя технология с открытым исходным кодом, которая подключается к Docker, Kubernetes и Rocket и включена в Clear Linux. Он предназначен для наилучшего использования функций Intel Architecture VT, что приводит к повышению скорости и снижению накладных расходов.
- Cloud Integrated Advanced Orchestrator (ciao): Ciao предоставляет легкий конструктор планировщика рабочей нагрузки с минимальной конфигурацией, полностью основанный на TLS, для ограничения ограничений текущих проектов облачных ОС. Это обеспечивает улучшенную масштабируемость, удобство использования, простоту развертывания и безопасность.
- Без сохранения состояния: он работает с пользовательской конфигурацией и разделяет конфигурации ОС на конфигурацию системы и пользовательские данные. Таким образом, даже если вы ошибетесь с системой по ошибке, ОС Clear Linux загрузится корректно, выполнив сброс к заводским настройкам, чтобы вы могли сразу же настроить его снова.
- Обновления программного обеспечения: В отличие от других дистрибутивов, Clear Linux поддерживает двоичное обновление дельт. Он поддерживает обновление только тех битов, которые изменяются, что приводит к очень маленькому контенту обновления и, следовательно, к более быстрому применению. Таким образом, основное исправление безопасности или обновление ядра займет всего несколько секунд, поскольку вы загружаете не полный пакет, а только часть, которая была изменена.
- Микшер: Микширование позволяет создавать ОС для очень специфического использования. Clear Linux предоставляет пакет для различных серверных возможностей и поддерживает добавление функций из других дистрибутивов.
- Телеметрия: Clear Linux включает в себя решение для телеметрии, которое отмечает такие интересные события, как Дизайн, исправление совместимости приложений, минимизацию данных и т. Д., И сообщает о них команде разработчиков. Это полностью под контролем пользователей и может быть отключено.
- Поддержка Autproxy: Clear Linux обнаруживает сценарий автоматической настройки Proxy и использует его для определения того, какой прокси нужен для данного соединения.
Функция Multiversioning: позволяет оптимизировать функцию для нескольких архитектур и их выполнения, когда двоичный файл обнаруживает архитектуру во время выполнения.
- Вся отладочная информация доступна постоянно.
Системные требования для установки Clear Linux
Clear Linux предназначен для работы на очень минимальном оборудовании, включая одноядерный процессор, 128 МБ ОЗУ и 600 МБ дискового пространства. Тем не менее, они рекомендовали приведенные ниже системные требования для оптимизации производительности.
- Процессор:
- 2-го поколения, или позже, семейство процессоров Intel Core .
- Процессор Intel Xeon E3
- Процессор Intel Xeon E5
- Процессор Intel Xeon E7
- Семейство процессоров Intel Atom C2000 для серверов — версия Q3 2013 или более поздняя.
- Процессор Intel Atom серии E3800 — версия Q4 2013 или более поздняя.
- 4 ГБ ОЗУ
- 20 ГБ памяти.
- Графика Intel HD для графического интерфейса.
Linux от Microsoft
Корпорация Microsoft выпустила первую стабильную сборку собственного Linux-дистрибутива CBL-Mariner. Его премьера состоялась спустя меньше месяца с момента анонса системы Windows 11.
CBL-Mariner 1.0 (Common Base Linux) представляет собой базовую платформу для развертывания Linux-окружений в различных онлайн-сервисах, включая облачные. Microsoft использует его в нескольких своих проектах, включая облачный сервис Azure – второй в мире по популярности после Amazon Web Services (19-процентная доля у Azure и 32% у AWS, по данным Statista.com за I квартал 2021 г.).
Также CBL-Mariner применяется в составе Linux-подсистемы в Windows (Windows Subsystem for Linux 2.0, WSL2). Как сообщал CNews, он отвечает, в частности, за запуск приложений для Linux с графическим интерфейсом.
 Теперь в активе Microsoft есть не только Windows, но и собственный Linux-дистрибутив
Документация и все необходимые файлы для CBL-Mariner 1.0 находятся в свободном доступе. Microsoft разместила их на сервисе GitHub, которым владеет с 2018 г. Проект распространяется под несколькими open source-лицензиями, включая GNU GPL и MIT.
Обновление Clear
Обновления ПО Clear Linux – загружаются и применяются автоматически по умолчанию. Период обновления – производится довольно часто. Так, ОС и комплекты обновляются девять раз в неделю, с учетом последних изменений и исправлений безопасности.
Процесс обновления спроектирован так, чтобы процедура проходила оптимально стремительно. Структура обновления представляет собой набор файлов содержащего хэши. Отдельный файл для доступных пакетов связывает отдельные «манифесты».
Данные, предоставляемые обновлением для системы, могут быть получены тремя различными способами. Полные файлы всегда генерируются в каждом выпуске. Это позволяет любой операционной системе Clear Linux получать точную копию содержимого для каждой версии напрямую.
Это будет использоваться, например, если требуется проверка ОС для замены одного файла. Пакеты доступны для некоторых выпусков и объединяют файлы для ускорения создания установочного носителя и больших обновлений.
Дельта-пакеты — это оптимизированная версия пакетов, которые содержат только обновления и не используются без исходного содержимого файла.
Самым интересным аспектом Clear Linux, помимо превосходной производительности, является следующее. Дизайн включает в себя инструменты для создания настраиваемого дистрибутива. Основным инструментом, обеспечивающим эту функциональность, является «микшер». Для чего он нужен?
Во-первых, микшер используется дистрибутивом для генерации обновлений. Во-вторых, может быть установлен пользователем в экземпляре дистрибутива.
Пользователи могут создать микс, пользовательскую версию ОС, выбрав компоненты из комплектов дистрибутива.
Эти нововведения по достоинству оценят разработчики и «сисадмины» для облачных операций. Но, к сожалению Clear Linux не готов для использования на настольных компьютерах при установке с нуля, в отличие от пользователей основных дистрибутивов GNU / Linux.
Целевая аудитория
Разработчики Linuxfx не уточняют, что побудило их сделать Linux-клона самой популярной настольной ОС в мире (доля Windows 10 на мировом рынке ОС, по статистике StatCounter, на июнь 2020 г. составляла 77,7% против 1,7% у всех дистрибутивов Linux). Как пишет портал Liliputing, их идея может понравиться Windows-пользователям.
Установка Windows-программы под Linuxfx
Linuxfx может пригодиться владельцам Windows-компьютеров в качестве инструмента для безболезненного перехода на Linux
Внимание к деталям, проявленное разработчиками в процессе копирования интерфейса Windows 10, позволит таким пользователям чувствовать себя «как дома», работая за новой для них ОС. Быстрой адаптации будет способствовать и наличие WINE, дающего возможность запуска привычных Windows-программ
Идеальный шторм на рынке полупроводников: вызовы и возможности
Бизнес

Linuxfx, как и Windows 10, можно запустить практически на любом компьютере. Системные требования версии для десктопов включают наличие в ПК хотя бы 2 ГБ оперативной памяти и всего лишь двух вычислительных ядер в составе центрального процессора.
Build, install, and load an out-of-tree module
Follow the steps in this section if you are an individual user or testing, and
you need an out-of-tree kernel module that is not available through Clear Linux OS. For
a more scalable and customizable approach, we recommend using the
to provide a custom kernel and updates.
Prerequisites
Before you begin, you must:
-
Disable Secure Boot.
-
Disable kernel module integrity checking.
-
Have a kernel module package in the form of source code.
-
Rebuild the module against new versions of the Linux kernel.
Note
Any time the kernel is upgraded on your Clear Linux system, you must
rebuild your out-of-tree modules.
Build and install kernel module
-
Determine which kernel variant is running on Clear Linux OS. In the example below,
the native kernel is in use.$ uname -r 5.XX.YY-ZZZZ.native
-
Install the kernel dev bundle corresponding to the installed kernel. The
kernel dev bundle contains the kernel headers, which are placed under
and are required to
compile kernel modules. For example:-
linux-dev for developing against the native kernel.
-
linux-lts-dev for developing against the LTS kernel.
sudo swupd bundle-add linux-dev
-
-
Follow instructions from the kernel module source code to compile the
kernel module. For example:curl -O http://<URL-TO-KERNEL-MODULE-SOURCE>.tar.gz tar -xvf <KERNEL-MODULE-SOURCE>.tar.gz cd <KERNEL-MODULE-SOURCE>/ cat README
Troubleshooting
-
The NVIDIA driver places installer and uninstaller logs under
and . -
shows many
parameters to control installation behavior. -
extracts
installation files into a directory named
. -
The X server logs under contain useful
information about display and driver loading. Check all the files and
timestamps when troubleshooting. -
-
The DKMS build logs under contain information
about kernel module builds which can be useful if the NVIDIA driver breaks
between kernel upgrades.
No display or blank screen
Check to see if the display has come up on another graphics device, including
the integrated graphics device.
You might get a black screen or the login screen might not come up after
installing the NVIDIA drivers until an Xorg configuration has been defined for
your monitors.
“Oh no! Something has gone wrong” GNOME* crash

NVIDIA driver GNOME crash dialogue on Clear Linux OS.
There have been reports of GNOME crashing with an “Oh no! Something has gone
wrong” error message with NVIDIA drivers installed while other graphics
devices are enabled.
Try disabling other graphics devices, including integrated graphics, in your
system’s EFI/BIOS.
Slow boot times
There have been reports of slow boot times with NVIDIA drivers installed.
Normally, when GDM detects NVIDIA proprietary drivers, it will disable Wayland
and enable X11. Should GDM fail to disbale Wayland, it may results in slow boot
times, according to this GitHub reprot.
To manually disable Wayland:
sudo tee /etc/gdm/custom.conf > /dev/null <<'EOF'

WaylandEnable=false
EOF
Brightness control
If you can’t control the screen brightness with the NVIDIA driver installed,
try one of the solutions below:
-
Add a kernel parameter acpi_osi= which disables the ACPI Operating System
Identification function. Some system firmware may manipulate brightness
control keys based on the reported operating system. Disabling the
identification mechanism can cause the system firmware to expose brightness
controls that are recognizable in Linux.sudo mkdir -p /etc/kernel/cmdline.d echo "acpi_osi=" | sudo tee /etc/kernel/cmdline.d/acpi-backlight.conf sudo clr-boot-manager update
-
Add a kernel parameter for the nvidia driver:
NVreg_EnableBacklightHandler=1. This handler overrides the ACPI-based one
provided by the video.ko kernel module. This option is available with NVIDIA
driver version 387.22 and above.sudo mkdir -p /etc/kernel/cmdline.d echo "nvidia.NVreg_EnableBacklightHandler=1" | sudo tee /etc/kernel/cmdline.d/nvidia-backlight.conf sudo clr-boot-manager update
-
Add the EnableBrightnessControl=1 options to the Device
section of your xorg config. Below is an example:sudo mkdir -p /etc/X11/xorg.conf.d/ sudo tee /etc/X11/xorg.conf.d/nvidia-brightness.conf > /dev/null <<'EOF' Section "Device" Identifier "Device0" Driver "nvidia" Option "RegistryDwords" "EnableBrightnessControl=1" EndSection EOF
Windows* OS steps
Verify the integrity of the Clear Linux OS image
Before you use a downloaded Clear Linux OS image, verify its integrity. This action
eliminates the small chance of a corrupted image due to download issues. To
support verification, each released Clear Linux OS image has a corresponding SHA512
checksum file designated with the suffix -SHA512SUMS.
-
Download the corresponding SHA512 checksum file of your Clear Linux OS image.
-
Start Command Prompt.
-
Go to the directory with the downloaded image and checksum files.
-
Get the SHA512 checksum of the image with the command:
CertUtil -hashfile ./clear-version number-image type.compression type SHA512
-
Manually compare the output with the original checksum value shown in
the downloaded checksum file and make sure they match.
Kernel module availability
Clear Linux OS comes with many upstream kernel modules available for use. Using an
existing module is significantly easier to maintain and retains signature
verification of the Clear Linux OS kernel. For more information on Clear Linux OS security
practices, see the page.
Before continuing, check if the kernel module you’re looking for is already
available in Clear Linux OS or submit a request to add the module.
Check if the module is already available
You can search for kernel module file names, which end with the
file extension, using the swupd search command, as shown in the
following example. See for more information.
sudo swupd search ${module_name}.ko
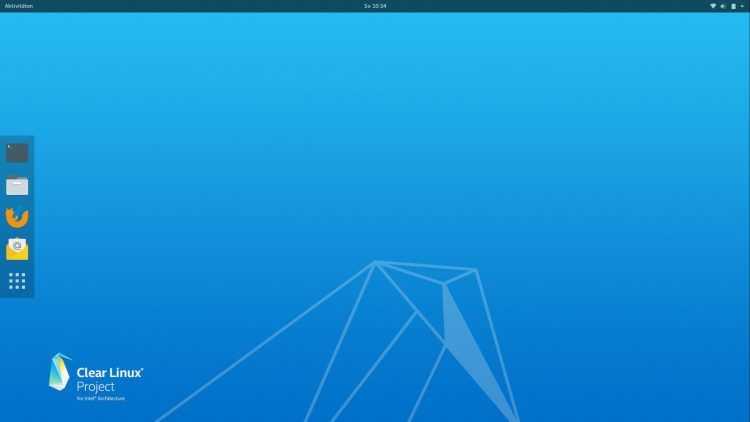
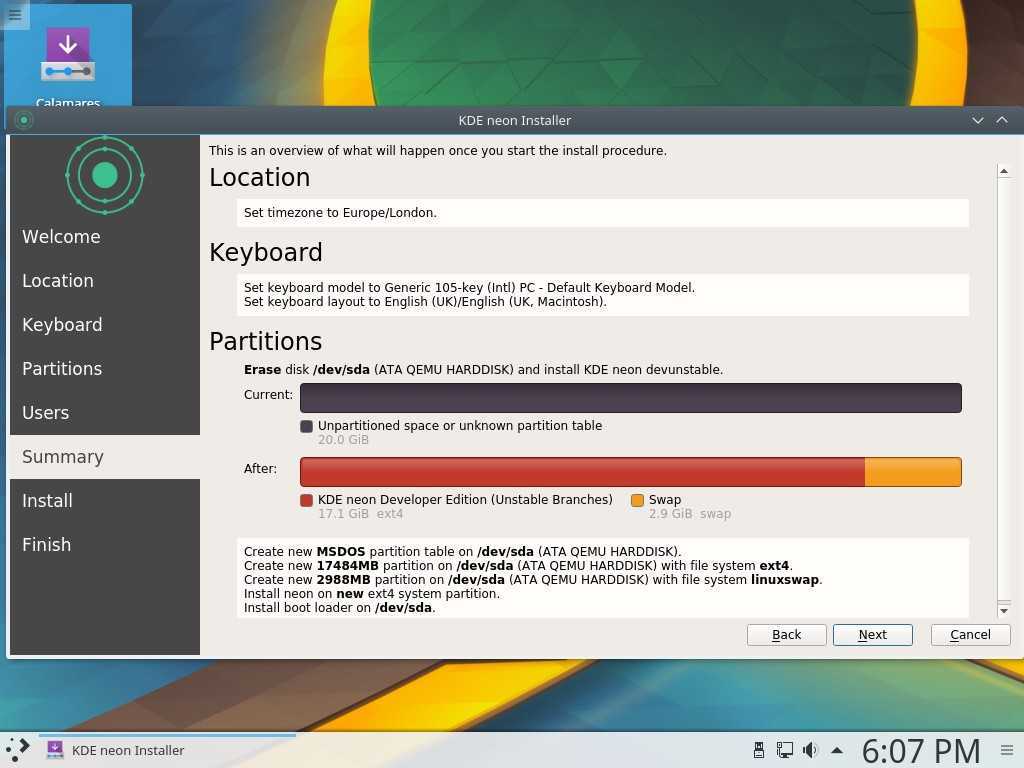
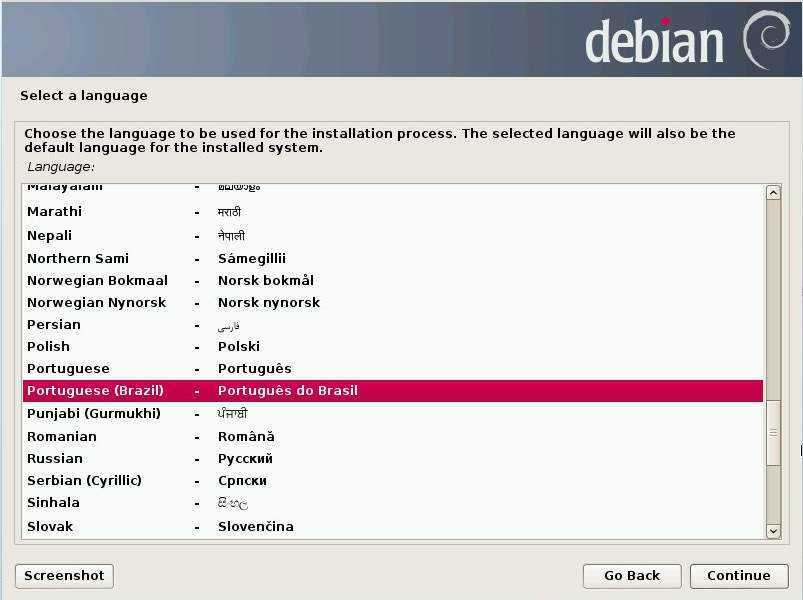
Как установить Clear Linux
Доступны виртуальные жесткие диски, содержащие разделы диска и файловую систему, которые можно использовать в качестве жесткого диска виртуальной машины.
Скачать Clear Linux
Вы можете получить виртуальный жесткий диск для Azure, образ для облака, контейнеры, гипер-v виртуальный жесткий диск, установщик ISO и образ в реальном времени.
Я загрузил образ установщика clear-linux для ОС Clear Linux, который я буду использовать для загрузки моей системы и установки поверх нее графического интерфейса.
Если вы настраиваете его в виртуальной коробке, как я, не забудьте включить EFI на вкладке Система в виртуальной коробке для загрузки.
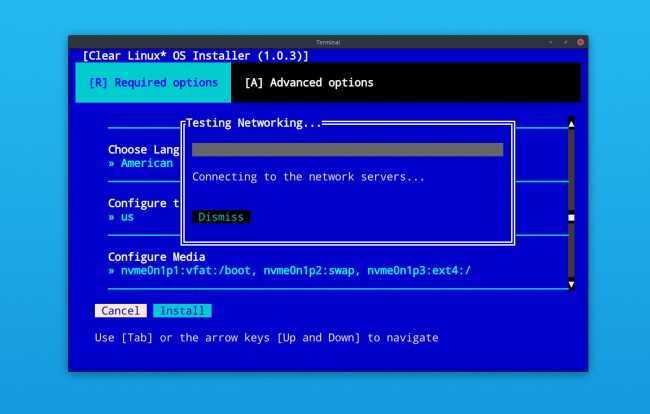
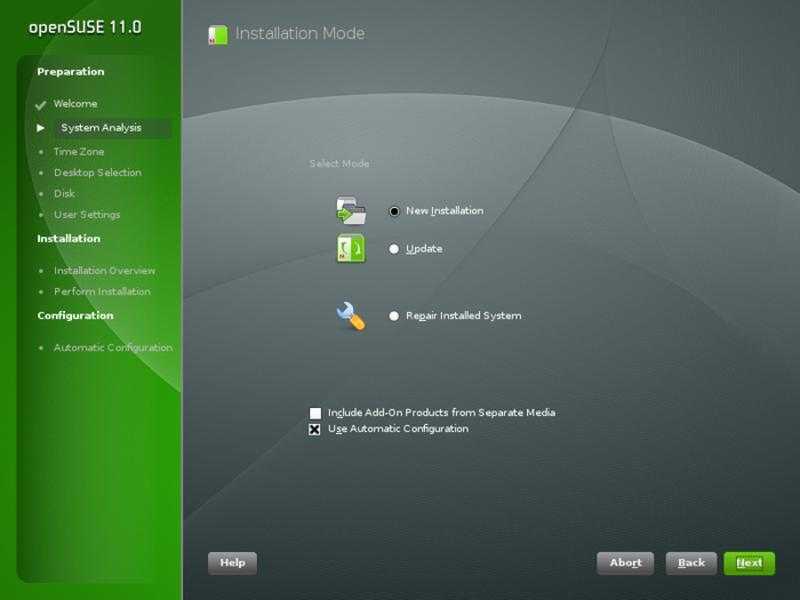
Шаг 1. Установите Virtual Box и загрузитесь с ISO.
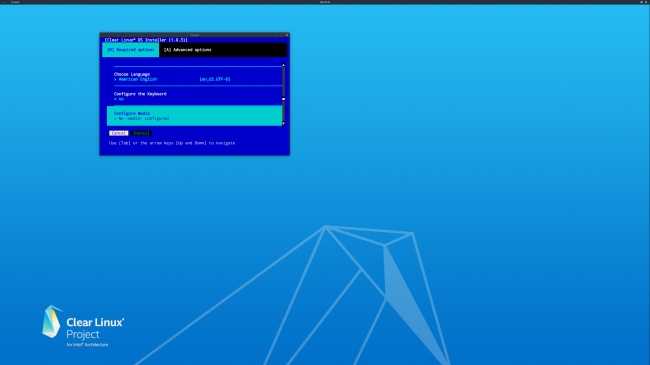
Первые шаги включают выбор клавиатуры и настройки прокси для подключения к серверу обновлений. В меню установки вы можете выбрать один из двух вариантов: установить Clear Linux OS или восстановить существующую установленную копию.


В Программе повышения стабильности вы можете разрешить (и запретить) Clear Linux собирать отчеты для повышения стабильности системы и отправлять их в Intel.
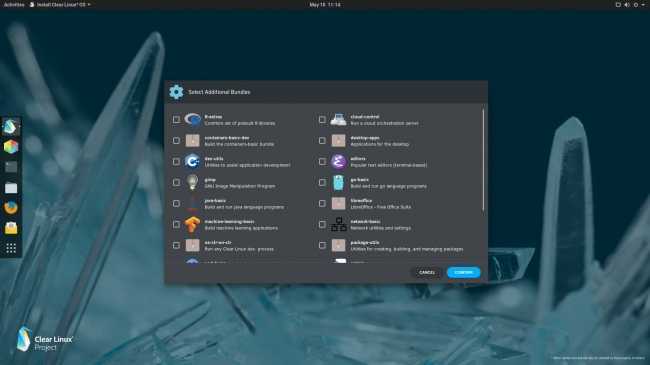
На следующем шаге выберите «Тип автоматической установки» или «Вручную», если вы предпочитаете брать вещи в свои руки. Следующий экран предназначен для создания раздела и выбора носителя, на который вы собираетесь установить.
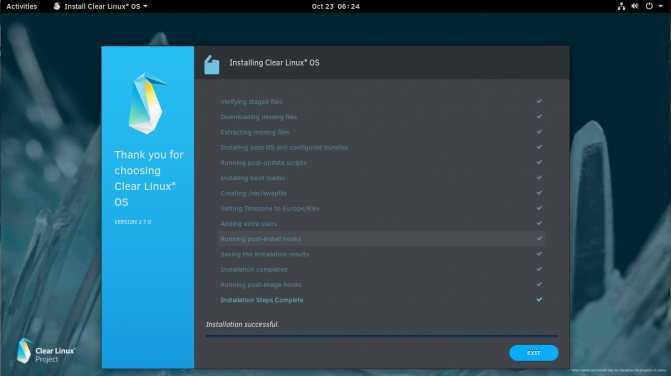
Последний шаг запрашивает подтверждение и начинается установка. Пройдет некоторое время, прежде чем установщик уведомит вас о завершении. Извлеките носитель и перезагрузите его.
Это слайд-шоу требует JavaScript.
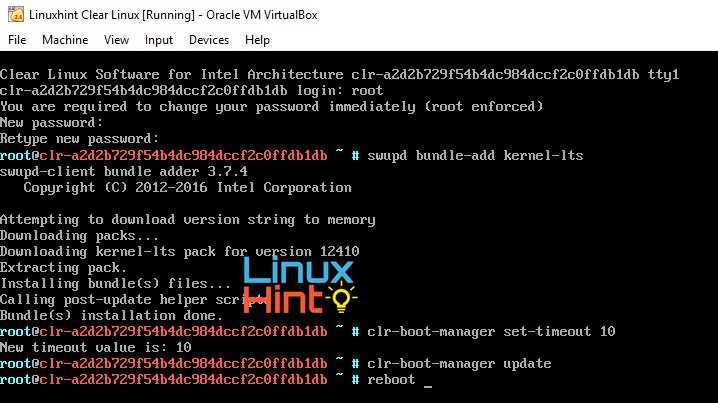
После этого запустите виртуальную машину и введите root в качестве имени пользователя и пароля, которые вы хотите сохранить для системы.
Следующее, что я сделаю, это создам графический интерфейс или среду рабочего стола, но перед этим сначала создадим пользователя.
Шаг 2: Настройка пользователя root и учетной записи пользователя
При первой загрузке в ОС Clear Linux введите «root» в качестве имени пользователя и пароля, которые вы хотите сохранить, и используйте приведенную ниже команду для добавления другого пользователя.
После этого вы должны включить команду sudo для созданного вами пользователя. Добавьте имя пользователя в группу колес и включите группу колес.
Создайте файл / etc / sudoers и добавьте к нему строку ниже.
Сохраните изменения, выйдите из системы и войдите снова, чтобы изменения отразились.
Шаг 3: Установка среды рабочего стола GNOME
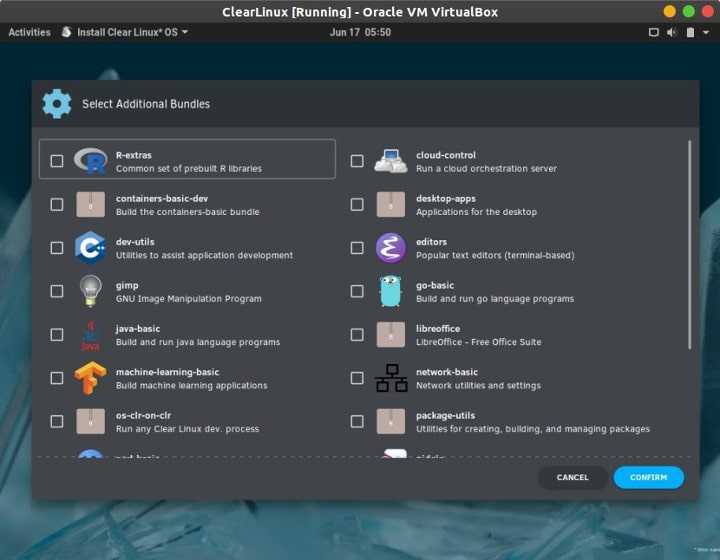
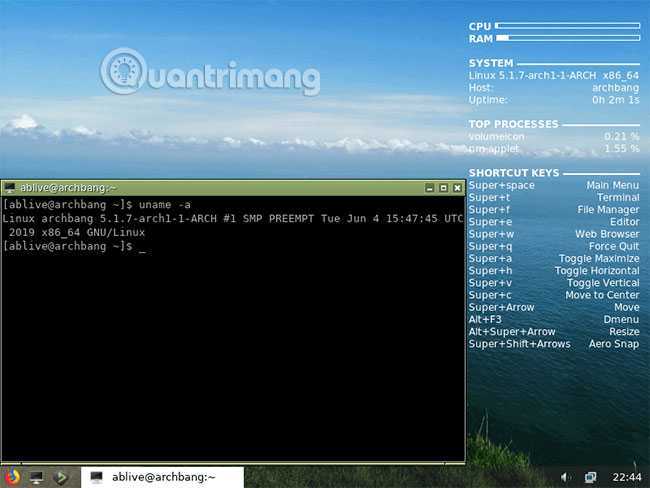
Clear Linux имеет другую архитектуру и использует утилиту обновления программного обеспечения или swupd для добавления или обновления приложений и выполнения системных обновлений. Прежде чем вы начнете использовать его, вам необходимо установить некоторые базовые приложения, такие как sysadmin-basic, editors, c-basics и другие полезные пакеты.
Теперь вы можете запустить приведенную ниже команду, чтобы запустить менеджер рабочего стола GNOME.
Заключительные слова о Clear Linux
С бесконечными дистрибутивами Linux Intel не пыталась создать еще один универсальный дистрибутив Linux. Clear Linux — это то, что постепенно будет подхвачено различными крупными корпусами, использующими аппаратное обеспечение Intel для повышения производительности и оптимизации. Например, наличие на рынке Azure указывает на его расширение.
![Installation of clearos [clearos documentation]](http://smartshop124.ru/wp-content/uploads/9/8/d/98d2934d2092f6a91bb623e7c5fbf29a.jpeg)