Uninstalling the Driver
Sometimes it is necessary to uninstall the driver, like before a version upgrade of Ubuntu or if the installation fails or is no longer needed. With Envy/EnvyNG, you can uninstall the driver directory from the program, see the above screenshot — it is the third choice. You will probably be asked to reboot the computer.
Free alternative
There is Nouveau: an open source driver with acceleration for NVIDIA cards. Currently (2008), there is 2D-support, and a very limited 3D support for extremely lucky developers. See http://nouveau.freedesktop.org/wiki/. Users that have installed the proprietary driver can help the development of Nouveau by sending information about their cards, see http://nouveau.freedesktop.org/wiki/REnouveauDumps.
See Also
Here are some other resources of interest:
-
Envy and EnvyNG — Automated script to build and install the latest official NVIDIA binary driver.
-
NVIDIA web forum Ubuntu installation notes — NVIDIA’s guide to installing their binary driver .pkg on Ubuntu.
CategoryHardware CategoryXwindowSystem
Install Nvidia drivers using from GUI
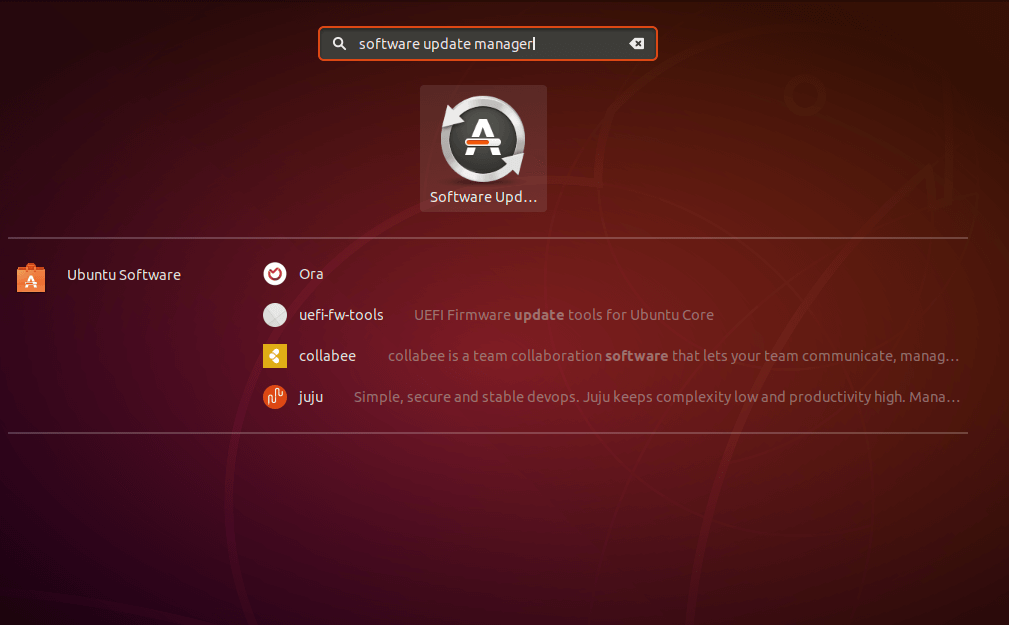
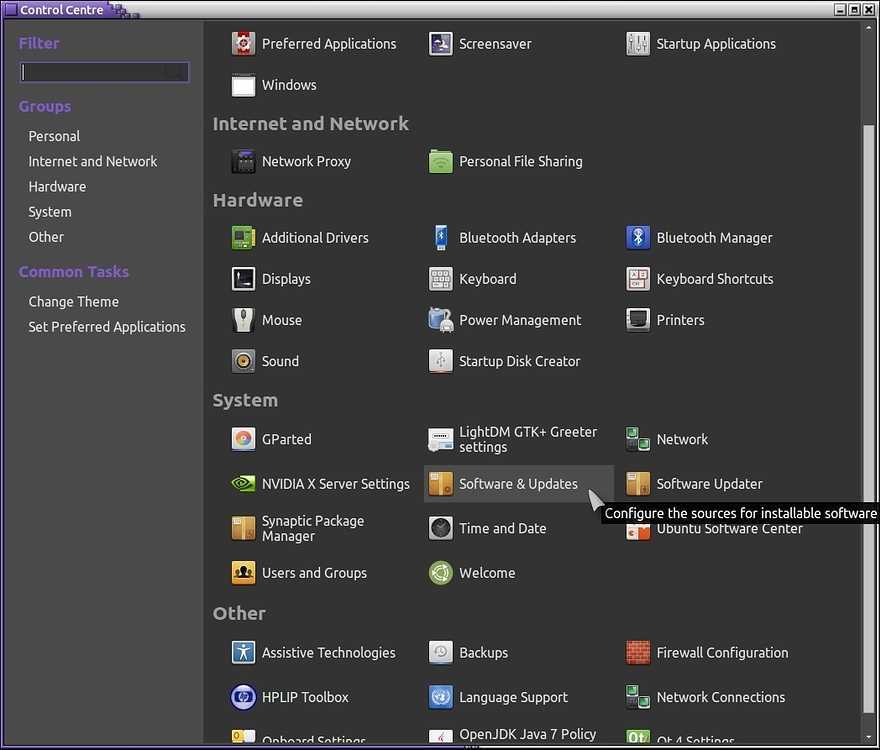
Lets first check how to install Nvidia driver from the graphical user interface. On the main menu, type «software update manager» and click on it to open.
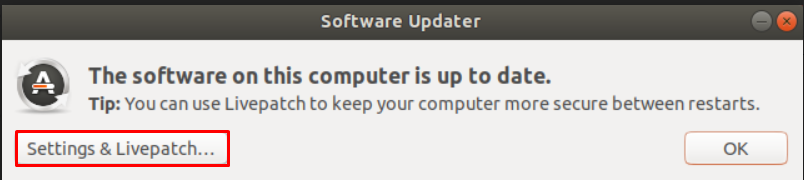
On the software updater pop-up, click on the ‘Settings & Livepatch’ button as shown.
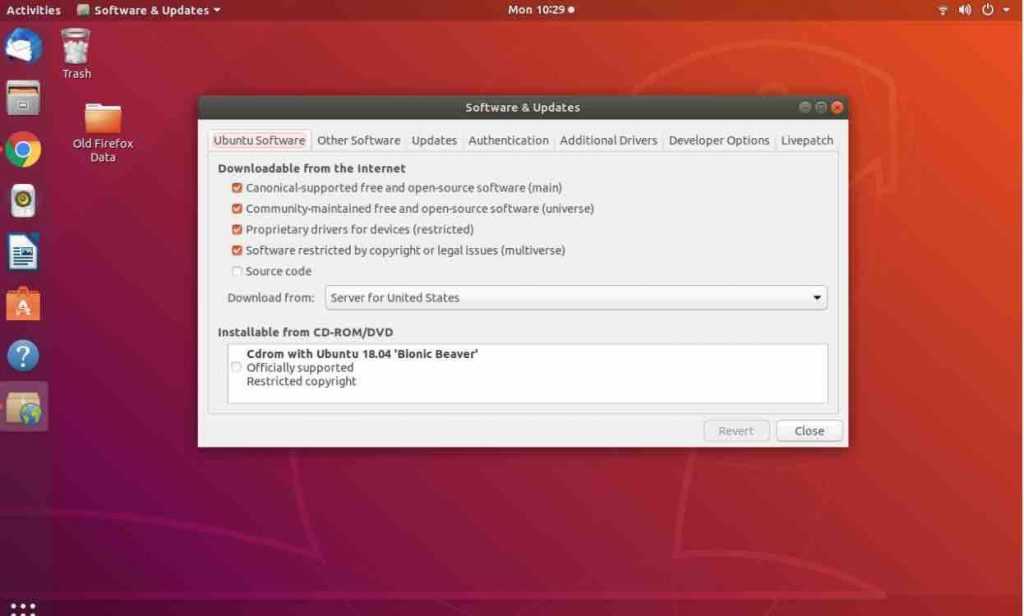
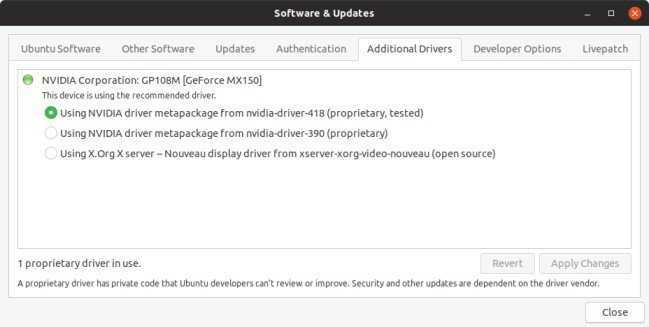
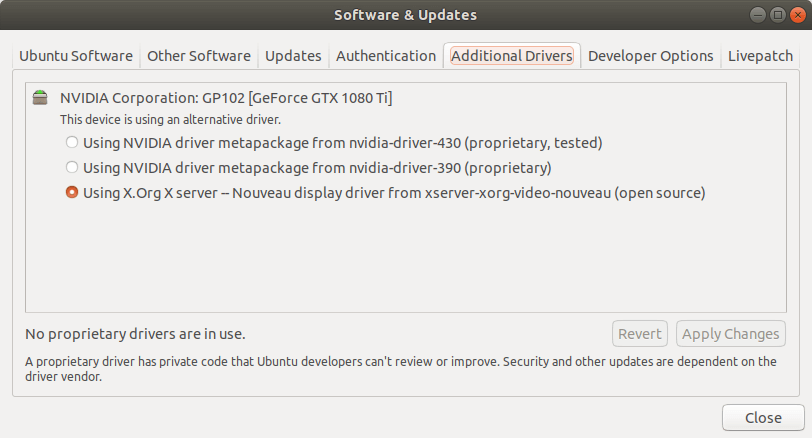
This will launch the ‘Software and Updates’ window as shown below:
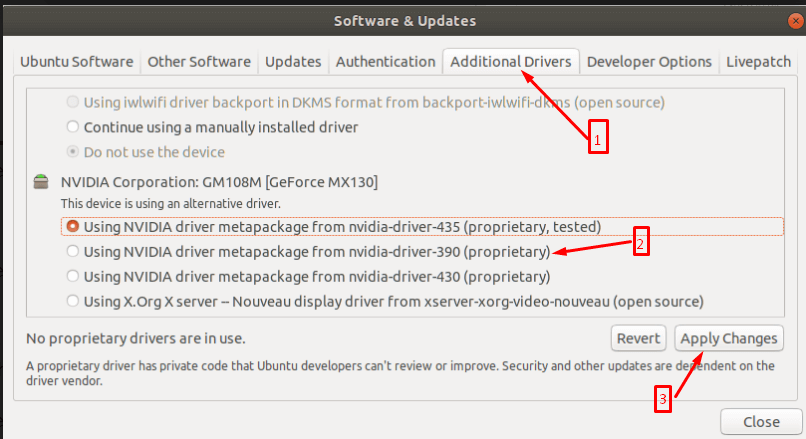
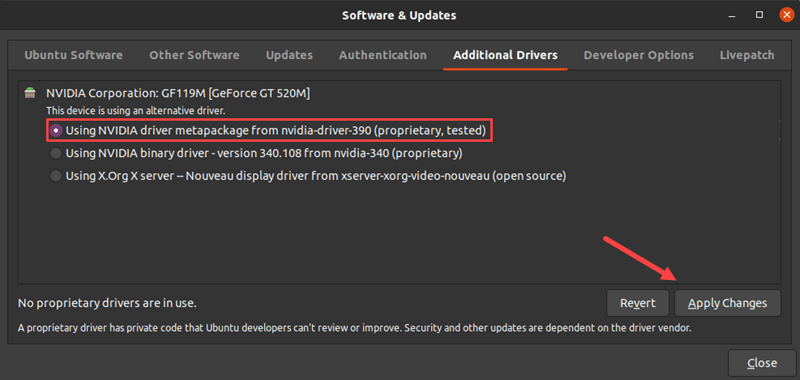
At the top-most section of the ‘Software and updates’ windows, be sure to find a couple of options displayed which include Ubuntu software, other software, updates e.t.c. In this case, click on Additional Drivers, you can see there, the ‘Nvidia — driver -435’ (proprietary, tested) is set up as default driver used for Nvidia card, along with some proprietary divers listed.
Both, ‘Nvidia — drivers 430’ (proprietary) and ‘Nvidia — drivers 390’ (proprietary) are available for GeForce GTX 1080 Ti card. Select the first option to install Nvidia driver 430. When you are done, click on the Apply changes button to install the driver.
Then wait for the download to complete from the internet and click on the close button.
Reboot your computer for the changes to take effect. Run the following to reboot your PC.
or
Prepare Configuration Files
The next step is to edit your xorg.conf file. This may not be needed in Hardy Heron and newer, but check anyway, esp. if you have upgraded from older versions of Ubuntu.
In Ubuntu:
gksudo gedit /etc/X11/xorg.conf
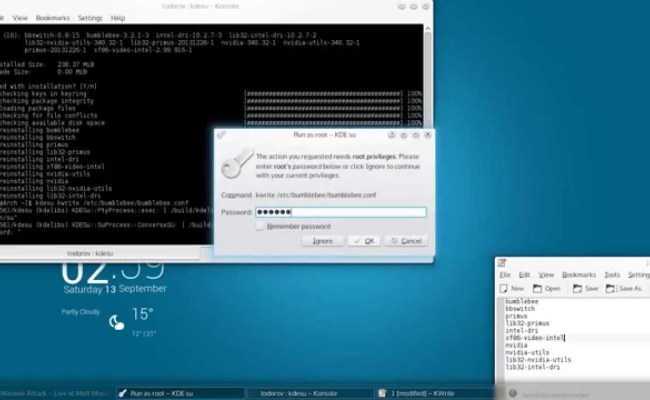
Or in Kubuntu:
kdesu kate /etc/X11/xorg.conf
Find the section Module and comment out DRI using the # symbol, such as in the following example.
Section "Module"
        Load    "bitmap"
        Load    "dbe"
        Load    "ddc"
#       Load    "dri"   <------ this is 'commented'
        Load    "extmod"
        Load    "freetype"
        Load    "glx"
        Load    "int10"
        Load    "record"
        Load    "type1"
        Load    "vbe"
EndSection
Now find the section Device, and change the Driver from nv (or vesa, fb, etc) to nvidia, as in the following example, and then save it.
Section "Device"
        Identifier      "Card0"
        Driver          "nvidia" #This is where you change it
EndSection
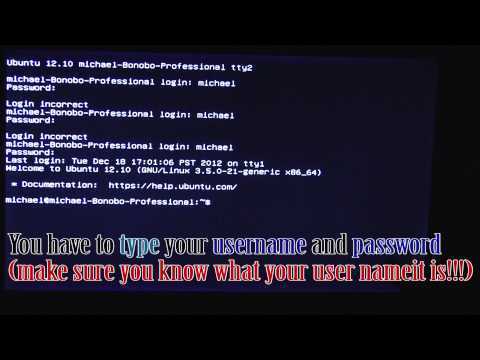
Now that your Xorg.conf is saved, we need to shutdown the X11 server so that we can install the new drivers. To do this, save your work and press ctrl-alt-f1, and log in. Then run the following command to shutdown X11. Make sure your work is saved, Gnome/KDE is going to shutdown too.
For Ubuntu 11.04 or lower:
sudo /etc/init.d/gdm stop
For Ubuntu 11.10 or higher:
sudo /etc/init.d/lightdm stop
For Kubuntu:
sudo /etc/init.d/kdm stop
Installation without X / from the console
The jockey-text command was removed with the release of Ubuntu 14.04. You can now use ubuntu-drivers to get the list of packages for each driver, and then install the packages using apt-get. For example:
sudo ubuntu-drivers devices
== /sys/devices/pci0000:00/0000:00:01.0/0000:01:00.0 ==

vendor   : NVIDIA Corporation
modalias : pci:v000010DEd00000DDAsv000017AAsd000021D1bc03sc00i00
model    : GF106GLM
driver   : xserver-xorg-video-nouveau - distro free builtin
driver   : nvidia-304-updates - distro non-free
driver   : nvidia-304 - distro non-free
driver   : nvidia-331 - distro non-free recommended
driver   : nvidia-331-updates - distro non-free
sudo apt-get install nvidia-331
Драйвер nouveau
Драйвер nouveau осуществляет полноценную поддержку 2D/3D ускорения.
Драйвер требует ядра linux 2.6.32 или выше.
В отличие от проприетарного драйвера nvidia nouveau корректно (то есть стандартным образом) поддерживает возможности X-системы
Например поддержку через xrandr несколько мониторов.
Для подключения драйвера
удаляем (если были установлены) все драйвера nvidia-glx
# apt-get remove nvidia-\*
Внимание!
Если перед nouveau стоял проприетарный драйвер, удалите вручную библиотеки libglx.so.* и libnvidia-wfb.so.*
в каталоге /usr/lib/xorg/modules/extensions/.
устанавливаем драйвер xorg-nouveau
# apt-get install libdrm-nouveau1 xserver-xorg-video-nouveau
добавляем в файл конфигурации X-сервера /etc/X11/xorg.conf секцию
   Section "Device"
      Driver      "nouveau"
   EndSection
(возможно необязательно?) проверяем модуль и добавляем загрузку драйвера nouveau при старте
  # modprobe nouveau
  # dmesg | tail
  # echo nouveau >> /etc/modules
перезапускаем X-сервер
Ссылки:
Переход на драйвер nouveau с проприетарных драйверов nvidia
Install Nvidia Driver Using GUI
Ubuntu comes with open-source Nouveau drivers for Nvidia GPUs out of the box. The Nouveau driver does not harness the GPU’s full power and sometimes performs worse or even causes system instability. Nvidia proprietary drivers are much more reliable and stable.
The first way to install Nvidia drivers is by using the GUI Software & Updates app.
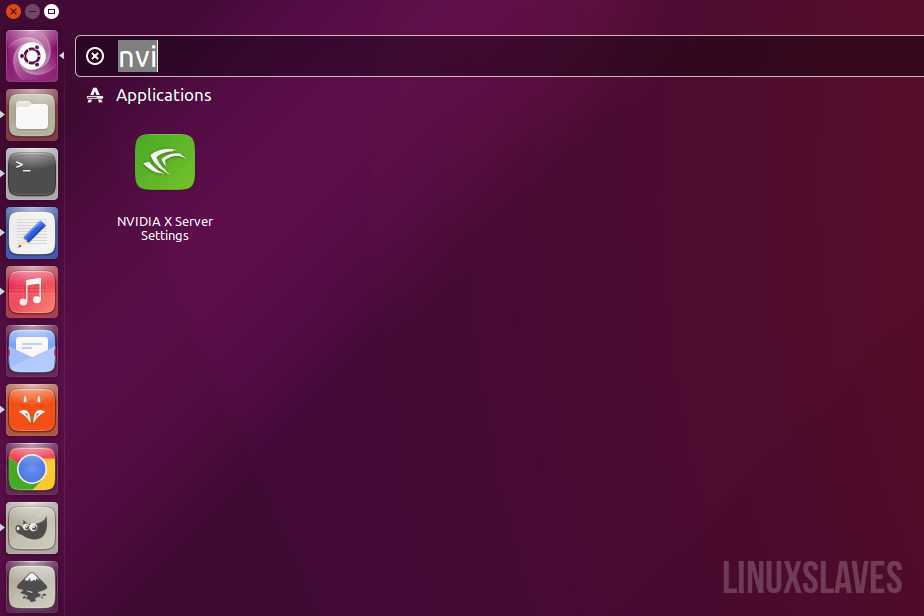
1. Open the Applications menu and type “software and updates.”
2. Select the Software and Updates app.
Step 2: Click the Additional Drivers Tab
Wait for the app to download a list of additional drivers available for your GPU.
The driver installed on your machine is selected by default. It is usually an open-source Nouveau display driver.
Step 3: Choose a Driver
1. From the list, select the latest Nvidia driver labeled proprietary, tested. This is the latest stable driver published by Nvidia for your GPU.

2. Click Apply Changes.
3. Enter your password and wait for the installation to finish.
Introduction
The purpose of this document is to provide some quick start notes for
installing NVIDIA drivers on Linux distributions for servers. For more
comprehensive information on installing CUDA Toolkit and drivers on various
Linux distributions (for both workstation and server variants), refer to the
.
Before installing the NVIDIA driver on Linux, some pre-installation steps are recommended to:
- Verify the system has a CUDA-capable GPU
- Verify the system is running a supported version of Linux
- Verify the system has build tools such as make, gcc installed
- Verify the system has correct Linux kernel headers
For more detailed steps on completing each of these pre-installation steps, refer to the
in the CUDA Installation Guide for Linux.
Note: Mixing installation methods (e.g. .run installers and .deb/.rpm packages) may result in driver conflicts and an unusable
system.
Refer to section in the guide above for other pre-install actions to handle
conflicting installation methods.
Install the Latest Version Of Nvidia Drivers via PPA
Update: Canonical now includes the latest version of Nvidia drivers in Ubuntu LTS repository. The information in this section is for archive purpose only. You can ignore it.
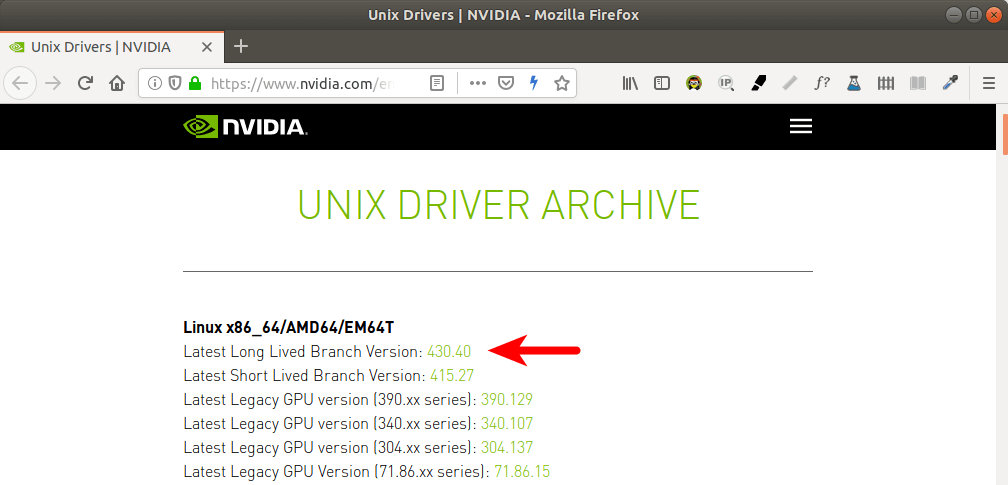
Nvidia website maintains a page for its latest driver for Unix/Linux platforms. On this page, you can see the latest version of Nvidia drivers. At the time of this writing, the latest version is 430.40. Clicking the version number will take you to a page where you can see changelogs and whether your card is supported or not.
The driver included in the default Ubuntu repository can be outdated but more stable. If you would like to install the latest version, you can add a PPA maintained by Ubuntu Team.
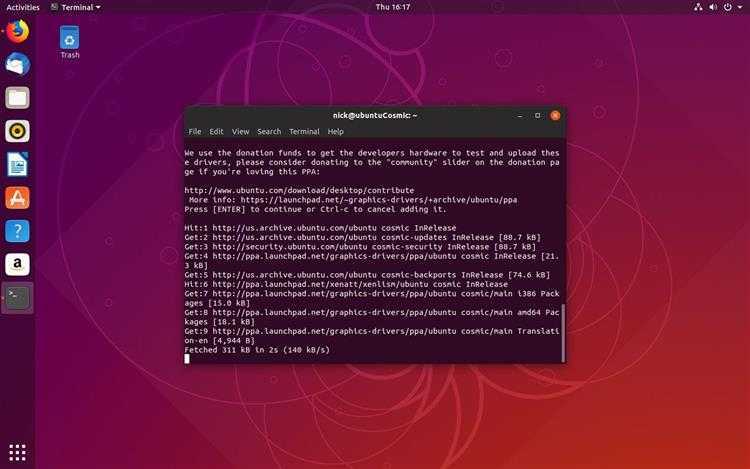
sudo add-apt-repository ppa:graphics-drivers/ppa
Notice that you don’t need to manually run after adding PPA on Ubuntu 18.04. This operation becomes automatic on Ubuntu 18.04. Now you can run:
sudo ubuntu-drivers devices
The newest version becomes the recommended driver.

Now you can run the following command to install the newest version.
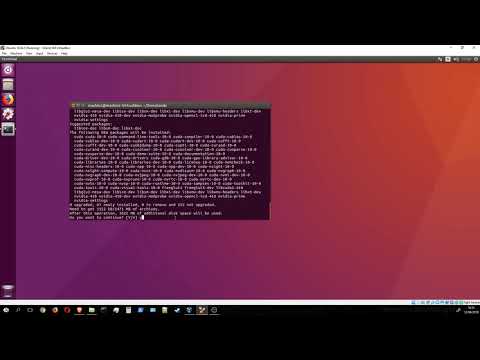
sudo ubuntu-drivers autoinstall
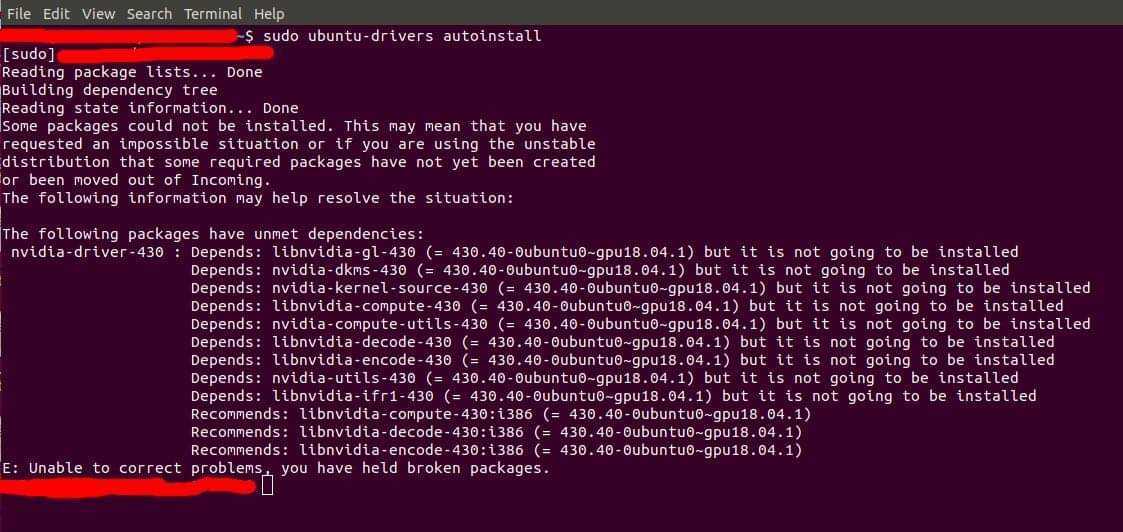
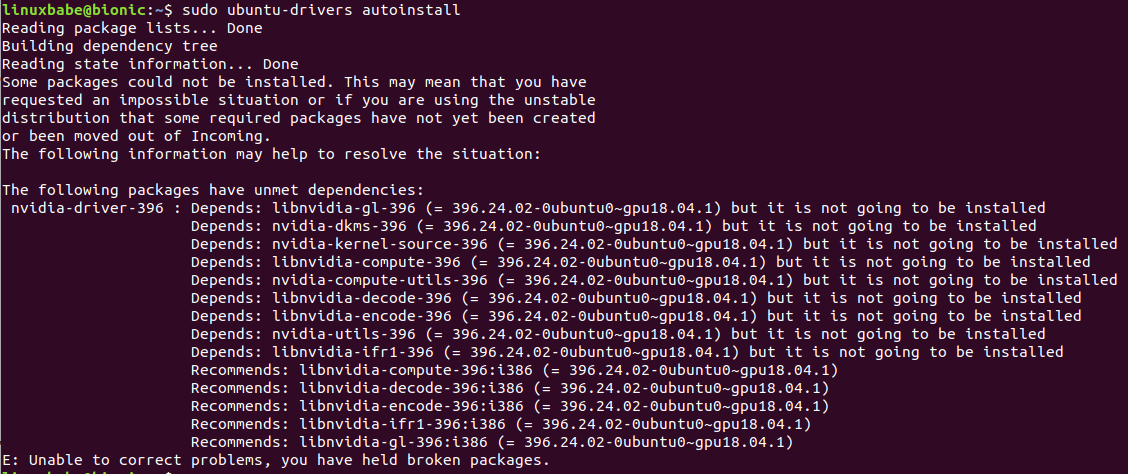
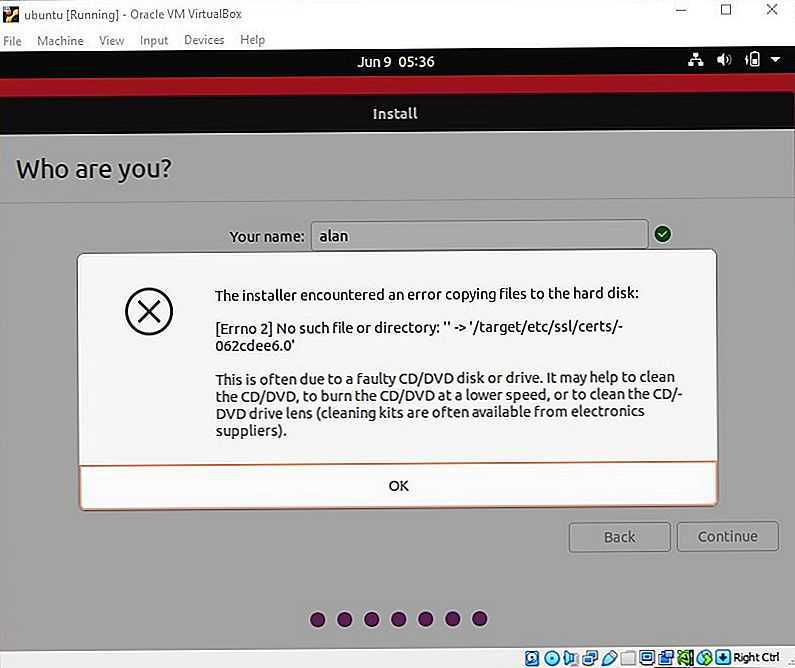
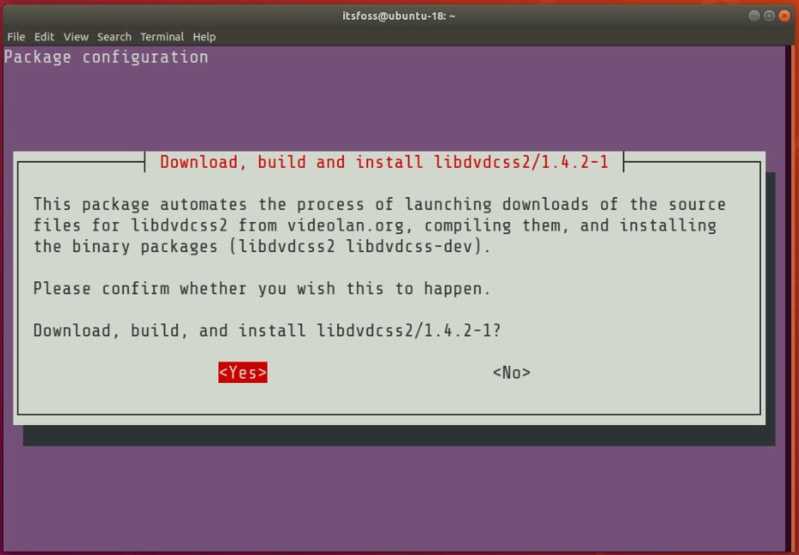
This PPA is still considered testing. Sometimes you might encounter dependency problems like below.
If you prefer stability over bleeding-edge, you can quit installing it. But if you are willing to take risks, you can upgrade the libraries by running the following command.
sudo apt upgrade
Then re-run the install command.
sudo ubuntu-drivers autoinstall
If there are still dependency problems, you can manually install them. For example, I saw the following error message.
The following packages have unmet dependencies:
 nvidia-driver-396 : Depends: xserver-xorg-video-nvidia-396 (= 396.24.02-0ubuntu0~gpu18.04.1) but it is not going to be installed
                     Depends: libnvidia-cfg1-396 (= 396.24.02-0ubuntu0~gpu18.04.1) but it is not going to be installed
I ran this command to fix the issue.
sudo apt install libnvidia-cfg1-396 xserver-xorg-video-nvidia-396 nvidia-driver-396
Once the newest version is installed, reboot your computer.
sudo shutdown -r now
Как установить последнюю версию драйвера Nvidia в Ubuntu
Если у вас самая новая графическая карта, выпущенная всего несколько месяцев назад. В этом случае не стоит ждать, пока Ubuntu включит лучший драйвер в свои основные репозитории. Чтобы установить самую последнюю версию драйвера графической карты, можно использовать сторонний репозиторий.

Откройте терминал и введите следующую команду:
| 1 | sudo add-apt-repository ppagraphics-drivers/ppa |
надстройка PPA
Обновите информацию о хранилище пакетов.
| 1 | sudo apt update |
Обновите все пакеты в системе. Даже если вы знаете, что ваша система обновлена, не пропускайте этот шаг
Это важно и помогает избежать некоторых сценариев, когда пакеты из PPA могут конфликтовать с другими пакетами
| 1 | sudo apt upgrade |
Проверьте, какие проприетарные пакеты драйверов доступны.
| 1 | ubuntu-drivers list |
Список доступных драйверов NVIDIA
Установите последнюю версию драйвера Nvidia. Например, на предыдущем рисунке «nvidia-driver-415» — самый свежий драйвер Nvidia для Ubuntu. Введите следующую команду и замените имя на версию последнего драйвера.
| 1 | sudo apt install nvidia-driver-версия-драйвера-nvidia |
В конце перезагрузите компьютер.
NVIDIA driver from the Ubuntu repositories
If one is using a NVIDIA driver package from a supported Ubuntu repository (not downloaded from NVIDIA’s website directly), then one is welcome to file a new report via a terminal:
ubuntu-bug xorg
Please ensure you have xdiagnose installed, and that you click the Yes button for attaching additional debugging information.
As well, please ensure all of the below are tested and provided:
- Did this happen with a prior version of the NVIDIA driver?
- Did this issue happen in a prior release of Ubuntu?
- Does this still occur with a later version of the NVIDIA driver provided by the Ubuntu repositories?
- Is this an issue with the latest version downloaded directly from NVIDIA’s website?
If the issue is not reproducible in the version from NVIDIA’s website, then the issue would be a downstream (Ubuntu) issue.
If the issue is reproducible in the version from NVIDIA’s website, the next step is to report a bug upstream as per below.
Install CUDA
Installing CUDA from runfile is much simpler and smoother than installing the NVIDIA driver. It just involves copying files to system directories and has nothing to do with the system kernel or online compilation. Removing CUDA is simply removing the installation directory. So I personally does not recommend adding NVIDIA’s repositories and install CUDA via or other package managers as it will not reduce the complexity of installation or uninstallation but increase the risk of messing up the configurations for repositories.
- an NVIDIA driver installer, but usually of stale version;
- the actual CUDA installer;
- the CUDA samples installer;
To extract above three components, one can execute the runfile installer with option. Then, executing the second one will finish the CUDA installation. Installation of the samples are also recommended because useful tool such as and are provided.
Scripts for installing CUDA Toolkit are summarized below.
After the installation finishes, configure runtime library.
It is also recommended for Ubuntu users to append string to system file so that will be included in . This will take effect after reboot.
Для начала немного теории
Современные ноутбуки зачастую поставляются с двумя графическими картами. В ноутбуках Dell, это встроенная Intel Corporation 3rd Gen Core processor Graphics Controller для которой Ubuntu использует драйвер i915, и дискретная, более мощная и дорогая NVIDIA Corporation GK107M .
Производители встраивают две карточки не просто так, а стремясь улучшить показатели энергопотребления и производительности в ноутбуках. К примеру, если вы используете браузер, офис и почту, то тут достаточно втсроенной слабой карточки, которая потребляет мало электроэнергии, не греется и не шумит.
Если же вы решили поиграть в соврменные игры, то в дело вступает дискретная карта ноутбука, обеспечивая вам должную производительноть в игре, но при этом потребляя много энергии, сильно нагреваясь и шумя.
Графические драйвера для Windows «умные» и они сами знают когда задействовать нужное железо. К сожалению для Linux, не все так хорошо, и если вы поставите Ubuntu на такой ноутбук, то заметите, что ноутбук сильно греется без причины, шумит, и у него быстро садится батарея.

Uninstall Nvidia Driver through GUI
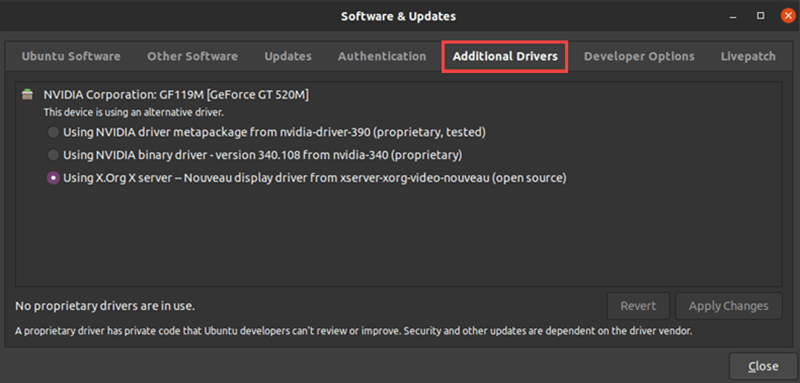
Uninstalling the Nvidia driver using a GUI is quite easy. First, locate the ‘software & Updates’ app then click on it to open. Once it has opened, select on the Additional Drivers tab.
This will display all the Nvidia drivers that are available on Ubuntu. On the list under the ‘Nvidia Corporation,’ select » using X.Org X server — Nouveau display.» This option will pass up the Nvidia graphics diver and it will install Nouveau display driver. For changes to take effect, click on the Apply changes button, and wait for some minutes.
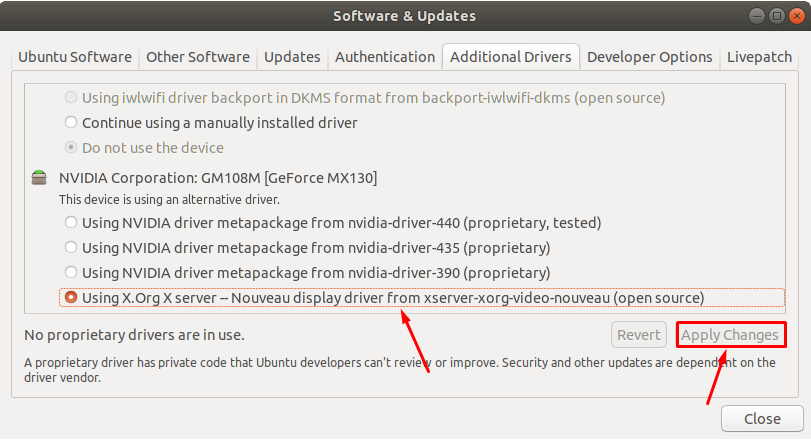
Once Nvidia driver is uninstalled, a message will display saying, «No proprietary drivers are in use» Now close the Software & Updates application and then reboot your computer.
Установка драйверов NVIDIA из командной строки
Если вы предпочитаете интерфейс командной строки, вы можете использовать инструмент ubuntu-drivers.
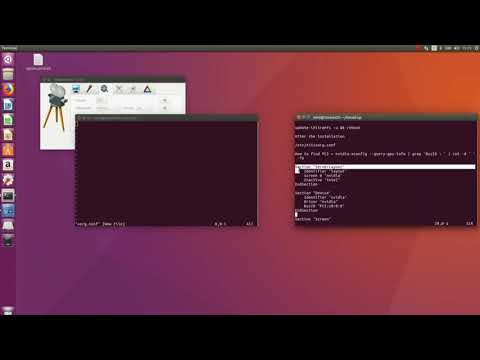
Откройте терминал ( Ctrl+Alt+T) и выполните следующую команду, чтобы получить информацию о вашей видеокарте и доступных драйверах:
ubuntu-drivers devices
Приведенный ниже вывод показывает, что в этой системе установлена «GeForce GTX 1650», а рекомендуемый драйвер – «nvidia-driver-440». Вы можете увидеть другой результат в зависимости от вашей системы.
== /sys/devices/pci0000:00/0000:00:01.0/0000:01:00.0 ==
modalias : pci:v000010DEd00001F95sv00001028sd0000097Dbc03sc02i00
vendor   : NVIDIA Corporation
model    : TU117M
driver   : nvidia-driver-440 - distro non-free recommended
driver   : xserver-xorg-video-nouveau - distro free builtin
Обычно лучше всего установить рекомендуемый драйвер. Для этого воспользуйтесь менеджером пакетов apt:
sudo apt install nvidia-driver-440
После завершения установки перезагрузите систему:
sudo reboot
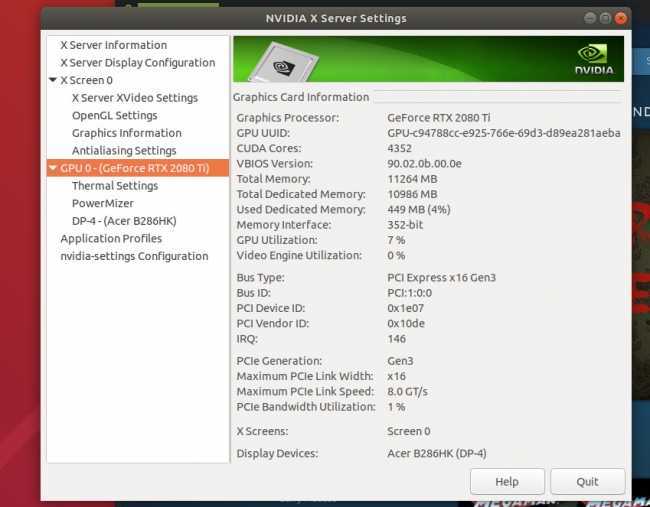
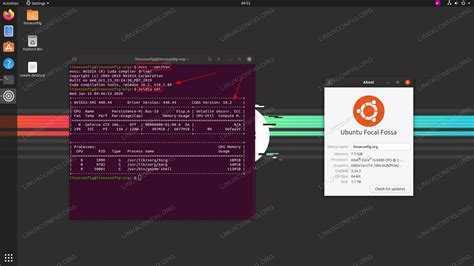
Когда система вернется, вы можете просмотреть состояние графической карты с помощью инструмента мониторинга nvidia-smi:
nvidia-smi
Команда отобразит версию используемого драйвера и другую информацию о карте NVIDIA:
Wed Nov 11 22:45:21 2020
+-----------------------------------------------------------------------------+
| NVIDIA-SMI 440.100      Driver Version: 440.100      CUDA Version: 11.1     |
|-------------------------------+----------------------+----------------------+
| GPU  Name        Persistence-M| Bus-Id        Disp.A | Volatile Uncorr. ECC |
| Fan  Temp  Perf  Pwr:Usage/Cap|         Memory-Usage | GPU-Util  Compute M. |
|                               |                      |               MIG M. |
|===============================+======================+======================|
|   0  GeForce GTX 165...  Off  | 00000000:01:00.0 Off |                  N/A |
| N/A   41C    P3    14W /  N/A |      4MiB /  3914MiB |      0%      Default |
|                               |                      |                  N/A |
+-------------------------------+----------------------+----------------------+

+-----------------------------------------------------------------------------+
| Processes:                                                                  |
|  GPU   GI   CI        PID   Type   Process name                  GPU Memory |
|        ID   ID                                                   Usage      |
|=============================================================================|
|    0   N/A  N/A      2323      G   /usr/lib/xorg/Xorg                  4MiB |
+-----------------------------------------------------------------------------+
Conclusion
In this tutorial, we have covered two ways that you can use to install Nvidia drivers on Ubuntu 20.04 LTS.
With that said, Nvidia is bringing Vulkan which is intended to offer higher performance and more balanced CPU/GPU usage driver to Linux, a replacement for OpenGL.
In recent years Redhat developers are adding extra code to Nouveau improve opensource code to make it much better, let’s hope the near future we could use it for the modern game.
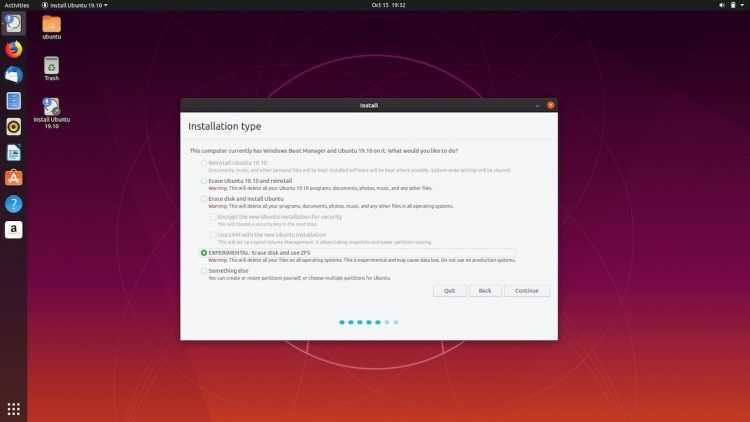
From Ubuntu 19.10, proprietary Nvidia drivers are available on install media (ie in ISO), which will bring a better fresh install experience for ubuntu users.
If you have any questions or feedback, feel free to leave a comment.
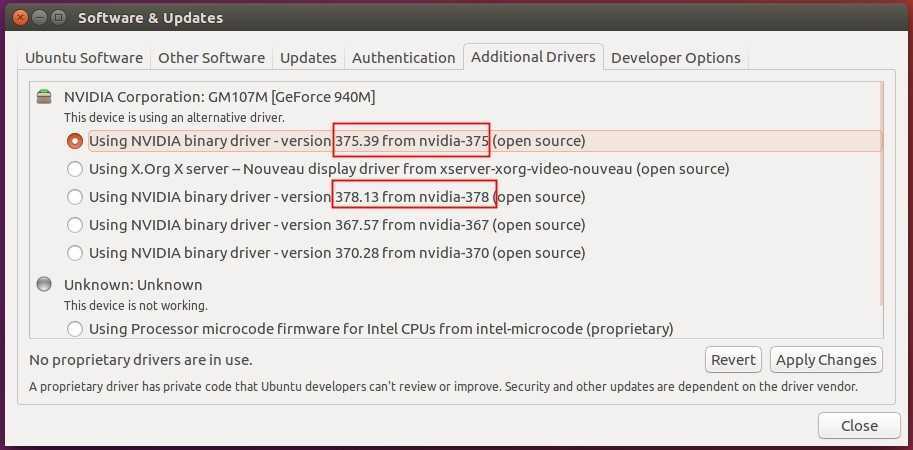
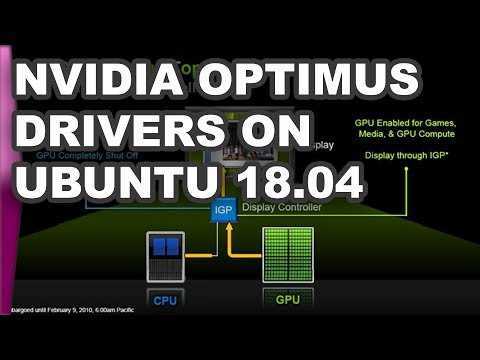
How to Install Nvidia Graphics Driver on Ubuntu 18.04 From Graphical User Interface
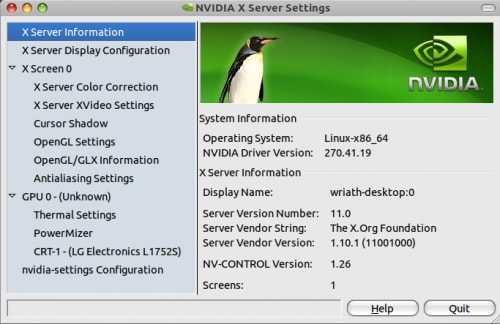
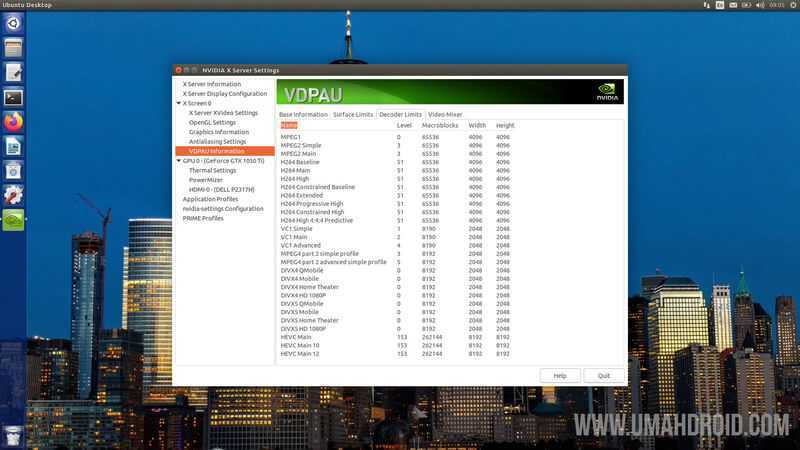
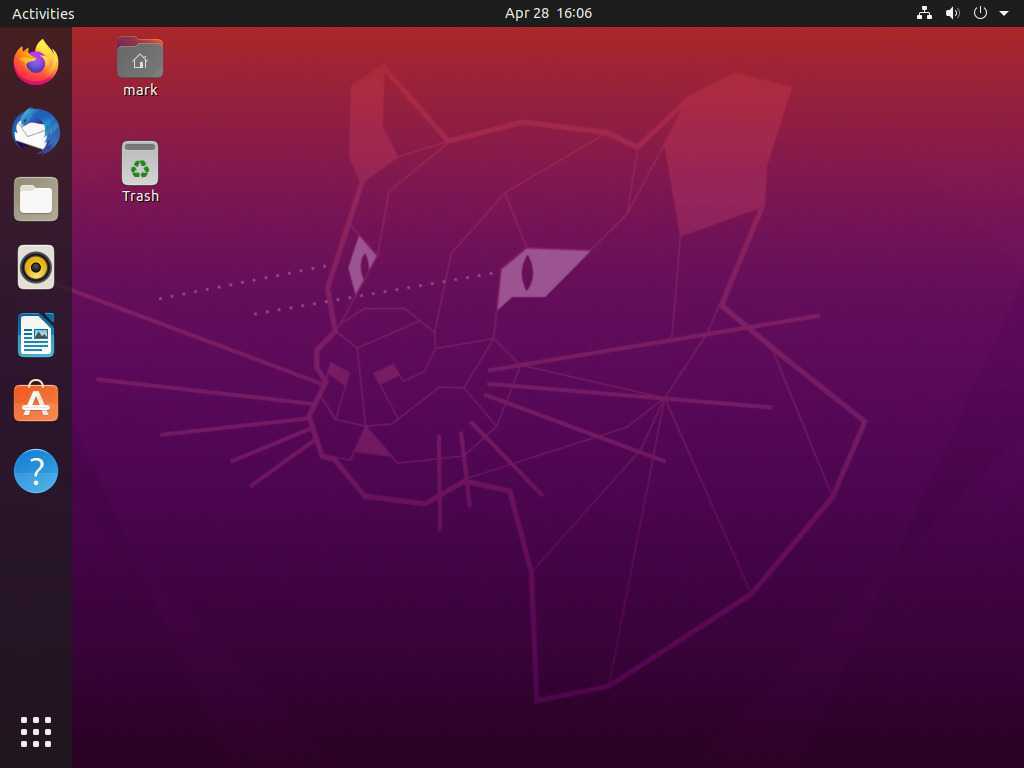
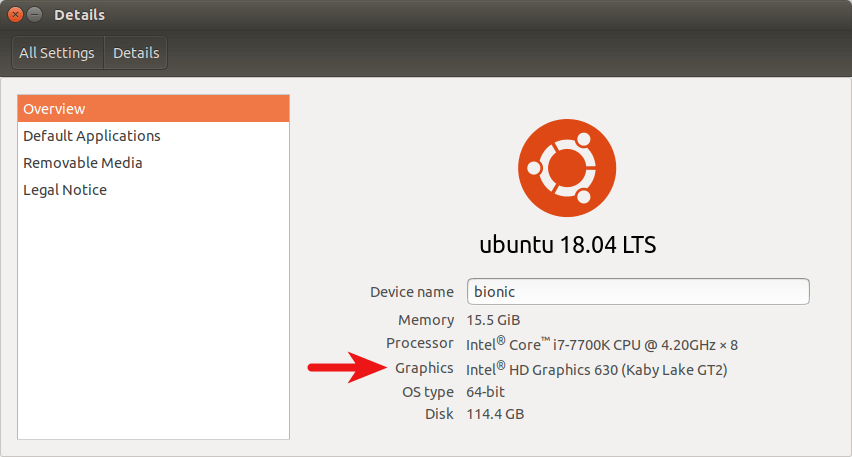
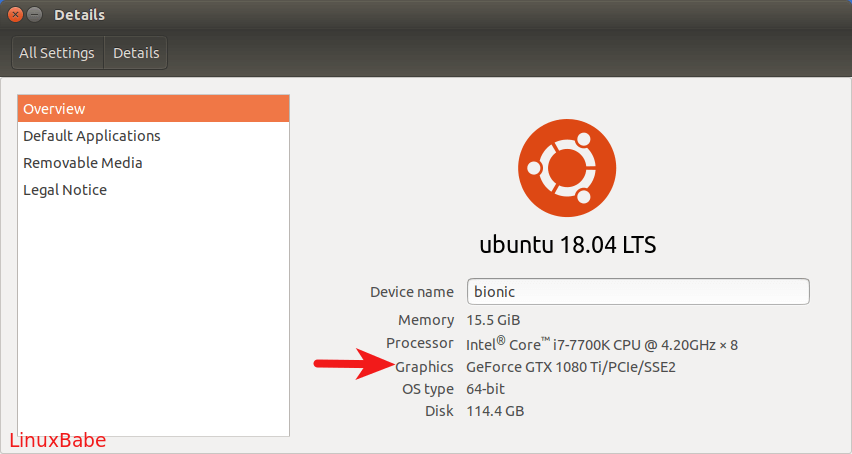
First, go to > and check what graphics card your computer is using. By default, your integrated graphics card (Intel HD Graphics) is being used.
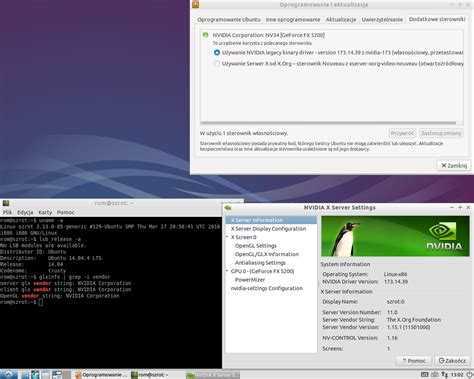
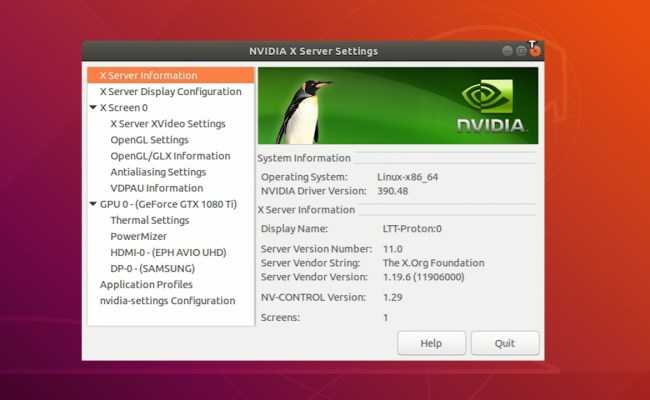
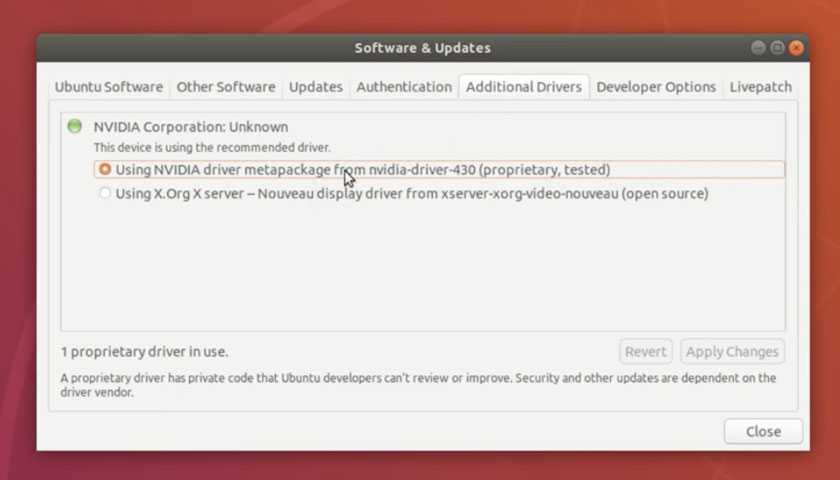
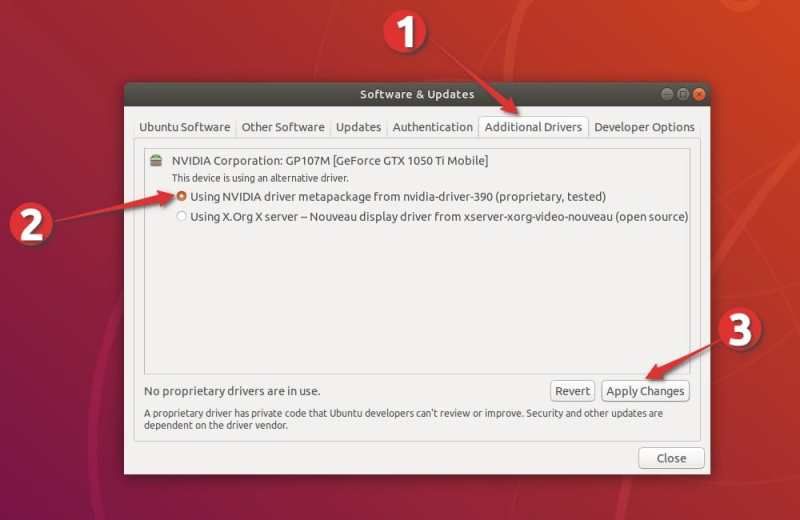
Then open program from you application menu. Click the tab. You can see what driver is being used for Nvidia card (Nouveau by default) and a list of proprietary drivers.
As you can see and are available for my card. So I select the first option to install . Your mileage may vary. There might be some other drivers for your particular card. Click button to install the driver.

After it’s installed, reboot your computer for the change to take effect. After that, go to > , you will see Ubuntu is using Nvidia graphics card.


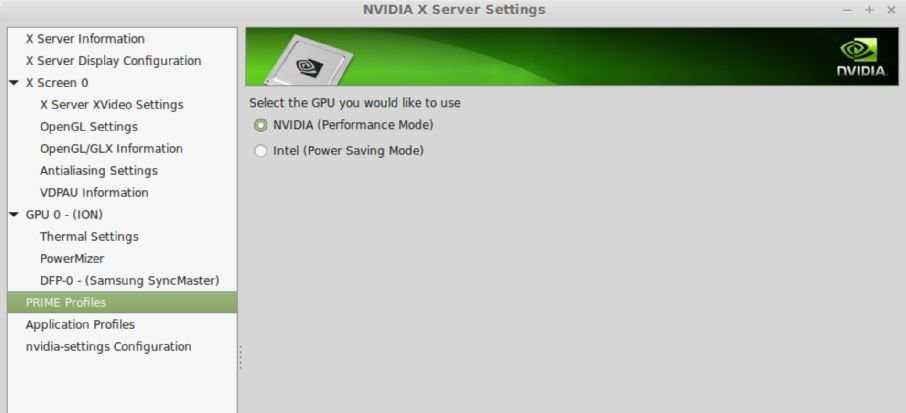
If you want Ubuntu to use Intel graphics card, open from application menu. Click tab on the left pane, and then select Intel card on the right pane.
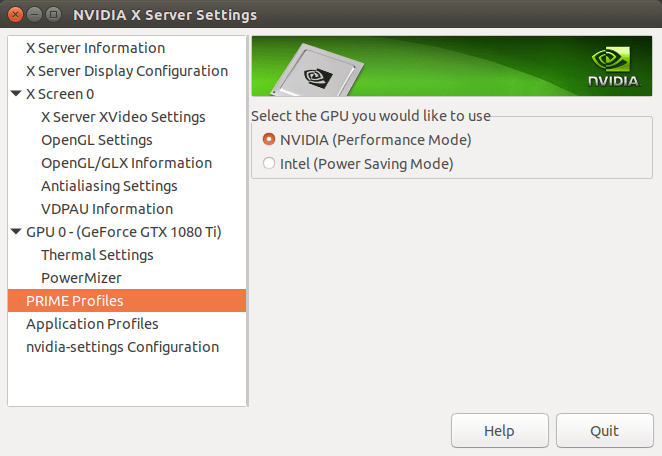
To switch back to Nvidia card, simply select NVIDIA in .
Автоматическая установка использование репозитория PPA для установки драйверов Nvidia Beta
Использование репозитория PPA позволяет нам устанавливать новейшие бета-драйверы Nvidia с риском нестабильности системы.
- Чтобы продолжить, сначала добавьте репозиторий в вашу систему:
$ sudo add-apt- репозиторий ppa: graphics-drivers/ppa $ sudo apt update
- Затем определите модель вашей видеокарты и рекомендуемый драйвер:
$ ubuntu-drivers devices ==/sys /devices/pci0000:00/0000:00:01.0/0000:01:00.0 == режимы: pci: v000010DEd00001C03sv00001043sd000085ABbc03sc00i00 Производитель: NVIDIA Corporation модель: GP106 [ GeForce GTX 1060 6GB] драйвер: nvidia-driver -390 - сторонний freedriver: nvidia-driver-410 - сторонний бесплатный рекомендуемый драйвер: nvidia-driver-396 - сторонний freedriver: xserver-xorg-video-nouveau - distro free встроенный
- То же, что и в приведенном выше примере стандартного репозитория Ubuntu, либо установите все рекомендуемые драйверы автоматически:
$ sudo ubuntu-drivers autoinstall
, либо выборочно с помощью команда. Пример:
$ sudo apt install nvidia-410
- После этого перезагрузите систему.
Установка последних драйверов NVIDIA
Большинству пользователей следует придерживаться стабильных драйверов NVIDIA, которые доступны в репозиториях Ubuntu по умолчанию. Если вы хотите быть на связи, вы можете установить последние версии драйверов либо с сайта NVIDIA, либо из PPA «Драйверы графики».
Мы будем использовать метод PPA, так как это проще устанавливать и обновлять драйверы.
Добавьте репозиторий PPA, используя следующую команду:
sudo add-apt-repository ppa:micahflee/ppa
Используйте инструмент ubuntu-drivers для просмотра доступных драйверов:
ubuntu-drivers devices
== /sys/devices/pci0000:00/0000:00:01.0/0000:01:00.0 ==
modalias : pci:v000010DEd00001F95sv00001028sd0000097Dbc03sc02i00
vendor   : NVIDIA Corporation
model    : TU117M
driver   : nvidia-driver-440-server - distro non-free
driver   : nvidia-driver-450-server - third-party non-free
driver   : nvidia-driver-455 - third-party non-free recommended
driver   : xserver-xorg-video-nouveau - distro free builtin
Установите желаемый драйвер:
sudo apt install nvidia-driver-455
Перезагрузите систему, чтобы активировать новый драйвер.
Смотрим на результаты
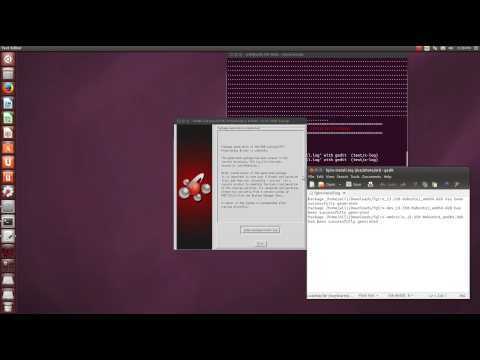
Что-бы проверить как драйвера nvidia и Primus влияют на производительность требовательных приложений, давайте сделаем несколько тестов. Для этого мы будем использовать программку glxspheres, в Ubuntu 64bit она называется glxspheres64 и находится тут /usr/bin/glxspheres64.
Давайте для начала запустим ее без Primus бэкенда и посмотрим на результат:
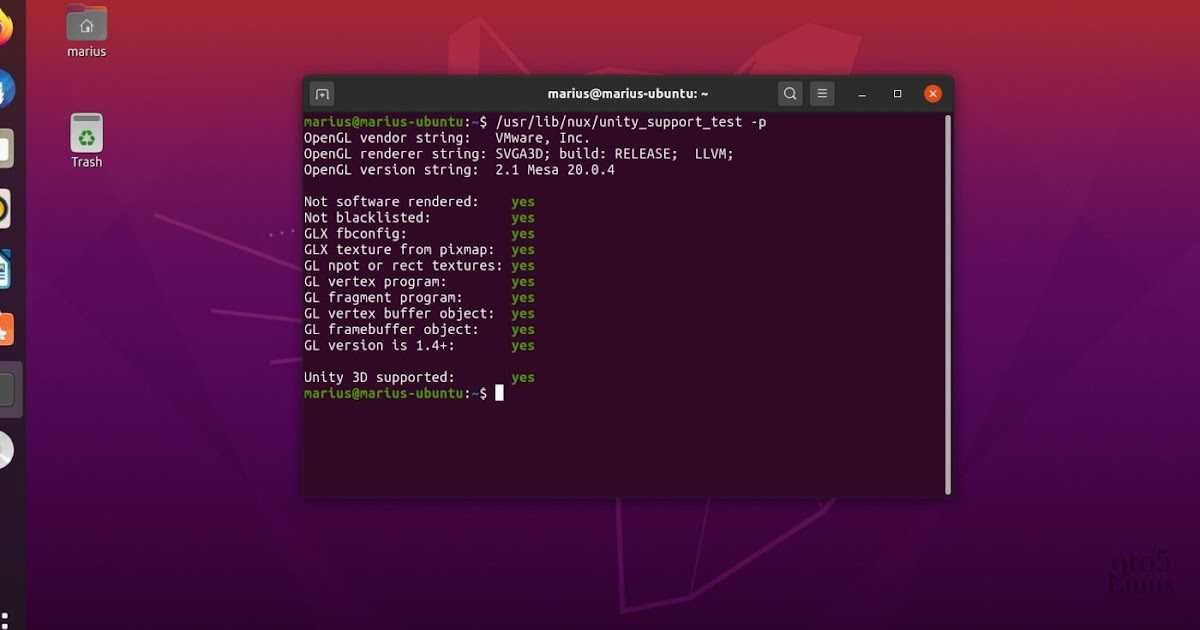
Как видно из скриншота, glxspheres64 запустилась с помощью встроенной графической карты Intel и открытого драйвера Mesa. Производительность установила планку ~66FPS. Что очень средненький результат.
Теперь, давайте запустим эту же программу, с помощью Nvidia Optimus:
На скриншоте видно, что теперь, для запуска утилиты glxspheres64 была задействованная дискретная GeForce GT 640M, а производительность сильно возросла, установив планку ~175FPS
Теперь давайте запуститм glxspheres64 с помощью primusrun:
На скриншоте видно, что GeForce GT 640M снова в деле, но производительность увеличилась в двое и теперь моя карточка выдает ~245FPS. Что является отличным показателем! Я запустил primusrun c ключом vblank_mode=0 primusrun, этот ключ рекомендован разработчикам в тех случаях, когда вам нужно отключить vblank синхронизацию.
В чем разница между optirun и primusrun? optirun использует VirtualGL, Primus же дает лучшую производительнось и более оптимальное энергопотребление в связке с Bumblebeе, заменяя VirtualGL.