Step 2: Install OS libraries
Remove any previous installations of x264</h3>
sudo apt-get remove x264 libx264-dev

We will Install dependencies now

sudo apt-get install build-essential checkinstall cmake pkg-config yasm
sudo apt-get install git gfortran
sudo apt-get install libjpeg8-dev libjasper-dev libpng12-dev

# If you are using Ubuntu 14.04
sudo apt-get install libtiff4-dev
# If you are using Ubuntu 16.04
sudo apt-get install libtiff5-dev

sudo apt-get install libavcodec-dev libavformat-dev libswscale-dev libdc1394-22-dev
sudo apt-get install libxine2-dev libv4l-dev
sudo apt-get install libgstreamer0.10-dev libgstreamer-plugins-base0.10-dev
sudo apt-get install qt5-default libgtk2.0-dev libtbb-dev
sudo apt-get install libatlas-base-dev
sudo apt-get install libfaac-dev libmp3lame-dev libtheora-dev
sudo apt-get install libvorbis-dev libxvidcore-dev
sudo apt-get install libopencore-amrnb-dev libopencore-amrwb-dev
sudo apt-get install x264 v4l-utils

# Optional dependencies
sudo apt-get install libprotobuf-dev protobuf-compiler
sudo apt-get install libgoogle-glog-dev libgflags-dev
sudo apt-get install libgphoto2-dev libeigen3-dev libhdf5-dev doxygen
Step 2: Download OpenCV and OpenCV_Contrib
Now we are going to download OpenCV 4.3.0 and openCV_contrib 4.3.0. With the help of the opencv_contrib, we will get more functions and modules. So while installing OpenCV, we can install both OpenCV and opencv_contrib at once.
To download, the OpenCV and opencv_contrib use the following command. We are installing OpenCV 4.3.0 but you can install any OpenCV version which exists on the OpenCV website. While writing this blog, the current OpenCV version is 4.3.0
To download the OpenCV 4.3.0 use the following command:
To download the OpenCV_Contrib 4.3.0 use the following command:
Note: OpenCV and OpenCV_Contrib both versions should be the same.
The installation of the Contrib along with OpenCV is required because we do not get some patent algorithms directly while installing OpenCV like SURF and SIFT algorithm. If you want to use these patent algorithms and daily research algorithms then you must install OpenCV_Contrib along with the OpenCV.
Now in the next step, we have to unzip both OpenCV and OpenCV_Contrib using the following commands. To do this, navigate to that folder or location where you downloaded both zip files and then run the below commands.
After unzipping the files, you will get your file name with the version which you downloaded. So we can rename the files. This step is optional and if you do not rename, then be careful while writing the below commands ahead because we will be using the rename file name.
Step 0: Select OpenCV version to install
echo "OpenCV installation by learnOpenCV.com"

#Specify OpenCV version
cvVersion="3.4.4"
We are also going to clean directories and create directory.
Download Code
To easily follow along this tutorial, please download code by clicking on the button below. It’s FREE!
Download Code
# Clean build directories
rm -rf opencv/build
rm -rf opencv_contrib/build
# Create directory for installation
mkdir installation
mkdir installation/OpenCV-"$cvVersion"
Finally, we will be storing the current working directory in variable. We are also going to refer to this directory as OpenCV_Home_Dir throughout this article.
# Save current working directory
cwd=$(pwd)
Работа в SLAM с помощью ROS и Kinect
Основная цель установки и настройки в нашем роботе датчиков технического зрения — самостоятельная навигация, обнаружение и обход препятствий. SLAM – это используемый в мобильных роботах алгоритм для создания карты неизвестной среды или обновления ранее созданной карты с помощью отслеживания текущего местоположения робота.
Карты используются для планирования траектории робота и навигации по этому пути. С помощью карты робот получит представление об окружающей среде. Основные две задачи в мобильной навигации робота – отображение и локализация.
Картографирование позволяет сформировать профиль препятствий вокруг робота. Благодаря картографированию робот поймет, как выглядит мир. Локализация – это процесс оценки положения робота на создаваемой нами карте.
SLAM извлекает данные из различных датчиков и использует их для построения карт. Датчик зрения 2D/3D-формата можно использовать как входной сигнал для SLAM. 2D-датчики зрения, как и лазерные дальномеры и 3D-датчики, такие как Kinect, в основном используются в качестве входных данных SLAMалгоритма.
Название библиотеки SLAM – OpenSlam (http://openslam.org/gmapping.html). Эта библиотека интегрирована в ROS как пакет под названием gmapping. Пакет gmapping предоставляет узел для выполнения лазерной обработки SLAM и называется slam_gmapping. Этот пакет поможет создать двухмерную карту данных лазерного сканирования и расположить собранные мобильным роботом данные.
Пакет gmapping доступен на http://wiki.ros.org/gmapping.
Чтобы использовать slam_gmapping, вам понадобится мобильный робот, который передает данные по одометрии и оборудован зафиксированным в горизонтальном положении лазерным дальномером.
Узел slam_gmapping получает сообщения от sensor_msgs/LaserScan и nav_msgs/Odometry и создает карту (nav_msgs/OccupancyGrid). Сгенерированную карту можно получить с помощью темы или сервиса ROS.
Чтобы применить SLAM в нашем Chefbot, мы использовали следующий файл запуска. Этот файл запускает узел slam_gmapping и содержит необходимые параметры для начала отображения среды робота:
$ rosrun gmapping slam_gmapping scan:=base_scan
Step 6: Test OpenCV3
We will test a red eye remover application written in OpenCV to test our C++ and Python installations. Download RedEyeRemover.zip and extract it into a folder.

Step 6.1: Test C++ code
Move inside extracted folder, compile and run.
# compile
# There are backticks ( ` ) around pkg-config command not single quotes
g++ -std=c++11 removeRedEyes.cpp `pkg-config --libs --cflags opencv` -o removeRedEyes
# run
./removeRedEyes
Step 6.2: Test Python code
Activate Python virtual environment
############ For Python 2 ############
workon facecourse-py2

############ For Python 3 ############
workon facecourse-py3
Quick Check
# open ipython (run this command on terminal)
ipython
# import cv2 and print version (run following commands in ipython)
import cv2
print cv2.__version__
# If OpenCV3 is installed correctly,
# above command should give output 3.3.1
# Press CTRL+D to exit ipython
Run RedEyeRemover demo
python removeRedEyes.py
Now you can exit from Python virtual environment.
deactivate
Whenever you are going to run Python scripts which use OpenCV you should activate the virtual environment we created, using workon command.
Subscribe & Download Code
If you liked this article and would like to download code (C++ and Python) and example images used in this post, please click here. Alternately, sign up to receive a free Computer Vision Resource Guide. In our newsletter, we share OpenCV tutorials and examples written in C++/Python, and Computer Vision and Machine Learning algorithms and news.
Download Example Code
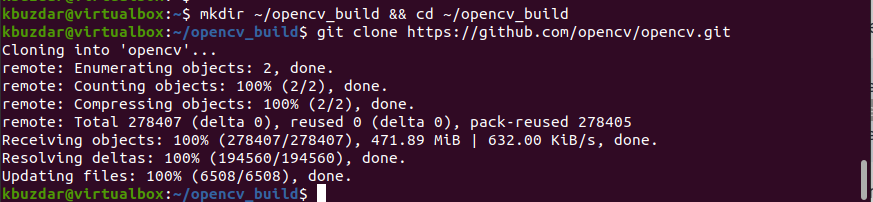
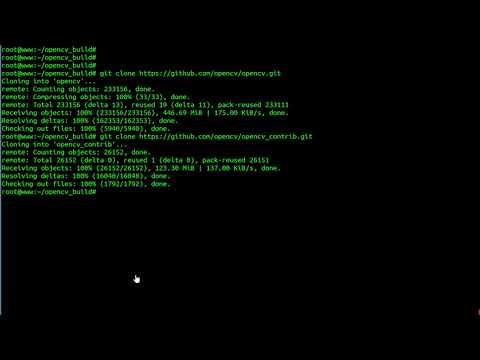
Step 2: Clone OpenCV’s repositories
Make the directory and navigate in it. Clone the OpenCV repository by running the following command:
$ mkdir ~/opencv_build && cd ~/opencv_build
$ git clone https://github.com/opencv/opencv.git
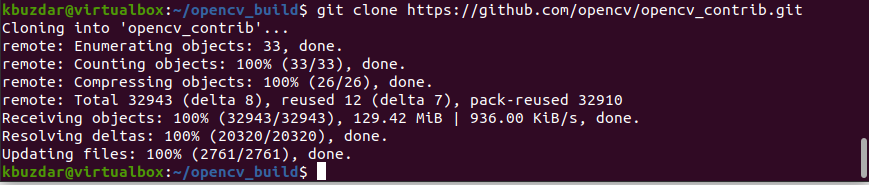
Then, clone the OpenCV contrib repositories by using the following command:
$ git clone https://github.com/opencv/opencv_contrib.git
At the time of writing this article, OpenCV 4.4.0 is available as the latest stable version.
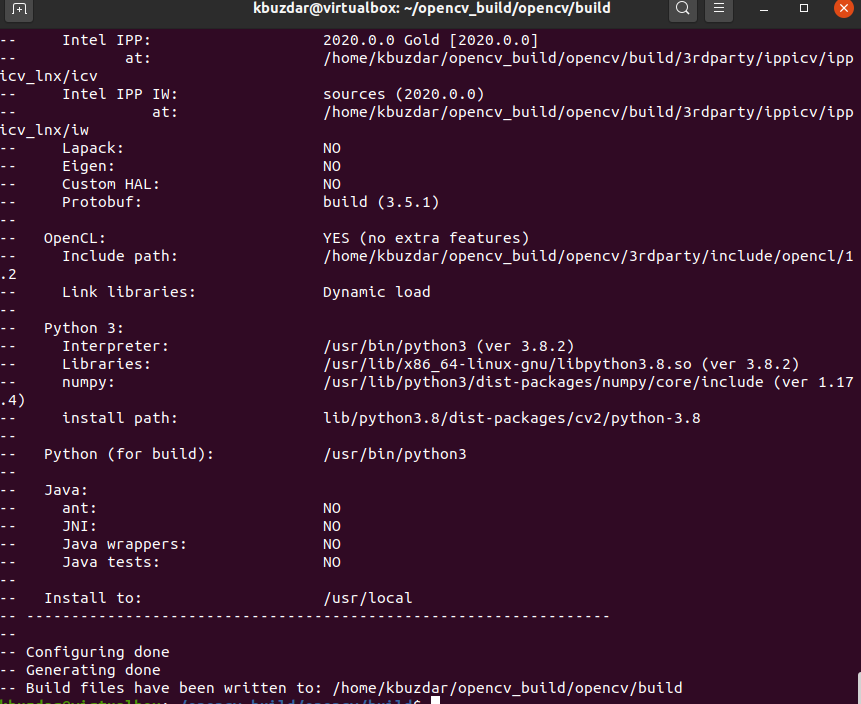
Step 3: Setup OpenCV build
Once the download is completed, create a directory named ‘build’ and navigate to it as follows:
$ cd ~/opencv_build/opencv
$ mkdir -p build && cd build

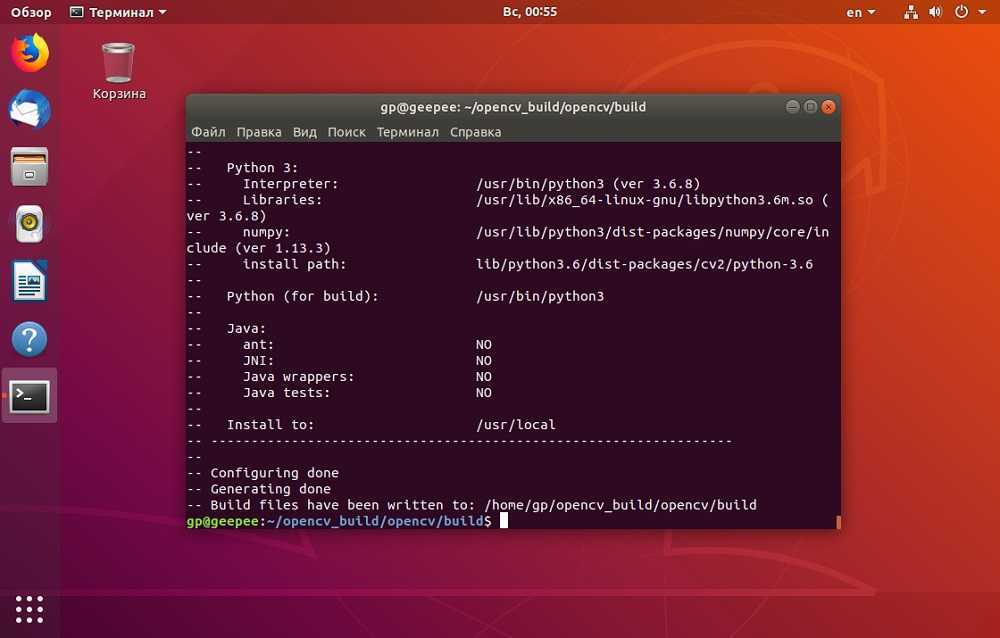
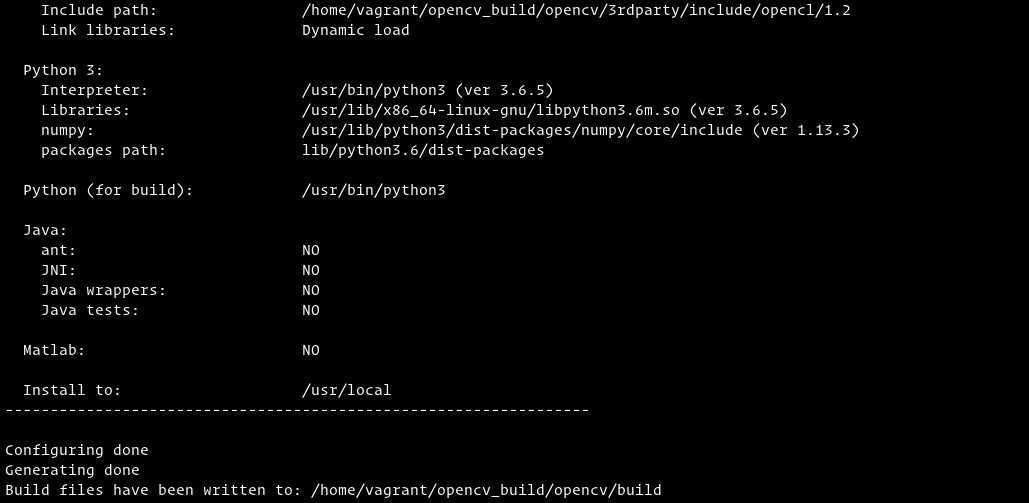
Now, setup OpenCV build with CMake by using the following command:
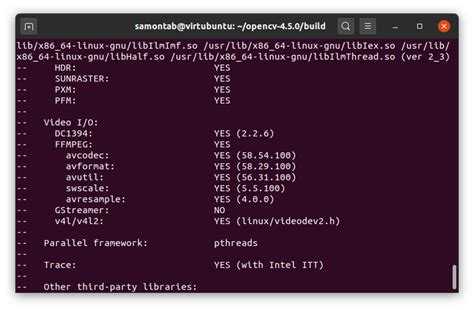
$ cmake -D CMAKE_BUILD_TYPE=RELEASE \
-D CMAKE_INSTALL_PREFIX=/usr/local \
-D INSTALL_C_EXAMPLES=ON \
-D INSTALL_PYTHON_EXAMPLES=ON \
-D OPENCV_GENERATE_PKGCONFIG=ON \
-D OPENCV_EXTRA_MODULES_PATH=~/opencv_build/opencv_contrib/modules \
-D BUILD_EXAMPLES=ON ..

You will see the following output on the terminal at the end:
Step 4: Start a compilation
Start the compilation process by using the following command:
$ make j8
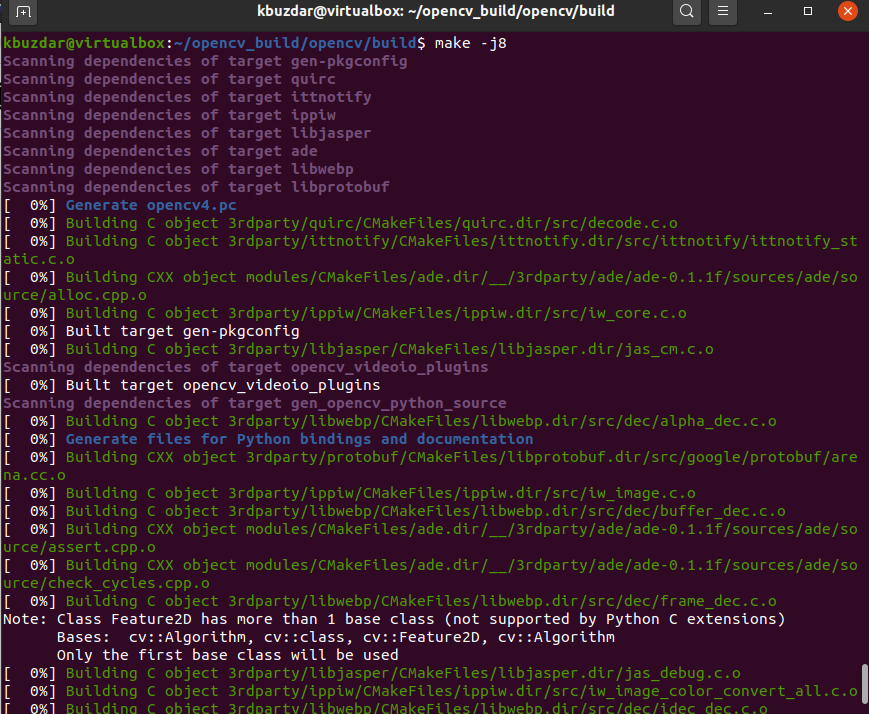
Modify the value of the ‘j’ flag according to your processors. If you don’t know about your processor cores then, type the nproc command. You can easily find the core of your processor in this way. The compilation process will take time according to your system configurations. So, be patient.
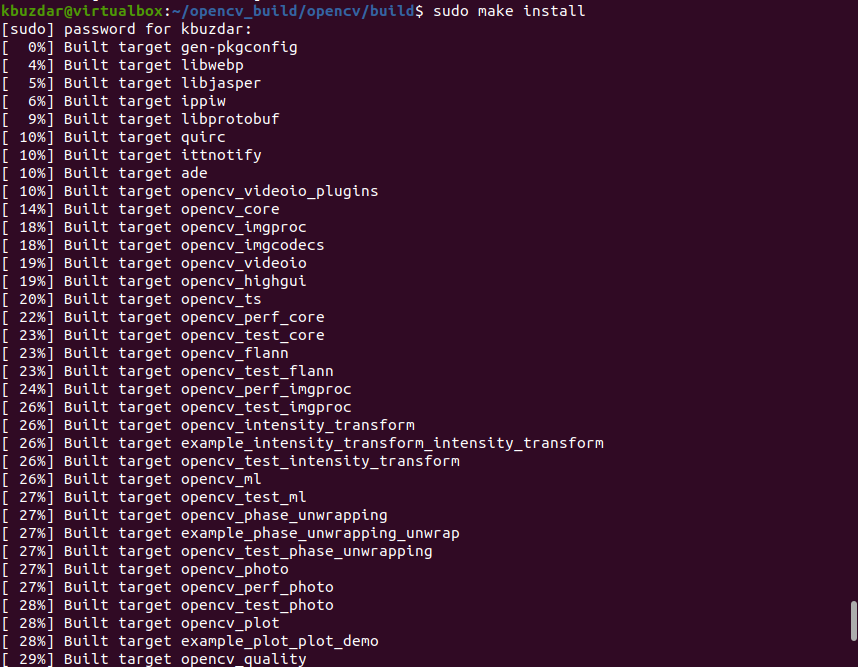
Step 5: Install OpenCV
Install the OpenCV by executing the following command:
$ sudo make install
After completing the installation process, type the following command to verify the OpenCV installation. For C++ binding:
$ pkg-config --modversion opencv4

For python binding run the command as follows:
$ python3 -c "import cv2; print(cv2.__version__)"

Congratulations! The newest OpenCV version 4.4.0 has been installed on your system now.


Согласование Orbbec Astra с ROS
Одной из альтернатив Kinect является Orbbec Astra. Для Astra доступны драйверы ROS. Рассмотрим настройку этого драйвера и получим изображение, глубину и облако точек от этого датчика.
Установка драйвера Astra-ROS
Полные инструкции по настройке драйвера Astra-ROS в Ubuntu приведены на https://github.com/orbbec/ros_astra_camera и http://wiki.ros.org/Sensors/OrbbecAstra. После установки драйвер запускается следующей командой:
$ roslaunch astra_launch astra.launch
Драйвер Astra также можно установить из репозитория пакетов ROS. Ниже представлена команда для установки этих пакетов:
$ sudo apt-get install ros-kinetic-astra-camera$ sudo apt-get install ros-kinetic-astra-launch
После установки этих пакетов необходимо обнаружить и идентифицировать камеру, чтобы с устройством можно было работать. Как это сделать, описано в http://wiki.ros.org/astra_camera. Темы ROS, созданные с помощью этого драйвера, можно проверить с помощью команды rostopic в терминале. Кроме того, для обработки изображений мы можем использовать тот же код Python, что был рассмотрен в предыдущей части статьи.
Troubleshooting and FAQ
In this section, I address some of the common questions, problems, and issues that arise when installing OpenCV on Ubuntu 16.04.
Q. When I execute or , I get a “command not found error”.
A. There are three primary reasons why you would be getting this error message, all of which are related to Step #3:
- First, make sure you have installed and using the package manager. You can verify this by running , examining the output, and ensuring that you see both and in the list of installed packages.
- Your file may not be updated correctly. To diagnose this, use a text editor such as and view the contents of your file. At the bottom of the file, you should see the proper and commands are present (again, check Step #3 for the commands that should be appended to ).
- After editing your file, you may have forgotten to it and reload its contents. Make sure you run source after editing it to ensure the contents are reloaded — this will give you access to the and commands.
Q. Whenever I open a new terminal, logout, or reboot my Ubuntu system, I cannot execute the or commands.
A. See reason #2 from the previous question.
Q. When I (1) open up a Python shell that imports OpenCV or (2) execute a Python script that calls OpenCV, I get an error: .
A. Unfortunately, the exact cause of this error message is extremely hard to diagnose as there are multiple reasons this could be happening. In general, I recommend the following suggestions to help diagnose and resolve the error:
- Make sure you are in the virtual environment by using the command. If this command gives you an error, then see the first question in this FAQ.
- If after you’ve ensured your file has been updated properly and ‘d, then try investigating the contents of the directory in your virtual environment. You can find the directory in or depending on your Python version. Make sure that (1) there is a file in this directory and (2) that it’s properly sym-linked to a valid, existing file.
- Be sure to check the (and even ) directory for the system install of Python located in and , respectively. Ideally, you should have a file there.
- If all else fails, check in your directory of your OpenCV build. There should be a file there (provided that both and executed without error). If the file is present, manually copy it into both the system directory as well as the directory for the virtual environment.
What’s next? I recommend PyImageSearch University.
Course information:
28 total classes • 39h 44m video • Last updated: 10/2021★★★★★ 4.84 (128 Ratings) • 3,000+ Students Enrolled
I strongly believe that if you had the right teacher you could master computer vision and deep learning.
Do you think learning computer vision and deep learning has to be time-consuming, overwhelming, and complicated? Or has to involve complex mathematics and equations? Or requires a degree in computer science?
That’s not the case.
All you need to master computer vision and deep learning is for someone to explain things to you in simple, intuitive terms. And that’s exactly what I do. My mission is to change education and how complex Artificial Intelligence topics are taught.
If you’re serious about learning computer vision, your next stop should be PyImageSearch University, the most comprehensive computer vision, deep learning, and OpenCV course online today. Here you’ll learn how to successfully and confidently apply computer vision to your work, research, and projects. Join me in computer vision mastery.
Inside PyImageSearch University you’ll find:
- ✓ 28 courses on essential computer vision, deep learning, and OpenCV topics
- ✓ 28 Certificates of Completion
- ✓ 39h 44m on-demand video
- ✓ Brand new courses released every month, ensuring you can keep up with state-of-the-art techniques
- ✓ Pre-configured Jupyter Notebooks in Google Colab
- ✓ Run all code examples in your web browser — works on Windows, macOS, and Linux (no dev environment configuration required!)
- ✓ Access to centralized code repos for all 400+ tutorials on PyImageSearch
- ✓ Easy one-click downloads for code, datasets, pre-trained models, etc.
- ✓ Access on mobile, laptop, desktop, etc.
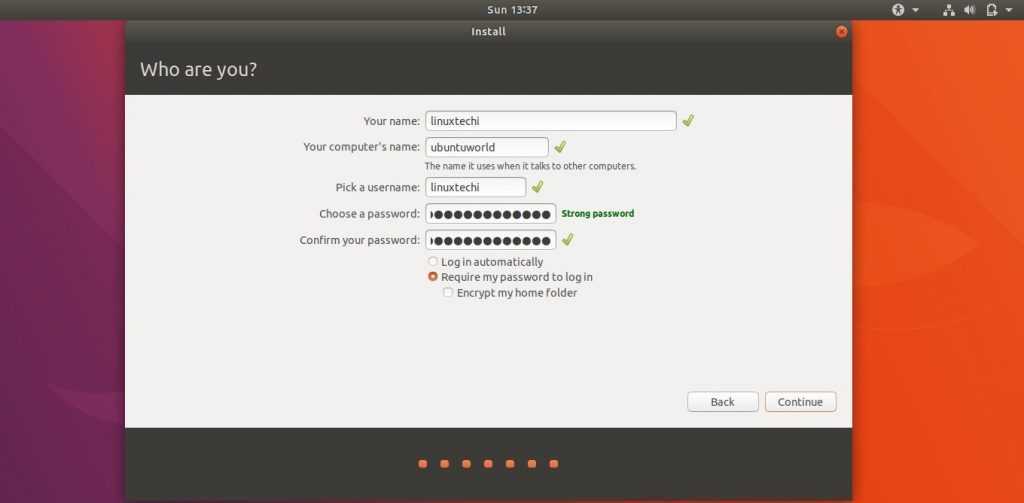
Step 3: Setup Virual Environment
Now we will use the pip for further installation. To configure pip from the old version to the new version using the following commands:
Before going to the next step of the installation of the OpenCV on an Ubuntu machine, we have to know about the virtual environment. The virtual environment helps us to keep the same package of different versions on the same machine. Because sometimes we need to run a project of the lower version but already we have installed the latest library on our machine. So, in that case, we can use a virtual environment which helps to keep different version library on the same machine.
For example, you are working on a project and you are using TensorFlow latest version on your system but to run that project you need Tensorflow version 2.0 or older. So if you remove the latest version then that might affect your other projects. So the best thing is that you create a virtual environment and install all the requirements libraries on that virtual environment and execute your project without affects the other projects.
To create a virtual environment there are two methods in python:
1. virtualenv
2. virtualenvwrapper
Any above methods you can choose, but the latest method is virtualenv, so I am also going to use this method here.
Now we have to update the path of the virtualenv to bash. So for that, we have to use the following steps:
export WORKON_HOME=$HOME/.virtualenvs
export VIRTUALENVWRAPPER_PYTHON=/usr/bin/python3
source /usr/local/bin/virtualenvwrapper.sh
We can also add these paths using the below method. Choose either the above or below the method for this step.
Now after done the above steps using any above methods, we have to save that file back to bash using the below command:
Now we are going to create a virtual environment along with python for my project. To create the environment we use the following command:
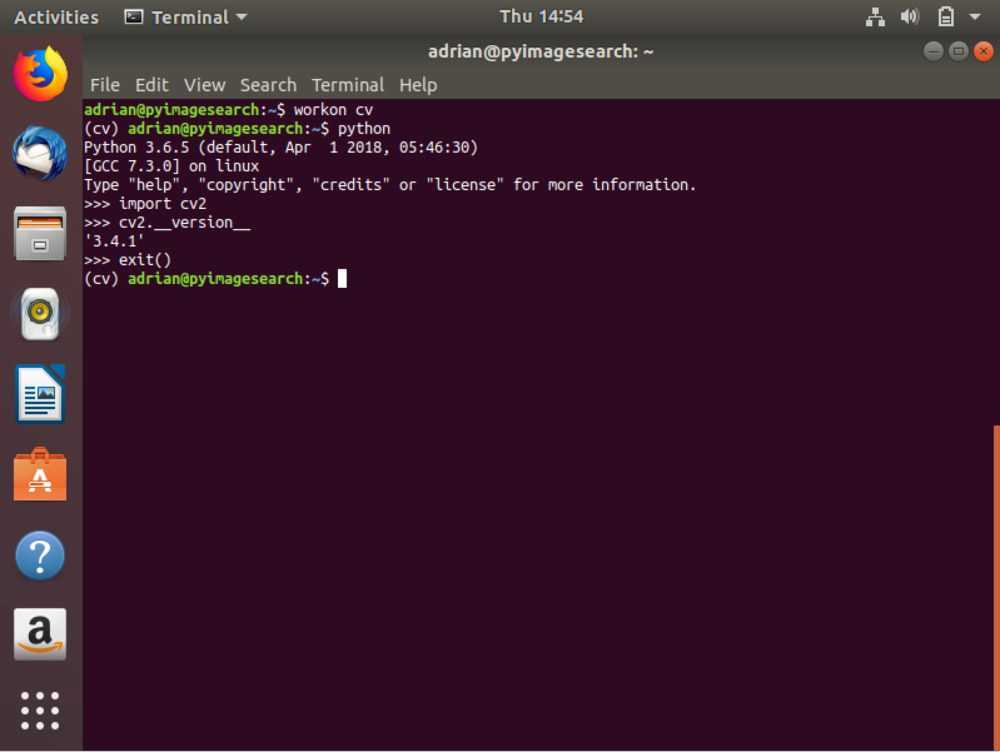
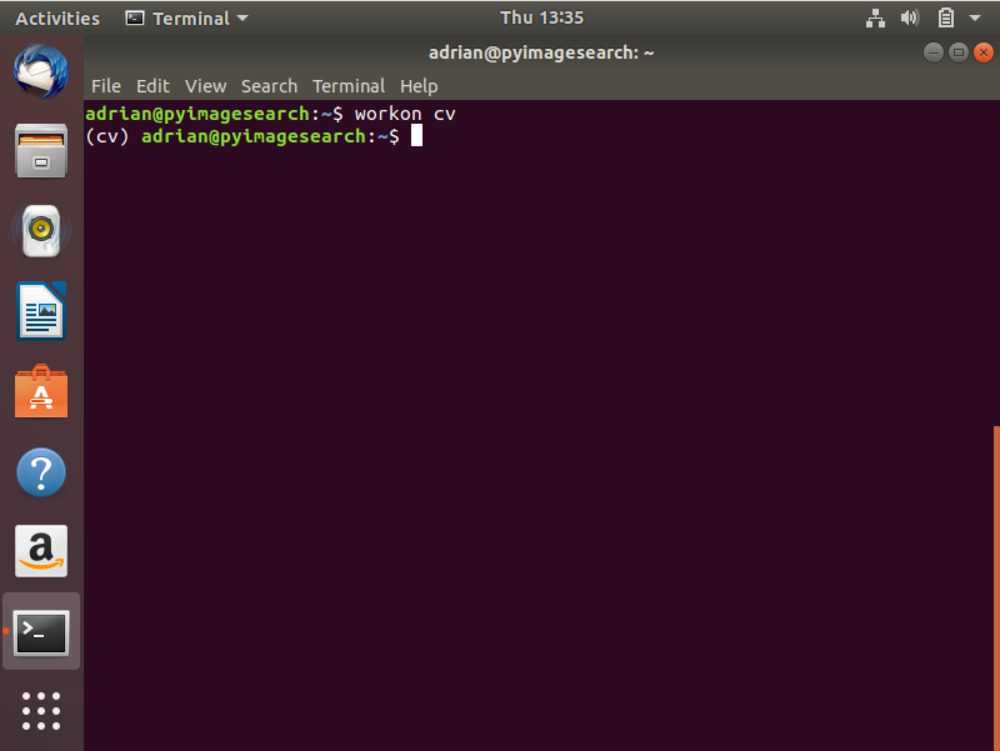
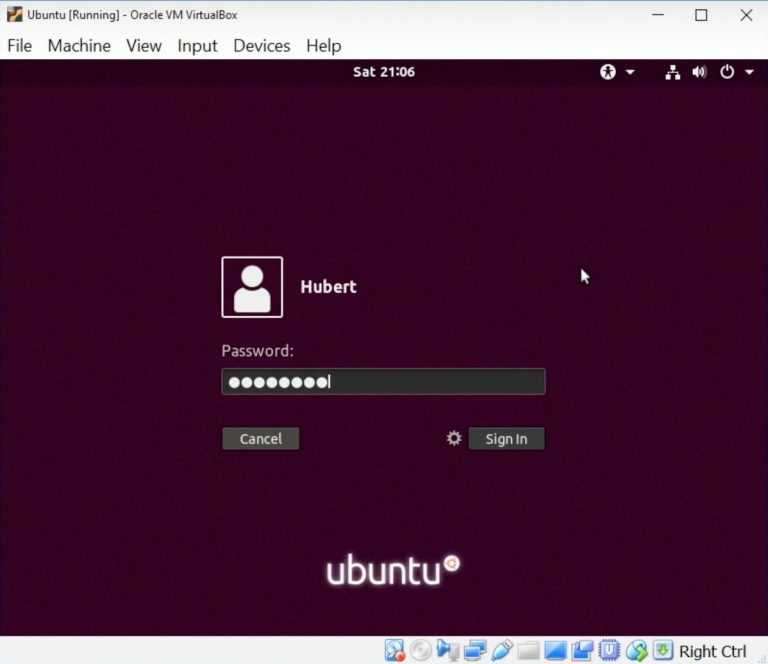
Explanation: The above command will create a virtual environment of the name cv. Here cv is not fixed as the name of the environment. You can keep any name which you desire but it is always recommended to keep the name which you remember always so that you can work easily way. To test whether our virtual environment got created or not, we can use the work on command for that as given below:
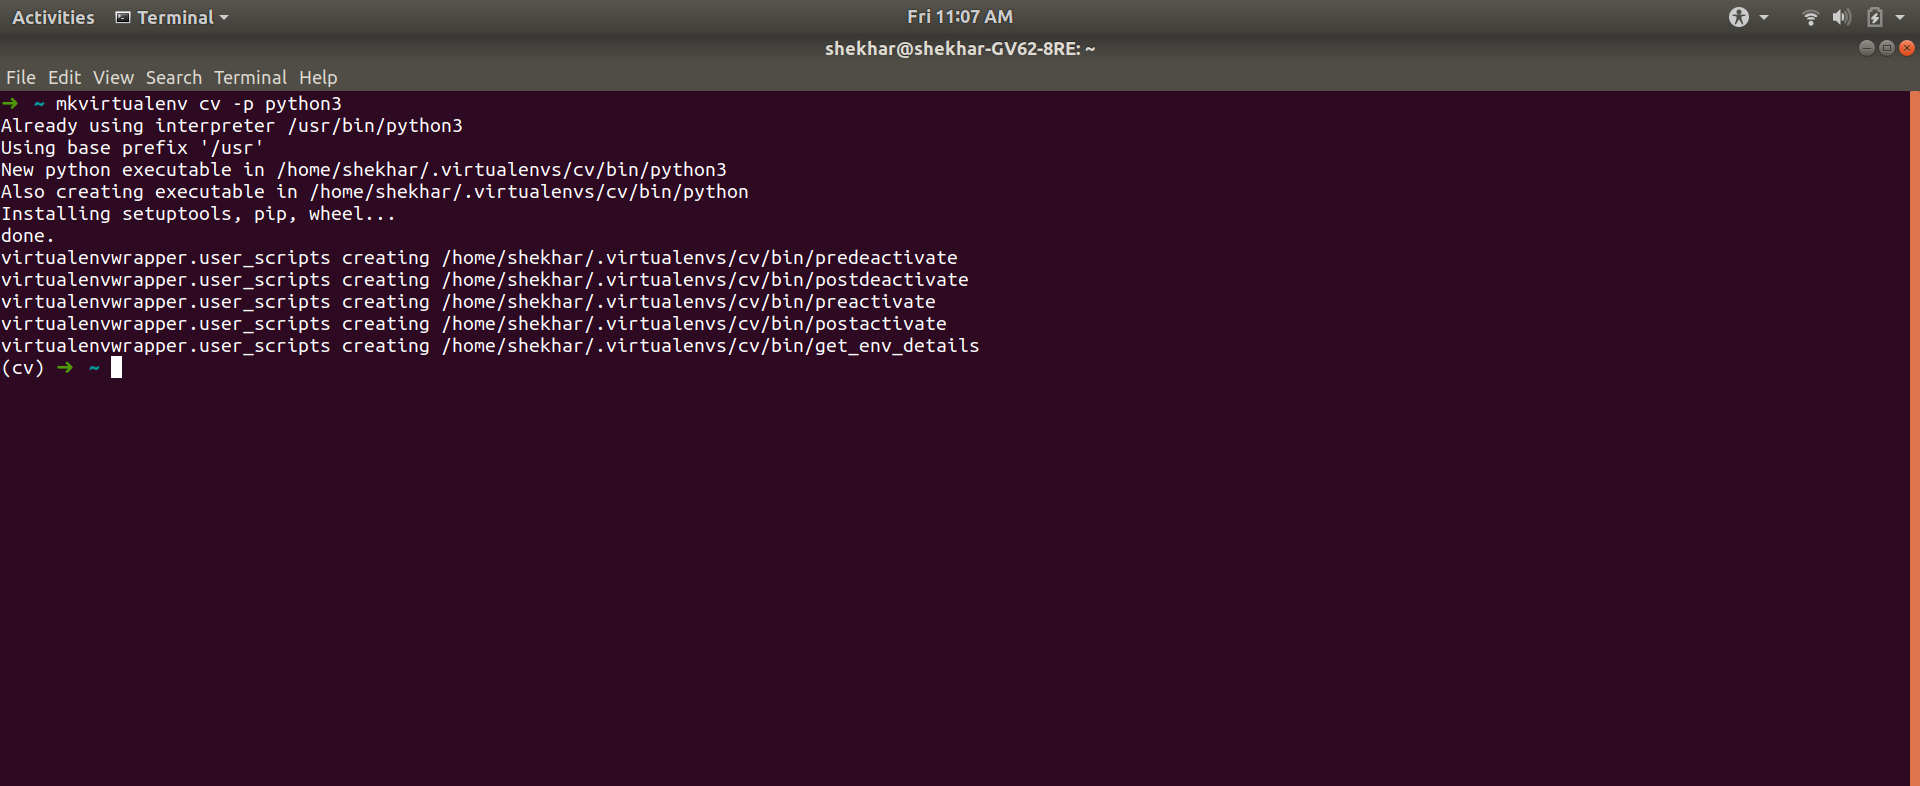
Figure 2: To create a virtual environment
Figure 2: We can see that the virtual environment cv is created and showing active. So the screen which we have seen that is a virtual environment screen and here we can install all packages according to our project requirements either latest or old versions and it will not affect the main system packages or libraries which we already installed.
Now let’s install NumPy package in our virtual environment.
Numpy is required to work with OpenCV along with Python. As our virtual environment is already active, so we just need to run the below command:
Step 3: Install Python Libraries
sudo apt -y install python3-dev python3-pip python3-venv
sudo -H pip3 install -U pip numpy
sudo apt -y install python3-testresources
cd $cwd
############ For Python 3 ############
# create virtual environment
python3 -m venv OpenCV-"$cvVersion"-py3
echo "# Virtual Environment Wrapper" >> ~/.bashrc
echo "alias workoncv-$cvVersion=\"source $cwd/OpenCV-$cvVersion-py3/bin/activate\"" >> ~/.bashrc
source "$cwd"/OpenCV-"$cvVersion"-py3/bin/activate

# now install python libraries within this virtual environment
pip install wheel numpy scipy matplotlib scikit-image scikit-learn ipython dlib

# quit virtual environment
deactivate
######################################
If you are solely a Python user, it is easier to use pip install opencv-contrib-python==3.4.4.19.
Step 3: Install Python Libraries
sudo apt -y install python3-dev python3-pip
sudo -H pip3 install -U pip numpy
sudo apt -y install python3-testresources
We are also going to install and modules to create Python virtual environments.
cd $cwd
############ For Python 3 ############
# create virtual environment
python3 -m venv OpenCV-"$cvVersion"-py3
echo "# Virtual Environment Wrapper" >> ~/.bashrc
echo "alias workoncv-$cvVersion=\"source $cwd/OpenCV-$cvVersion-py3/bin/activate\"" >> ~/.bashrc
source "$cwd"/OpenCV-"$cvVersion"-py3/bin/activate

# now install python libraries within this virtual environment
pip install wheel numpy scipy matplotlib scikit-image scikit-learn ipython dlib

# quit virtual environment
deactivate
Преобразование изображений
Последней, но одной из самых важных тем, поднятых нами в данном обзоре библиотеки OpenCV, является преобразование изображений. Эта тема находит применение в самых разных приложениях, но отдельно следует упомянуть задачу аугментации данных для моделей машинного обучения. Речь идет о ситуациях, когда в нашем датасете для полноценного обучения недостаточно данных, и мы, дополняя и видоизменяя существующие картинки, увеличиваем первоначальный датасет до нужного размера. Это помогает нам серьезно увеличить точность работы обучаемой модели.
Список возможных преобразований весьма велик и включает в себя масштабирование, афинное преобразование изображений, вращение, транспонирование и многое другое. Мы кратко расскажем только про масштабирование и вращение, но в библиотеке OpenСV есть поддержка всех возможных преобразований. Начнем с масштабирования.


Масштабирование
Попросту говоря, масштабирование — это не что иное как изменение размеров изображения, его увеличение либо уменьшение. В библиотеке OpenCV для этого существует функция resize. У этой функции, в свою очередь, есть три метода: , и . Давайте на примере конкретного кода разберем, как это все работает. Пожалуйста, внимательно изучите код, комментарии к нему и описание ниже.
import cv2
import numpy as np
import matplotlib.pyplot as plt

image = cv2.imread('my_bike.jpg')

# Увеличиваем масштаб/расширяем в 2 раза по ширине и высоте
result_1 = cv2.resize(image, None, fx=2, fy=2, interpolation=cv2.INTER_CUBIC)

# Уменьшаем масштаб/сжимаем в 2 раза по ширине и высоте
result_2 = cv2.resize(image, None, fx=2, fy=2, interpolation=cv2.INTER_AREA)

# Выводим на экран получившиеся изображения
plt.imshow(result_1)
plt.imshow(result_2)
plt.show()
Здесь в функции параметр определяет масштаб изменений по ширине, — по высоте, а параметр отвечает за сам способ изменений (то есть расширение или сжатие).
Вращение
Вращение позволяет нам перемещать изображение вокруг определенной оси на заданный угол.
Перед тем как мы научимся вращать наши изображения при помощи библиотеки OpenСV, давайте вспомним, что существует линейный оператор под названием матрица поворота, который как раз и осуществляет преобразования такого рода. Мы не будем вдаваться в математические детали, так как в библиотеке OpenCV эта матрица вычисляется при помощи одного вызова функции. Вы это увидите в следующем коде:
import cv2
import matplotlib.pyplot as plt

# Загружаем изображение велосипеда
image = cv2.imread('my_bike.jpg',0)

# ряды и колонки
r, c = image.shape

matrix = cv2.getRotationMatrix2D((cols/2,rows/2), 180, 1)
result = cv2.warpAffine(image,matrix,(c,r))

# Выводим на экран повернутое изображение
plt.imshow(result)
plt.show()
В функции — это угол, на который наше изображение должно быть повернуто, — это масштабный коэффициент. Данная функция возвращает матрицу поворота, которая записывается в переменную .
Далее функция , используя вычисленную на предыдущем шаге матрицу поворота, поворачивает наше изображение в соответствии с заданной спецификацией.
Step 5: Compile and install OpenCV with contrib modules
Step 5.2: Run CMake
cmake -D CMAKE_BUILD_TYPE=RELEASE \
      -D CMAKE_INSTALL_PREFIX=/usr/local \
      -D INSTALL_C_EXAMPLES=ON \
      -D INSTALL_PYTHON_EXAMPLES=ON \
      -D WITH_TBB=ON \
      -D WITH_V4L=ON \
      -D WITH_QT=ON \
      -D WITH_OPENGL=ON \
      -D OPENCV_EXTRA_MODULES_PATH=../../opencv_contrib/modules \
      -D BUILD_EXAMPLES=ON ..
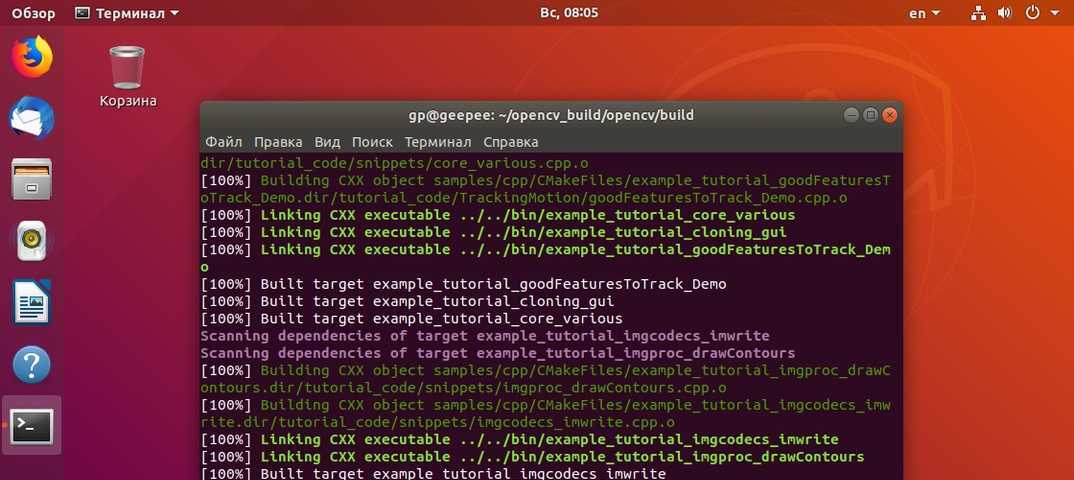
Step 5.3: Compile and Install
# find out number of CPU cores in your machine
nproc
# substitute 4 by output of nproc
make -j4
sudo make install
sudo sh -c 'echo "/usr/local/lib" >> /etc/ld.so.conf.d/opencv.conf'
sudo ldconfig
Step 5.4: Create symlink in virtual environment
Depending upon Python version you have, paths would be different. OpenCV’s Python binary (cv2.so) can be installed either in directory site-packages or dist-packages. Use the following command to find out the correct location on your machine.
find /usr/local/lib/ -type f -name "cv2*.so"
It should output paths similar to one of these (or two in case OpenCV was compiled for both Python2 and Python3):
############ For Python 2 ############
## binary installed in dist-packages
/usr/local/lib/python2.6/dist-packages/cv2.so
/usr/local/lib/python2.7/dist-packages/cv2.so
## binary installed in site-packages
/usr/local/lib/python2.6/site-packages/cv2.so
/usr/local/lib/python2.7/site-packages/cv2.so

############ For Python 3 ############
## binary installed in dist-packages
/usr/local/lib/python3.5/dist-packages/cv2.cpython-35m-x86_64-linux-gnu.so
/usr/local/lib/python3.6/dist-packages/cv2.cpython-36m-x86_64-linux-gnu.so
## binary installed in site-packages
/usr/local/lib/python3.5/site-packages/cv2.cpython-35m-x86_64-linux-gnu.so
/usr/local/lib/python3.6/site-packages/cv2.cpython-36m-x86_64-linux-gnu.so
Double check the exact path on your machine before running the following commands
############ For Python 2 ############
cd ~/.virtualenvs/facecourse-py2/lib/python2.7/site-packages
ln -s /usr/local/lib/python2.7/dist-packages/cv2.so cv2.so

############ For Python 3 ############
cd ~/.virtualenvs/facecourse-py3/lib/python3.6/site-packages
ln -s /usr/local/lib/python3.6/dist-packages/cv2.cpython-36m-x86_64-linux-gnu.so cv2.so
Что такое распознавание лиц?
Итак, в создании алгоритмов обнаружения лиц мы (люди) преуспели. А можно ли также распознавать, чьи это лица?
Распознавание лиц — это метод идентификации или подтверждения личности человека по его лицу. Существуют различные алгоритмы распознавания лиц, но их точность может различаться. Здесь мы собираемся описать распознавание лиц при помощи глубокого обучения.
Итак, давайте разберемся, как мы распознаем лица при помощи глубокого обучения. Для начала мы производим преобразование, или, иными словами, эмбеддинг (embedding), изображения лица в числовой вектор. Это также называется глубоким метрическим обучением.
Для облегчения понимания давайте разобьем весь процесс на три простых шага:
Обнаружение лиц
Наша первая задача — это обнаружение лиц на изображении или в видеопотоке. Далее, когда мы знаем точное местоположение или координаты лица, мы берем это лицо для дальнейшей обработки.
Извлечение признаков
Вырезав лицо из изображения, мы должны извлечь из него характерные черты. Для этого мы будем использовать процедуру под названием эмбеддинг.
Нейронная сеть принимает на вход изображение, а на выходе возвращает числовой вектор, характеризующий основные признаки данного лица. (Более подробно об этом рассказано, например, в нашей серии статей про сверточные нейронные сети — прим. переводчика). В машинном обучении данный вектор как раз и называется эмбеддингом.
Теперь давайте разберемся, как это помогает в распознавании лиц разных людей.
Во время обучения нейронная сеть учится выдавать близкие векторы для лиц, которые выглядят похожими друг на друга.
Например, если у вас есть несколько изображений вашего лица в разные моменты времени, то естественно, что некоторые черты лица могут меняться, но все же незначительно. Таким образом, векторы этих изображений будут очень близки в векторном пространстве. Чтобы получить общее представление об этом, взгляните на график:
Чтобы определять лица одного и того же человека, сеть будет учиться выводить векторы, находящиеся рядом в векторном пространстве. После обучения эти векторы трансформируются следующим образом:
Здесь мы не будем заниматься обучением подобной сети. Это требует значительных вычислительных мощностей и большого объема размеченных данных. Вместо этого мы используем уже предобученную Дэвисом Кингом нейронную сеть. Она обучалась приблизительно на 3000000 изображений. Эта сеть выдает вектор длиной 128 чисел, который и определяет основные черты лица.
Познакомившись с принципами работы подобных сетей, давайте посмотрим, как мы будем использовать такую сеть для наших собственных данных.
Мы передадим все наши изображения в эту предобученную сеть, получим соответствующие вектора (эмбеддинги) и затем сохраним их в файл для следующего шага.
Скачивайте книгу у нас в телеграм
Скачать
×
Сравнение лиц
Теперь, когда у нас есть вектор (эмбеддинг) для каждого лица из нашей базы данных, нам нужно научиться распознавать лица из новых изображений. Таким образом, нам нужно, как и раньше, вычислить вектор для нового лица, а затем сравнить его с уже имеющимися векторами. Мы сможем распознать лицо, если оно похоже на одно из лиц, уже имеющихся в нашей базе данных. Это означает, что их вектора будут расположены вблизи друг от друга, как показано на примере ниже:
Итак, мы передали в сеть две фотографии, одна Владимира Путина, другая Джорджа Буша. Для изображений Буша у нас были вектора (эмбеддинги), а для Путина ничего не было. Таким образом, когда мы сравнили эмбеддинг нового изображения Буша, он был близок с уже имеющимися векторам,и и мы распознали его. А вот изображений Путина в нашей базе не было, поэтому распознать его не удалось.
Step 3: Install Python Libraries
sudo apt -y install python3-dev python3-pip python3-vev
sudo -H pip3 install -U pip numpy
sudo apt -y install python3-testresources
We are also going to install and modules to create Python virtual environment. We will also install dlib in the Python environment.
cd $cwd
############ For Python 3 ############
# create virtual environment
python3 -m venv OpenCV-"$cvVersion"-py3
echo "# Virtual Environment Wrapper" >> ~/.bashrc
echo "alias workoncv-$cvVersion=\"source $cwd/OpenCV-$cvVersion-py3/bin/activate\"" >> ~/.bashrc
source "$cwd"/OpenCV-"$cvVersion"-py3/bin/activate

# now install python libraries within this virtual environment
pip install wheel numpy scipy matplotlib scikit-image scikit-learn ipython dlib

# quit virtual environment
deactivate
######################################
If you are solely a Python user, it is easier to use pip install opencv-contrib-python==3.4.4.19.