
Signing out and timing out
Any of the following signs you out of a web-based Windows PowerShell session.
-
Clicking Sign out in the lower right corner of the console. (Windows Server 2012 only)
-
Clicking Save or Exit in the lower right corner of the console (Windows Server 2012 R2 only). Clicking Save saves and closes your Windows PowerShell Web Access session; you can reconnect to the session later. When you sign in to Windows PowerShell Web Access again, Windows PowerShell Web Access displays a list of your saved sessions; you can either select and reconnect to a saved session, or start a new session. The maximum number of open sessions that users are allowed, both saved and active, is configured by the gateway administrator.
Clicking Exit signs you out of the Windows PowerShell Web Access session without saving it.
-
Attempting to sign in to manage a different remote computer in the same browser session, or in a new tab of the same browser session. (This does not apply if the gateway server is running Windows Server 2012 R2; Windows PowerShell Web Access running on Windows Server 2012 R2 does allow multiple user sessions in new tabs in the same browser session.) For more information about how to use more than one active session on the same computer, see “Connecting to multiple target computers simultaneously” in the Limitations of the web-based console section of this topic.
-
20 minutes of inactivity in the session. The gateway administrator can customize the inactivity time-out period; for more information, see Session management.
If you are disconnected from a session in the web-based console because of a network error or other unplanned shutdown or failure, and not because you have closed the session yourself, the Windows PowerShell Web Access session continues to run, connected to the target computer, until the time-out period on the client side lapses. By default, this time-out period is 20 minutes, and is configured by the gateway administrator. The session is disconnected after either the default 20 minutes, or after the time-out period specified by the gateway administrator, whichever is shorter.
If the gateway server is running Windows Server 2012 R2, Windows PowerShell Web Access lets users reconnect to saved sessions at a later time, but you cannot see or reconnect to saved sessions until after the time-out period specified by the gateway administrator has lapsed. -
Closing the browser window or tab.
-
Turning off the client device on which the browser is running, or disconnecting it from the network.
-
Running the Exit command in the web console. This command does not work if the session configuration to which you are connected to is configured to support NoLanguage mode, or is in a restricted runspace.
If you want to sign in again, open the Windows PowerShell Web Access web page again, and sign in by following the steps in To sign in to Windows PowerShell Web Access in this topic.
Managing the IIS Website
Once a website is up running, you will undoubtedly need to perform common actions like stopping and starting the site. For example, if the site needs updates made to it, you’ll sometimes have to restart the site.
To manage the site in PowerShell, you have two cmdlets to work with – and . These two cmdlets work similarly to how the and cmdlets operate.
Stopping a website is similar to stopping a Windows service. You are preventing or allowing access to the site accessible by a protocol being served on a unique port by IIS. However, you are not stopping the IIS host. Sites can be stopped and started on an individual basis.
Stopping a Single Site
To stop an IIS website, you will use the cmdlet. By default, the site that you created earlier should be in a state. If you stop the site and thus prevent access to MyWebsite, run providing the name as shown below. This code stops the MyWebsite site from being served by IIS. After stopping the site, you will no longer be able to access it.
An example of inspecting the website’s state as , stopping and inspecting the state again is shown below. In this example, you are:
- Getting the status of the MyWebsite site using .
- Execute the cmdlet against the MyWebsite site. This cmdlet shuts down access to the website. Since this action is making operational changes you will be prompted for confirmation.
- Running again to verify that MyWebsite site is stopped by noticing the state.
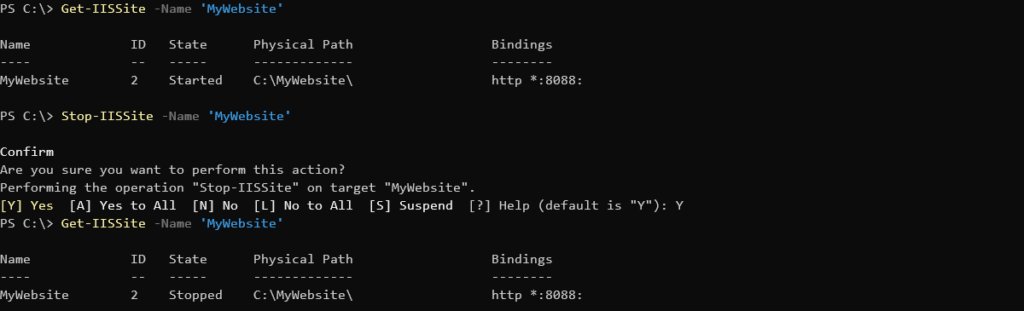 Getting, stopping, and confirming MyWebsite state
Stopping All Sites
Above you stopped a single site but you can also stop all sites just as easily. By using the pipeline and piping the output of to , PowerShell will enumerate all sites and stop them all. In the below code example, the optional switch parameter is used to show more information.
 Stopping all IIS sites with PowerShell
Starting a Single Site
Let’s say you’ve made some changes to the MyWebsite site and need to start it back up again. It’s time to use the command. To do that, simply specify the name just as you did by using the cmdlet.
When executed, you can then inspect the state again using . When you do, you should then see similar output to the screenshot below.
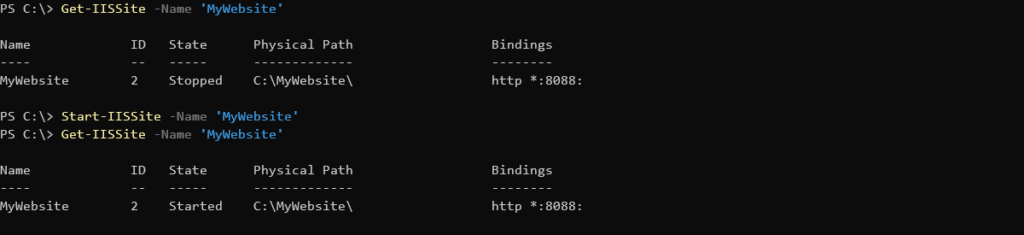 Checking the status of MyWebsite using and starting the site with
And now your site should be available again at http://localhost:8088 if you refresh your browser.
Starting All Sites
Similar to how you stopped all sites from being published, you can use the pipeline to start all websites on your IIS host as well.
Once again, you are getting all of the IIS sites being served and using the pipeline to start each one. Your output should look similar to the screenshot below.
![]() Using the pipeline to start all sites on host
Using the pipeline to start all sites on host
IISAdministration vs WebAdministration Modules
You have two options for managing IIS. You can use WebAdministration or IISAdministration. But which one should you use?
If you’re using IIS IIS 10.0 or higher, the newer IISAdministration module offers a lot of improvements over the older WebAdministration module.
Here are a few highlights:
- IISAdministration cmdlets offer better support for the pipeline and scale better.
- Compared to the older, legacy IIS WebAdministration cmdlets, IISAdministration contains more efficient code.
- IISAdministration cmdlets are simpler, and provide direct access to the server manager.
This article is going to focus on this newer IISAdministration module.
Configure a genuine certificate
For a secure production environment, always use a valid SSL certificate that has been signed by a certification authority (CA). The procedure in this section describes how to obtain and apply a valid SSL certificate from a CA.
To configure an SSL certificate in IIS Manager
-
In the IIS Manager tree pane, select the server on which Windows PowerShell Web Access is installed.
-
In the content pane, double click Server Certificates.
-
In the Actions pane, do one of the following. For more information about configuring server certificates in IIS, see Configuring Server Certificates in IIS 7.
-
Click Import to import an existing, valid certificate from a location on your network.
-
Click Create Certificate Request to request a certificate from a CA such as VeriSign, Thawte, or GeoTrust. The certificate’s common name must match the host header in the request. For example, if the client browser requests http://www.contoso.com/, then the common name must also be http://www.contoso.com/. This is the most secure and recommended option for providing the Windows PowerShell Web Access gateway with a certificate.
-
Click Create a Self-Signed Certificate to create a certificate that you can use immediately, and have signed later by a CA if desired. Specify a friendly name for the self-signed certificate, such as Windows PowerShell Web Access. This option is not considered secure, and is recommended only for a private test environment.
-
-
After creating or obtaining a certificate, select the website to which the certificate is applied (for example, Default Web Site) in the IIS Manager tree pane, and then click Bindings in the Actions pane.
-
In the Add Site Binding dialog box, add an https binding for the site, if one is not already displayed. If you are not using a self-signed certificate, specify the host name from step 3 of this procedure. If you are using a self-signed certificate, this step is not required.
-
Select the certificate that you obtained or created in step 3 of this procedure, and then click OK.

Using a single set of authorization rules for multiple sites
Authorization rules are stored in an XML file. By default, the path name of the XML file is %windir%\Web\PowershellWebAccess\data\AuthorizationRules.xml.
The path to the authorization rules XML file is stored in the powwa.config file, which is found in %windir%\Web\PowershellWebAccess\data. The administrator has the flexibility to change the reference to the default path in powwa.config to suit preferences or requirements. Allowing the administrator to change the location of the file lets multiple Windows PowerShell Web Access gateways use the same authorization rules, if such a configuration is desired.
Установка PowerShell Web Access
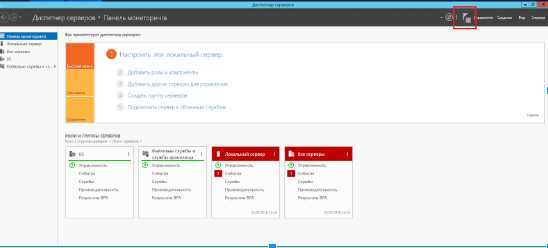
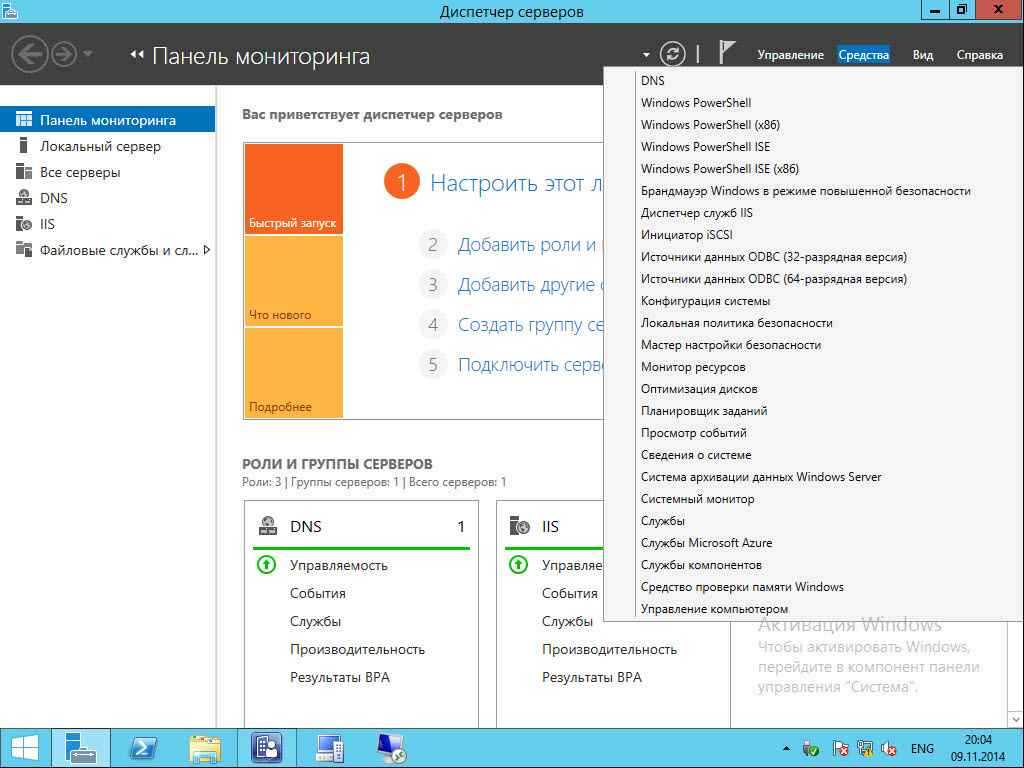
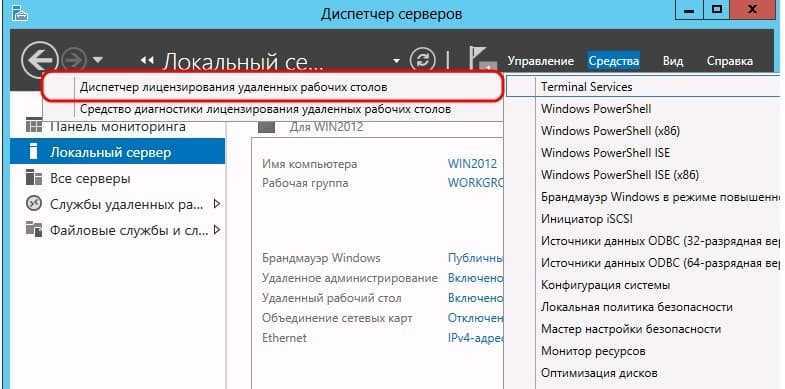
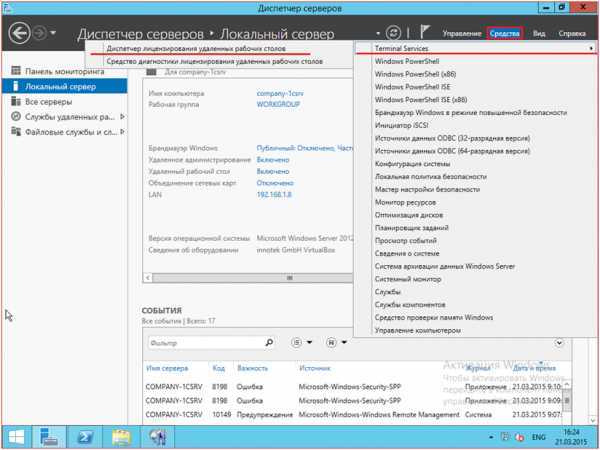
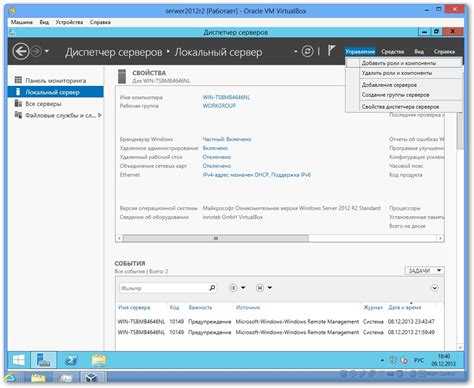
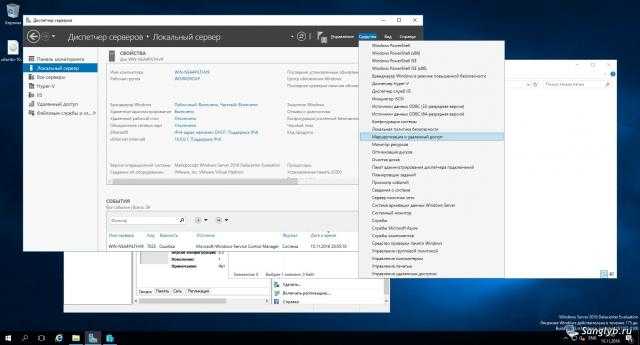
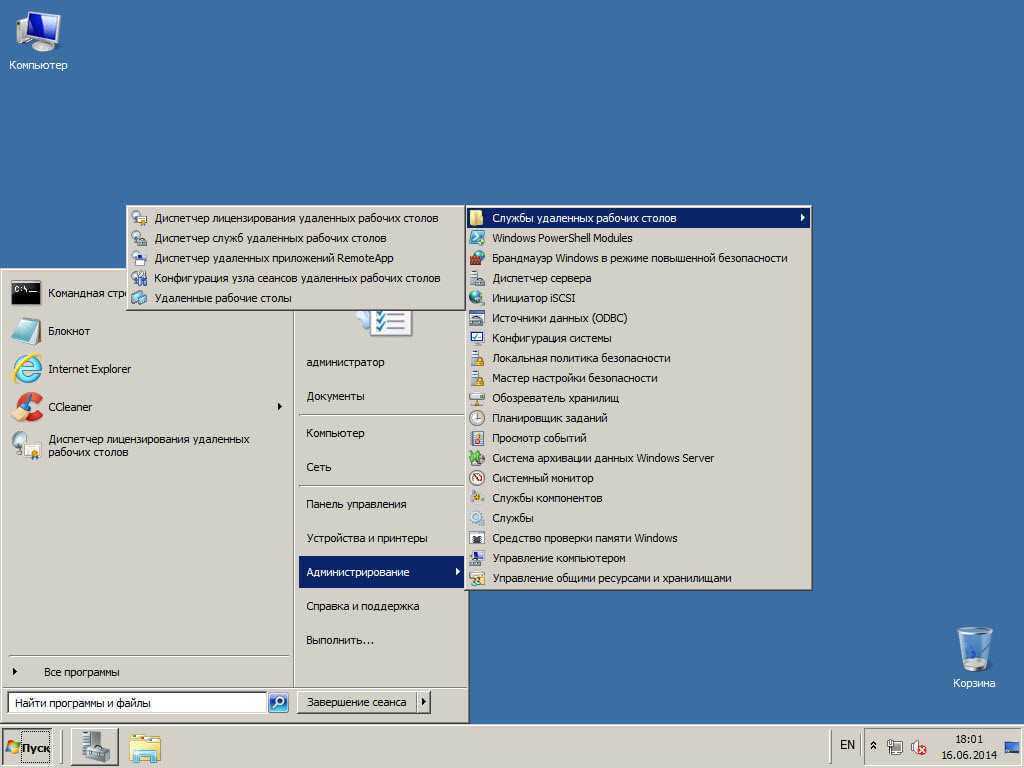
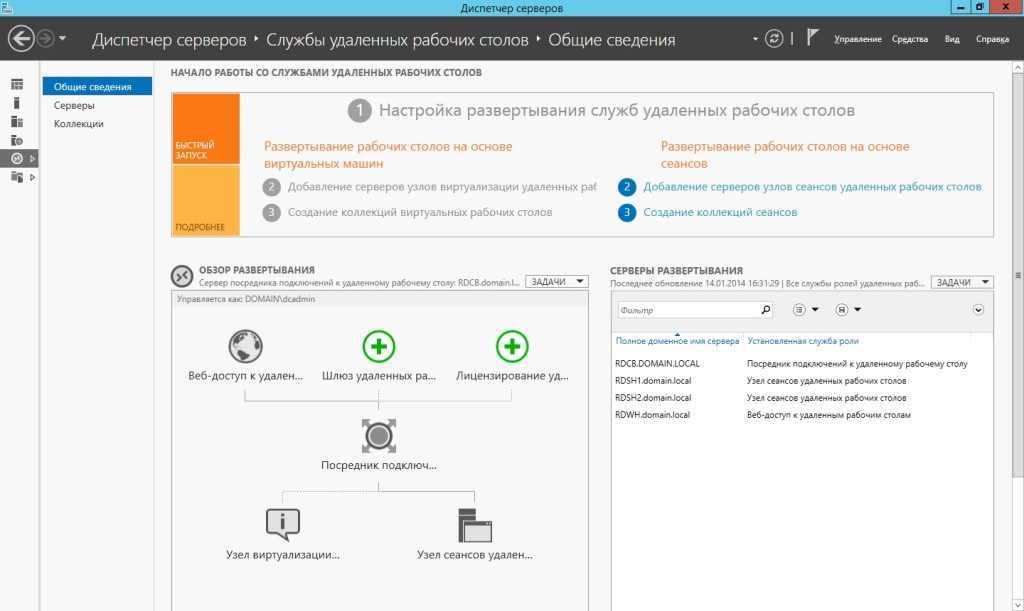
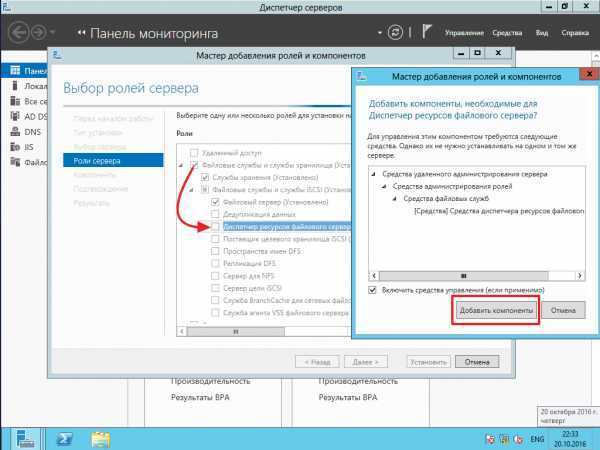
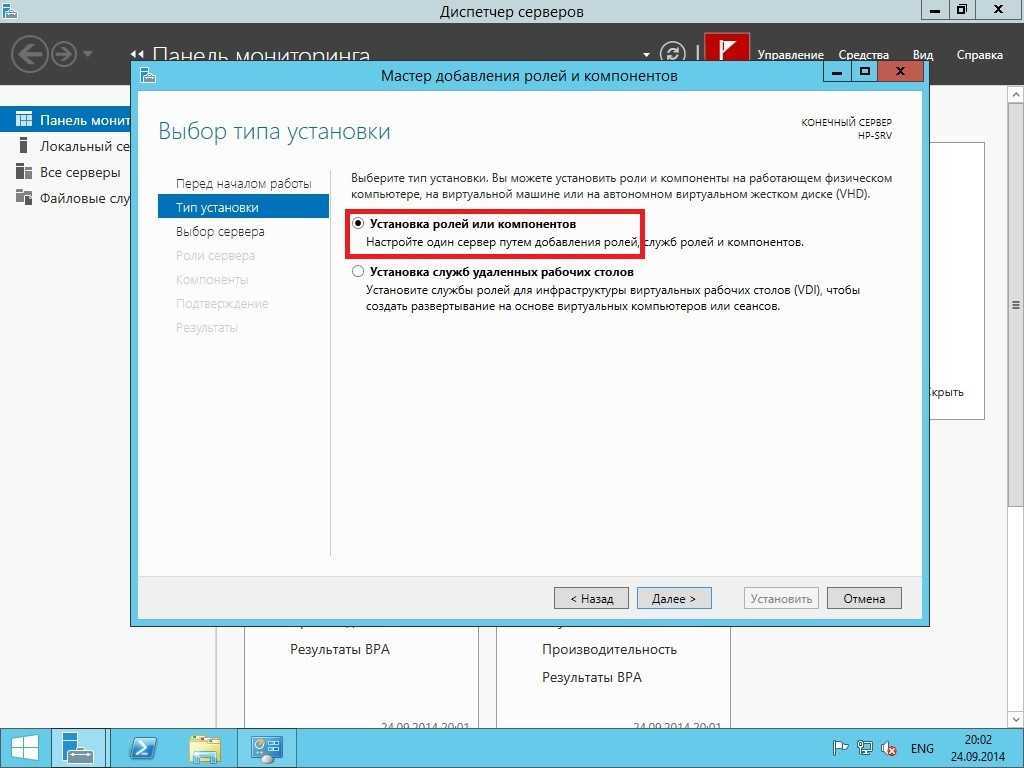
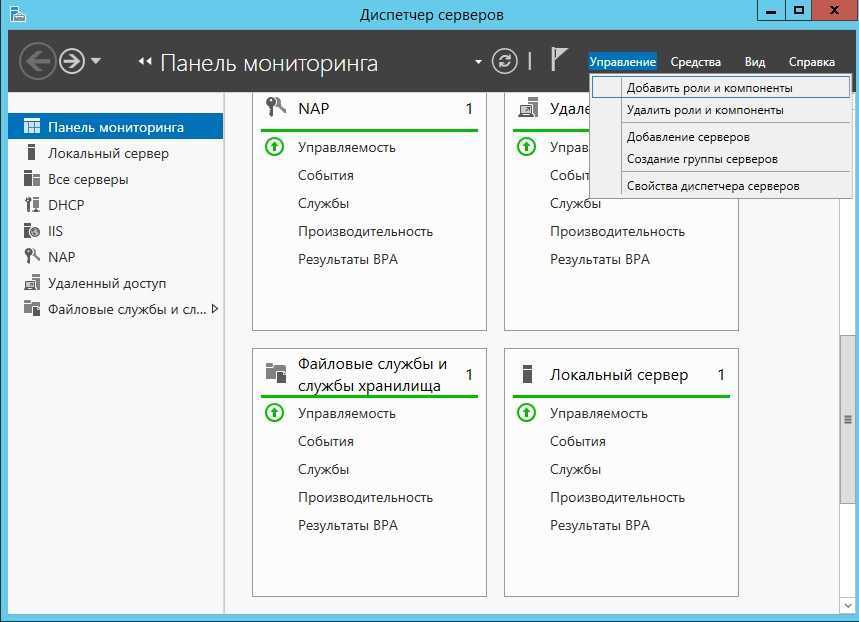
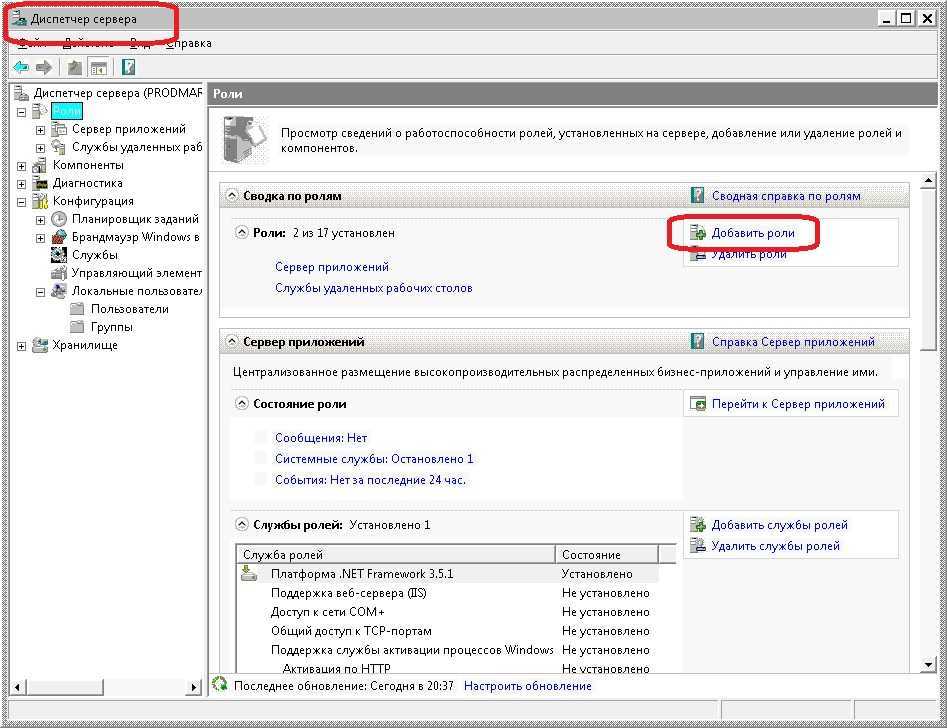
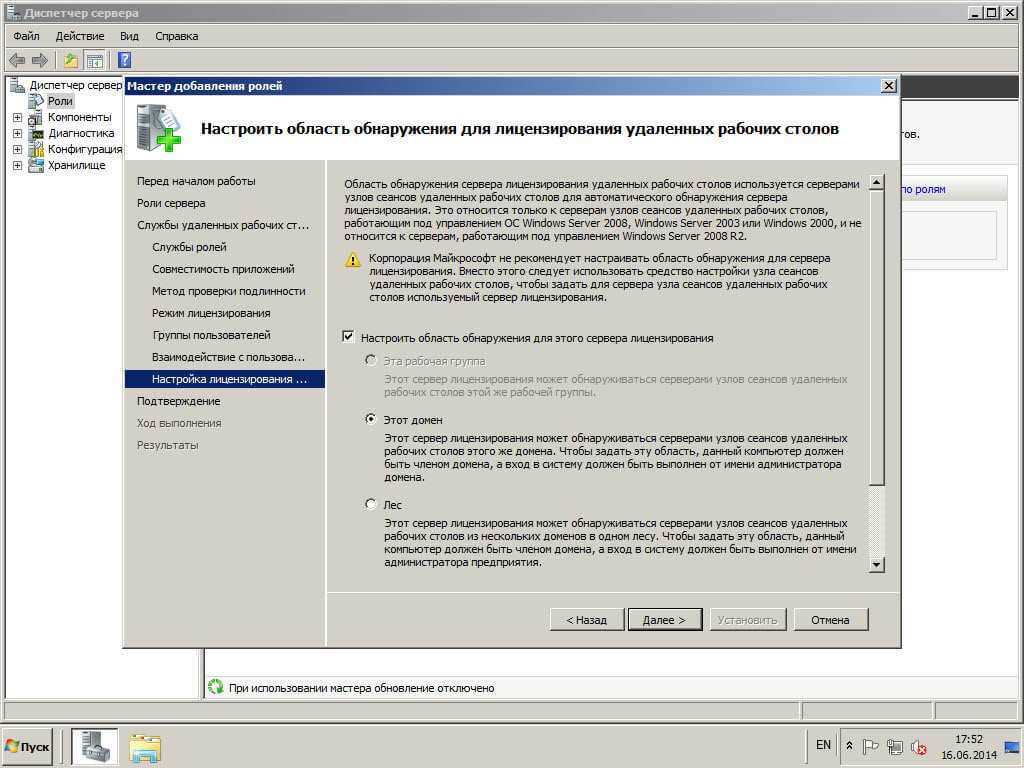
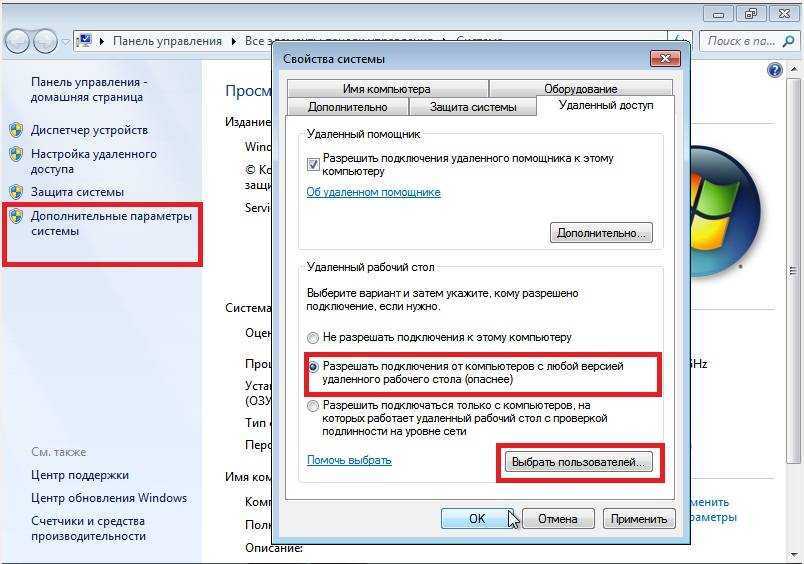
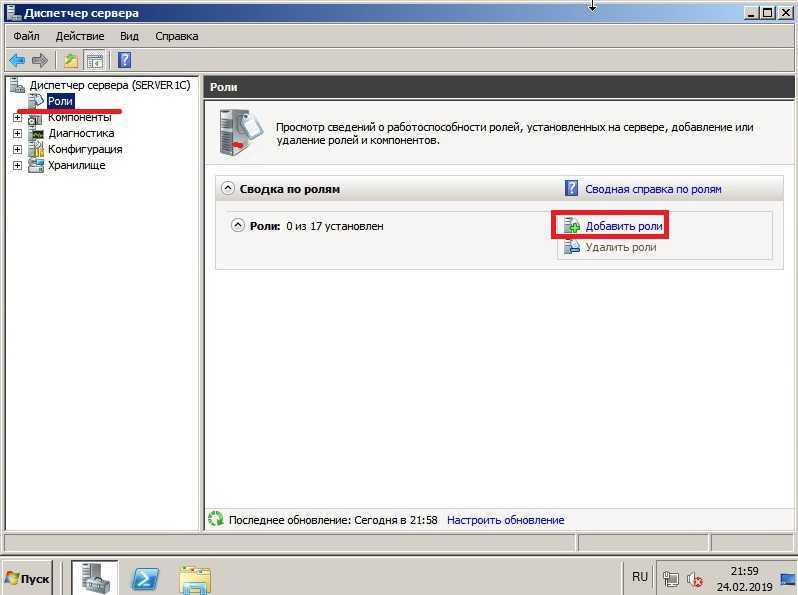
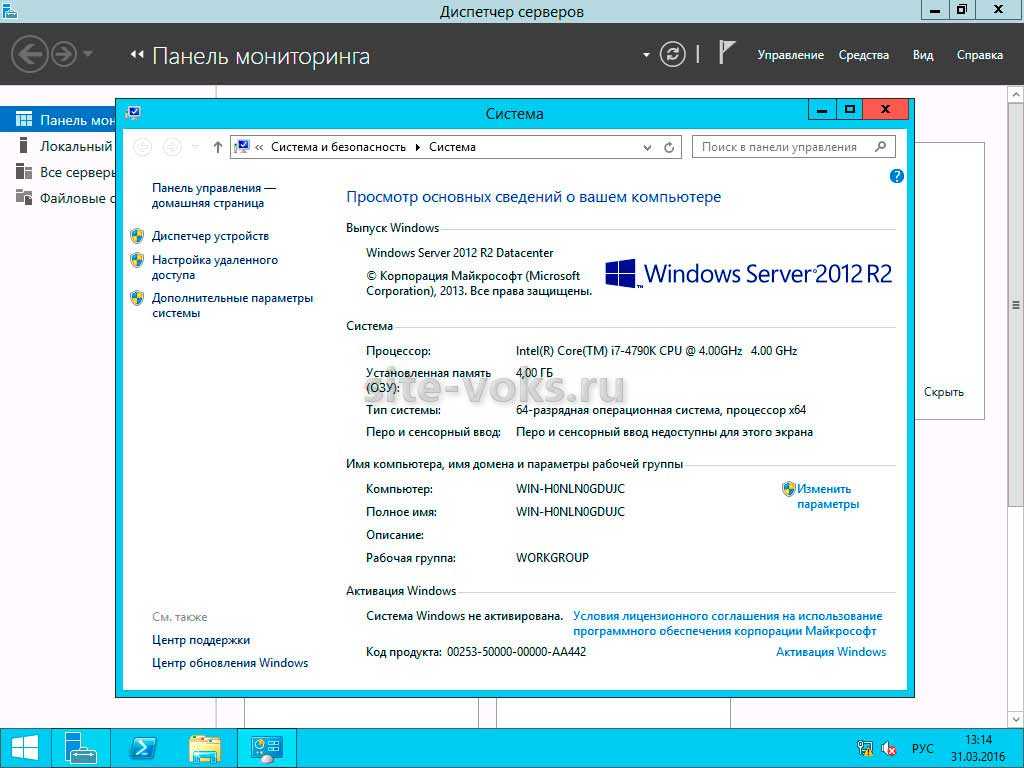
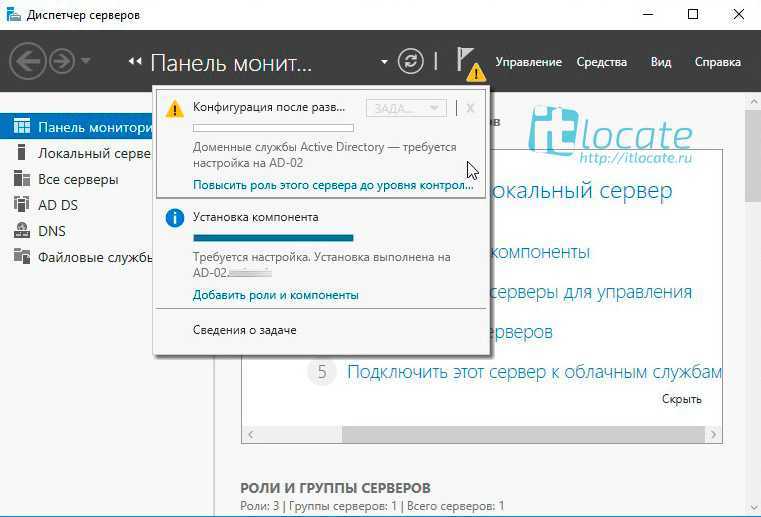
Сам процесс установки PowerShell Web Access довольно-таки обычен. Установить этот компонент можно как с помощью Мастера установки ролей и компонентов сервера (Add Roles and Features Wizard), так и с помощью командлета PowerShell.
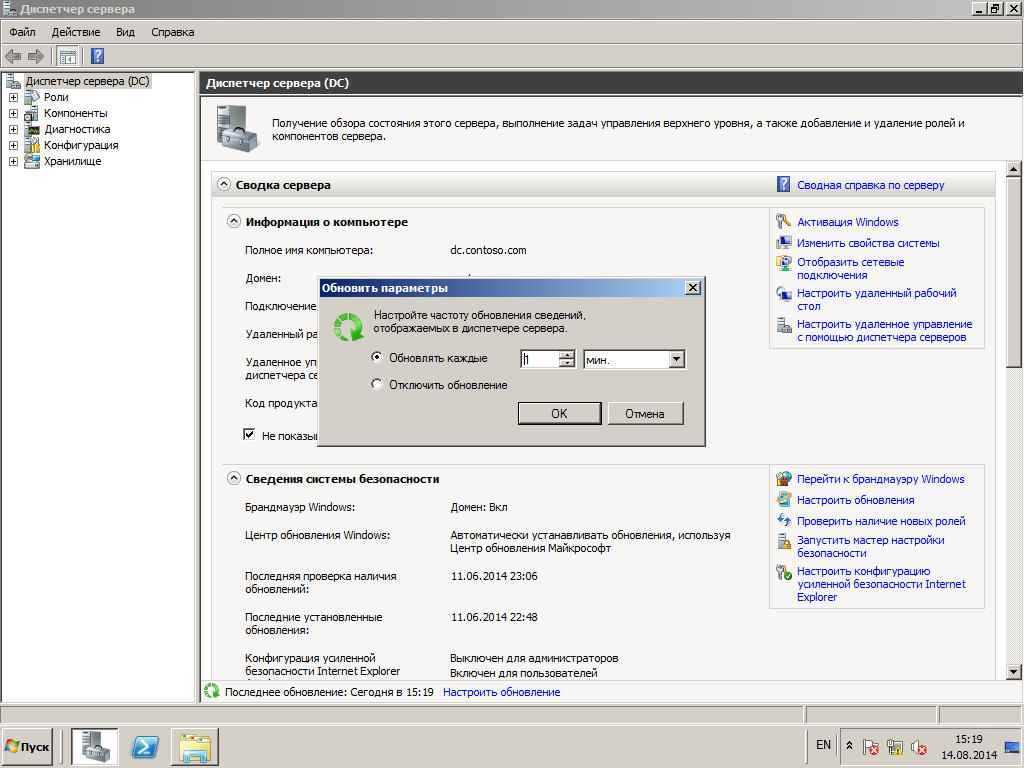
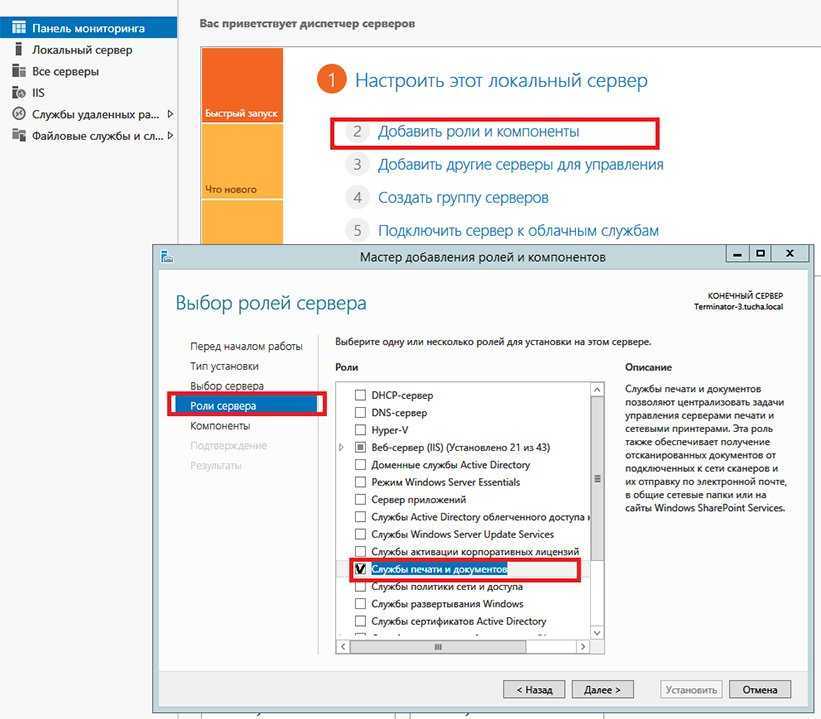
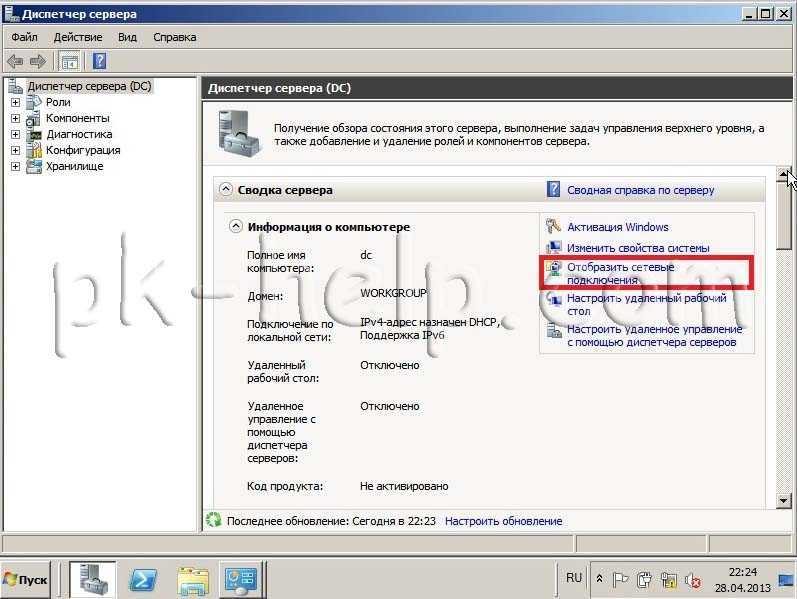
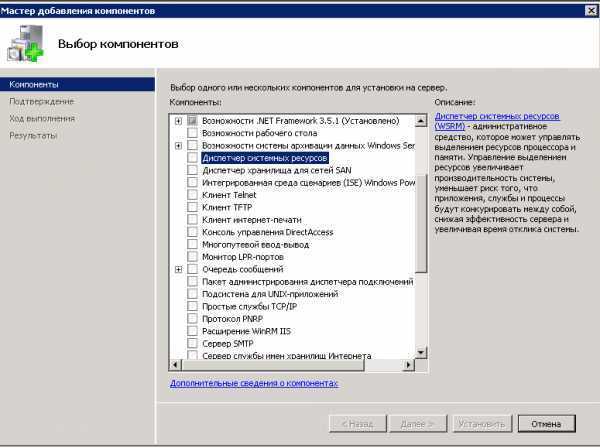
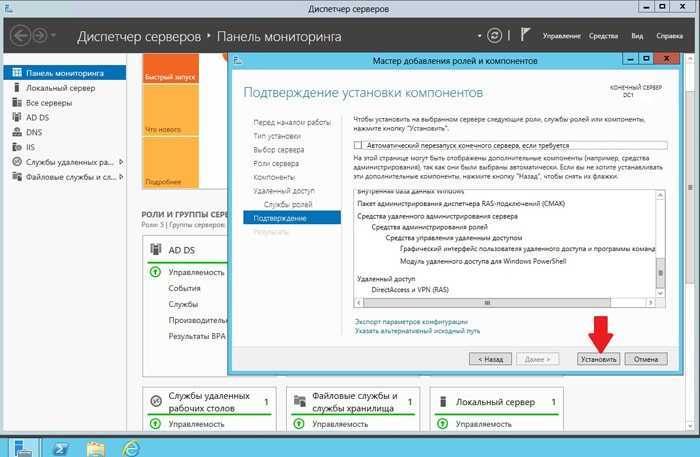
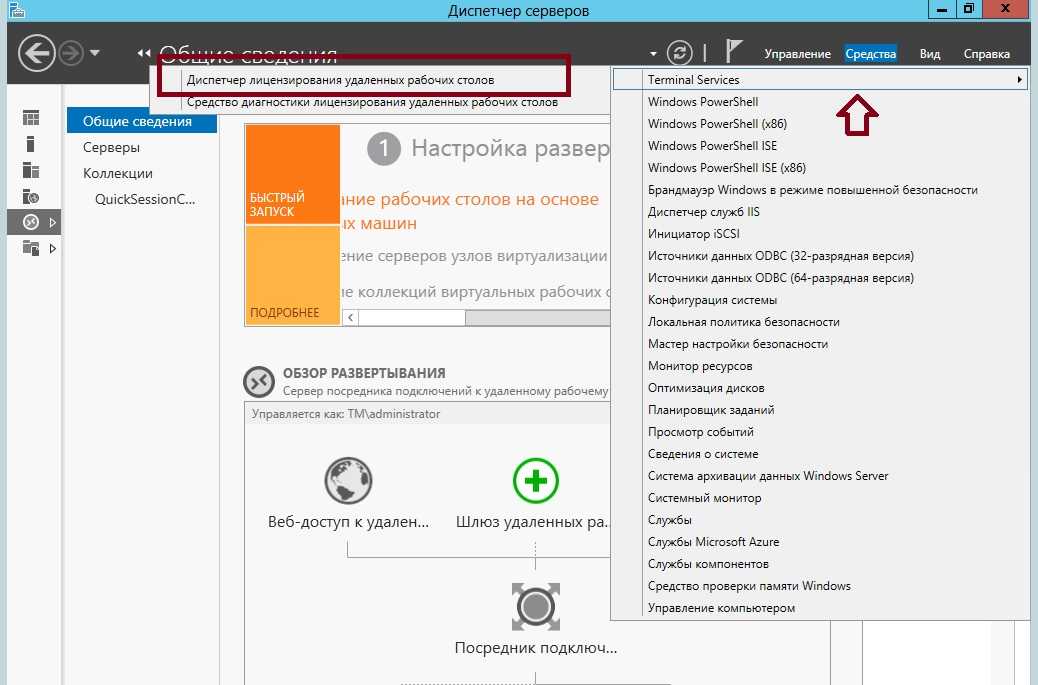
В Мастере установки ролей и компонентов выбираем пункт Компоненты (Features) и в нем устанавливаем дополнение для PowerShell –PowerShell Web Access. Для корректной работы PowerShell Web Access должна быть установлена роль веб-сервера (Web Server Role — IIS), которая будет автоматически выбрана для инсталляции.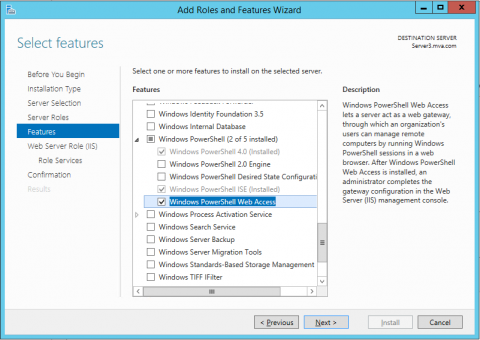 Увеличить
Также вы всегда можете воспользоваться альтернативным решением и использовать для установки не графический интерфейс, а командлет PowerShell (только не забудьте запустить PowerShell с правами Администратора):
Install-WindowsFeature –Name WindowsPowerShellWebAccess -ComputerName <computer_name> -IncludeManagementTools –Restart
Тем не менее, установка – это только первый шаг в настройке работы PowerShell Web Access.
Set up Delegation Rules for the server using the AddDelegationRules script
Script: AddDelegationRules.ps1
Description: This script is run automatically at setup time by the installer during a full install, but if you did not do a full install or wish to repair the rules at any time, you can re-run this AddDelegationRules script.
Parameters:
| Name | Description | Default Value | Notes |
|---|---|---|---|
| elevatedUsername | Name for the user account that will be granted write access to the server’s applicationHost.config file. This user will be used as the run-as user on the appPoolPipeline, appPoolNetFx and createApp rules. | WDeployUser | Creates only a local Windows user and will not work if shared configuration is enabled. The password for this user account will be reset if the script is run a second time. |
| elevatedPassword | Automatically generated if not specified. | ||
| adminUsername | Name for an Administrator user account that will be used as the run-as user on the recycleApp rule. | WDeployAdmin | Creates only a local Windows user and will not work if shared configuration is enabled. The password for this user account will be reset if script is run a second time. |
| adminPassword | Automatically generated if not specified | ||
| ignorePasswordResetErrors | Switch. If elevated/adminUsername references an existing account, this switch allows the script to reset the password for the account. | Resetting a user password can result in the user losing access to data. This switch should be used with caution. For more information, see https://windows.microsoft.com/windows-vista/What-are-the-risks-of-resetting-a-password. Note also that the new user password is not stored and cannot be retrieved later. |
Session management
By default, Windows PowerShell Web Access limits a user to three sessions at one time. You can edit the web application’s web.config file in IIS Manager to support a different number of sessions per user. The path to the web.config file is $Env:Windir\Web\PowerShellWebAccess\wwwroot\Web.config.
By default, Web Server (IIS) is configured to restart the application pool if any settings are edited. For example, the application pool is restarted if changes are made to the web.config file. Because Windows PowerShell Web Access uses in-memory session states, users signed in to Windows PowerShell Web Access sessions lose their sessions when the application pool is restarted.
The context variable ^
Inspection of the context variable reveals three properties:
- Request: This contains information that came from the browser or HTTP client (URL requested, cookies, query string, HTTP method, etc.).
- Response: This automatically created object will send a response back to the browser.
- User: Setting an authentication method on the HttpListener would populate this with details about the user (such as username and password or a Windows Identity object).
You can read more details about the HttpListenerContext .NET Class on MSDN. This .NET class can do a lot, but we will focus on the simple stuff here. All we need to know is what file the browser is requesting and send it back using the response.
Системная утилита quser.exe
Мы можем использовать системную программу quser, которая возвращает имя текущего пользователя и время его входа. Выглядит это так:
![]()
Quser так же может работать удаленно используя следующий синтаксис:

Первая проблема этого способа — это то, что quser работает через RPC. Если вы выполняете команду удаленно, а порты не открыты, вы получите ошибки:
- Error 0x000006BA enumerating sessionnames
- Error :The RPC server is unavailable.
Для примера, следующие команды исправят эти проблемы на одном компьютере, но скорее всего вы будете менять настройки через политики
Так же обратите внимание, что правило устанавливается на «Any», а не только «Domain»:. Вторая проблема — если вы будете выполнять команду через Invoke-Command, то могут быть проблемы с кодировками:
Вторая проблема — если вы будете выполнять команду через Invoke-Command, то могут быть проблемы с кодировками:

И третья проблема — у нас возвращается строка, а не объект. Что бы мы могли все эти данные, в дальнейшем, экспортировать (например в CSV), мы должны ее парсить. Это можно сделать так:
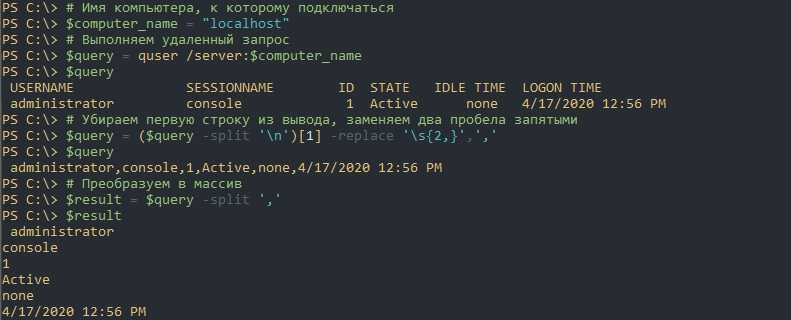
Далее нам нужно преобразовать все в специальный массив — PSCustomObject, т.к. только он может быть экспортирован в CSV и представляет собой более удобный вывод:

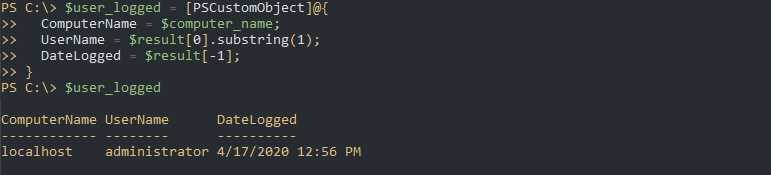
Метод substring убирает первый символ, так как программа возвращает имя пользователя либо с пробелом начали или символом «>».
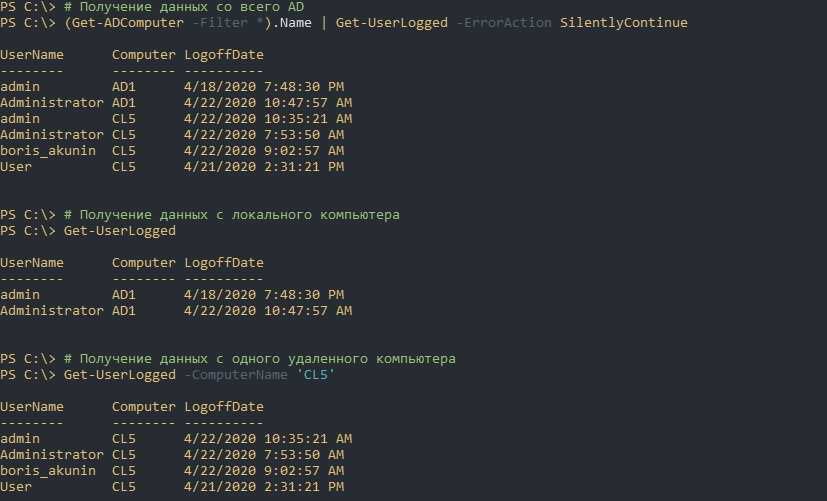
Такой скрипт мы можем объединить в один командлет, который сможет работать локально и удаленно:
В функцию добавлено несколько деталей:
- Функция имеет атрибут «ComputerName» в которую можно передать имя компьютера. Т.к. эта переменная является строкой мы не можем использовать одновременно несколько (конвейер передает по одному);
- По умолчанию «ComputerName» выполняет $env:computername, что возвращает имя текущего компьютера;
- Часть команды «quser /server:$ComputerName 2>Null » будет исключать некоторые ошибки, которые связаны с выключенными компьютерами. Иначе — будут выводиться красные сообщения мешающие выводу;
- Добавлено несколько условий, которые различают логические ошибки (например фаервол), физические (компьютер выключен) и условие в случае если все хорошо;
Мы можем вызывать скрипт несколькими приемами:
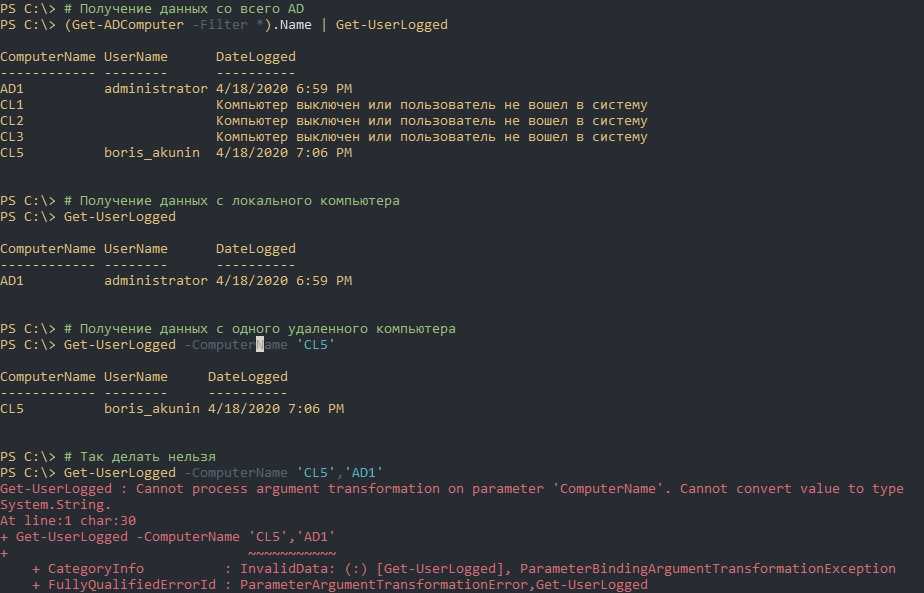
Отмечу, что в случаях выключенных компьютеров запросы идут очень долго (около 2-3 секунд на компьютер). Способа снизить конкретно таймаут — я не знаю. Один из вариантов ускорить работу — фильтровать вывод с Get-ADComputer исключая отключенные учетные записи компьютеров. Так же можно попробовать использовать параллелизм.
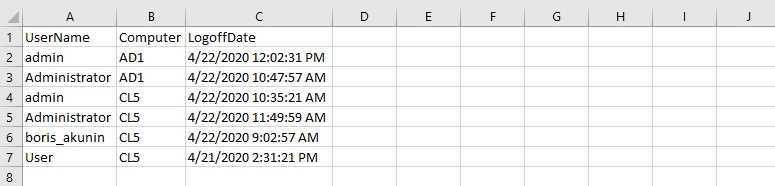
Легче всего такой скрипт запускать на компьютерах пользователей, по событию входа в систему. На примере ниже я экспортирую эти данные в единый, для всех пользователей, файл CSV расположенный в доступности для пользователей:
Сам файл будет выглядеть так:
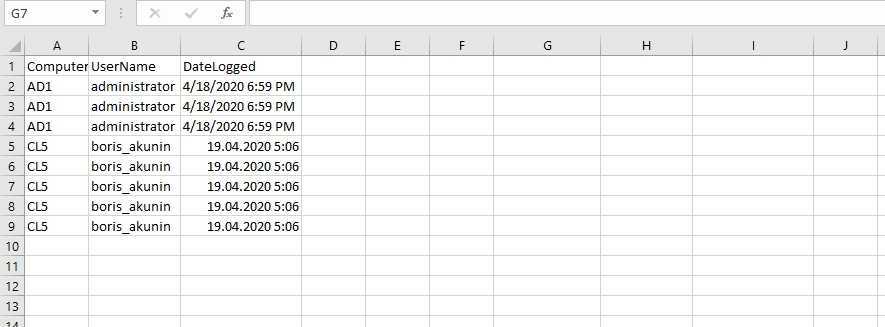
Отмечу следующие моменты:
- Можно увидеть разницу во времени и датах. У меня одна ОС с американской локализацией, а другая с русской. В принципе у вас таких проблем быть не должно, но можно исправить через Get-Date (парсингом даты);
- Из-за предыдущего пункта у меня бывали проблемы с кодировками, но они самоустранились быстрее, чем я смог предпринять действия.
Functional disparity with PowerShell.exe
The majority of Windows PowerShell host functionality is available in the Windows PowerShell Web Access web-based console, but there are some features that are not available.
-
Nested progress displays. Windows PowerShell Web Access displays a progress GUI for cmdlets that report progress, but only top-level progress information is displayed.
-
Input color modification. The input color (both foreground and background) cannot be changed. The style of output, warning, verbose, and error messages can all be changed by running a script.
-
PSHostRawUserInterface. Windows PowerShell Web Access is implemented over Windows PowerShell remote management, and uses a remote runspace. Windows PowerShell Web Access does not implement some methods in this interface; for example, any command that writes to the Windows console. Commands such as PowerTab do not work in Windows PowerShell Web Access.
-
Function keys. Windows PowerShell Web Access does not support some function keys, in many cases because the commands are reserved by the browser.
|
Unsupported Function Key |
Action |
|---|---|
|
Ctrl+C |
In Windows PowerShell Web Access, Ctrl+C is used by the browser to copy content. The console offers a Cancel button, and users can also use Ctrl+Q to cancel commands. |
|
Alt-space, e, l |
Scroll through the screen buffer |
|
Alt+Space, e, f |
Search for text in the screen buffer |
|
Alt+Space, e, k |
Select text to be copied from the screen buffer |
|
Alt+Space, e, p |
Paste clipboard contents into the Windows PowerShell console |
|
Alt+Space, c |
Close the Windows PowerShell console |
|
Ctrl+Break |
Force the Windows PowerShell window to close |
|
Ctrl+Home |
Deletes from the beginning of the current command line |
|
Ctrl+End |
Deletes to end of the command line |
|
F1 |
Move cursor one character to the right on your command line |
|
F2 |
Creates a new command by copying your last command up to the character that you type |
|
F3 |
Complete the command line with content from your last command line |
|
F4 |
Deletes characters from cursor position |
|
F5 |
Scan backward through your command history. To access commands in the command history in Windows PowerShell Web Access, click the History scroll buttons in the web-based console. |
|
F7 |
Interactively select a command from your command history |
|
F8 |
Scan history displaying commands that match current text |
|
F9 |
Run a specific numbered command from history |
|
Page Up |
Run the first command in the history |
|
Page Down |
Run the last command in the history |
|
Alt+F7 |
Clear the command history list |

Examples
Example 2: Create a proxy for a Web service and specify namespace and class
This example uses the cmdlet to create a .NET Framework proxy of the
calculator Web service.
The command uses the Uri parameter to specify the URI and the Namespace and Class
parameters to specify the namespace and class of the object.
Example 3: Display methods of a Web service proxy
This example uses the cmdlet to display the methods of the Web service proxy object in
the variable. We uses these methods in the following example.
Notice that the TypeName of the proxy object, WebServiceProxy, reflects the namespace and class
names that were specified in the previous example.
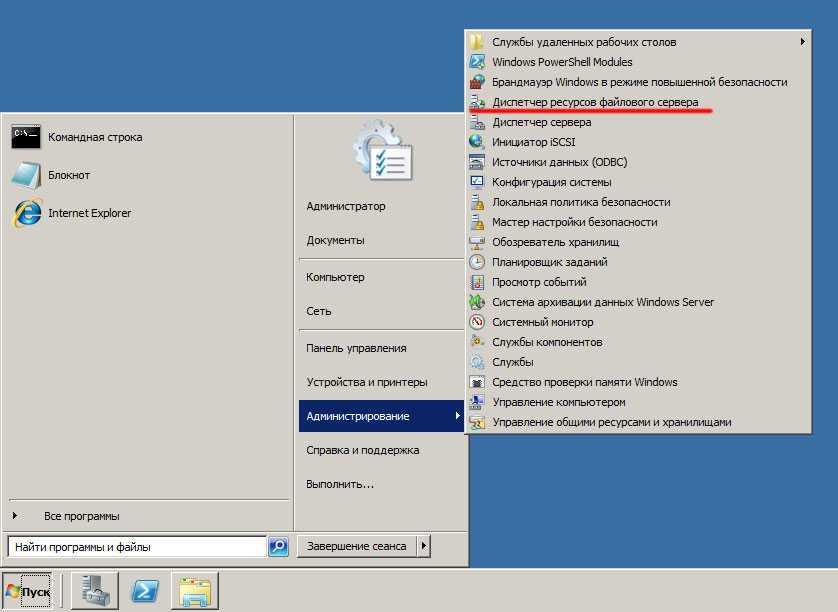
IRP-система штатными средствами Windows
Как мы увидели, встроенный функционал подсистемы журналирования Windows позволяет весьма гибко осуществлять поиск по зафиксированным событиям аудита ИБ, комбинируя различные условия поиска. Однако, у Windows есть еще одна интересная «фишка», которая позволяет использовать сформированные описанным выше образом правила поиска событий — мы говорим про создание задач с определенным триггером в «Планировщике заданий» Windows, что также является штатным функционалом ОС.
Как мы знаем, задачи в ОС Windows могут выполнять совершенно разные функции, от запуска диагностических и системных утилит до обновления компонент прикладного ПО. В задаче можно не только указать исполняемый файл, который будет запущен при наступлении определенных условий и триггеров, но и задать пользовательский PowerShell/VBS/Batch-скрипт, который также будет передан на обработку. В контексте применения подсистемы журналирования интерес для нас представляет функционал гибкой настройки триггеров выполнения задач. Открыв «Планировщик заданий» (taskschd.msc), мы можем создать новую задачу, в свойствах которой на вкладке «Триггеры» мы увидим возможность создать свой триггер. При нажатии на кнопку «Создать» откроется новое окно, в котором в drop-down списке следует выбрать вариант «При событии», а в открывшейся форме отображения установить radio-button «Настраиваемое». После этих действий появится кнопка «Создать фильтр события», нажав на которую, мы увидим знакомое меню фильтрации событий, на вкладке XML в котором мы сможем задать произвольное поисковое условие в синтаксисе XPath-запроса.
Например, если мы хотим выполнять некоторую команду или скрипт при каждом интерактивном входе в систему пользователя Username, мы можем задать в качестве триггера задачи следующее поисковое выражение, уже знакомое нам по примеру выше:
Другой пример: оповещение администратора при подозрительном обращении к системному процессу lsass.exe, который хранит в своей памяти NTLM-хэши и Керберос-билеты пользователей Windows, что может говорить об использовании утилиты Mimikatz или аналогичных ей:
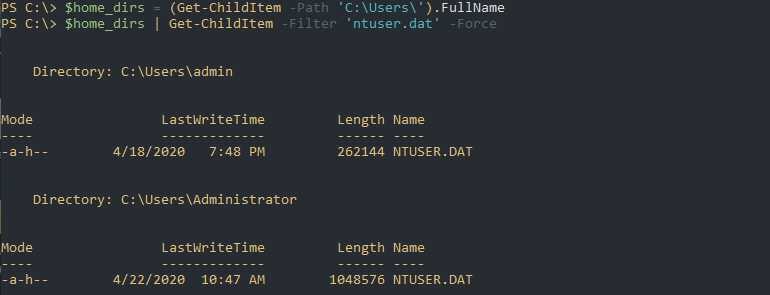
Через файл ntuser.dat
Каждый раз, как пользователь входит в систему все его настройки загружаются из файла ntuser.dat, который находится в домашнем каталоге ‘C:\Users\UserName\’. При выходе из системы все настройки записываются в этот же файл. То есть мы можем получить имя пользователя по дате изменения этого файла.
В этом примере вернутся все каталоги пользователей:

Получим даты изменения файлов ‘ntuser.dat’:
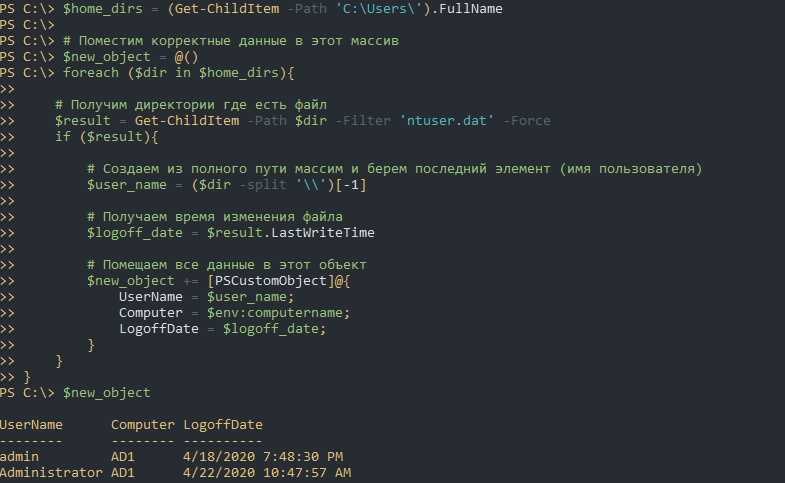
Извлечем из пути имя пользователя и уберем лишние колонки:
Как вы знаете к большинству компьютеров можно подключится используя следующие пути:
Это же мы можем использовать с командой Get-ChildItem. Соединим все это в функцию:
Далее мы можем использовать команду в таких вариациях:
Ключ ‘-ErrorAction SilentlyContinue’ нужен для игнорирования ошибок связанных с выключенными компьютерами. Если его не написать вы получите ошибки формата:
Get-ChildItem : Cannot find path ‘\\CL2\C$\Users\’ because it does not exist.
Отмечу несколько моментов:
- В отличие от первого скрипта Get-ChildItem может принимать массивы. Изменив строки на массивы вы можете немного ускорить работу скрипта. То есть вы можете написать
«Get-Childitem -Path ‘\\Computer1\C$\Users’, ‘\\Computer2\C$\Users’ «; - LogoffDate — это отдельный тип данных даты и времени, а это значит, например, что мы можем увидеть кто вышел за последний час/сутки. Пример будет ниже.
- Если вы выполняете команды типа ‘Invoke-Command’ (удаленные команды) — они тоже могут изменить файл ntuser.dat. То есть вы возможно захотите исключить часть пользователей из финального списка. Пример ниже.
Представим, что мы захотим сформировать список из тех пользователей, которые выполнили выход за последний час. Это можно сделать так:
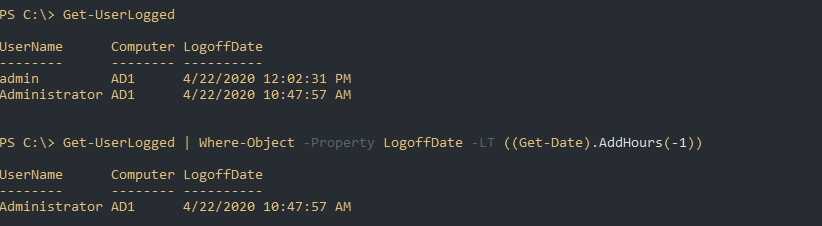
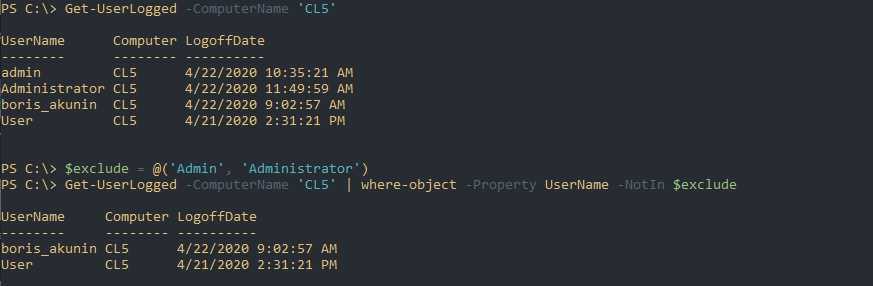
Исключить пользователей мы можем так же:
Экспорт для Excel аналогичен предыдущему примеру:
Вам так же будет интересно:
Description
The Add-PswaAuthorizationRule cmdlet adds a new authorization rule to the Windows PowerShell Web Access authorization rule set.
You must specify the users, computers, and Windows PowerShell endpoints for this rule.
You can specify both users and computers either by individual user accounts and computer names, or by specifying groups.
For a computer that is joined to an Active Directory domain, the cmdlet uses the security identifier (SID) of the computer to create the rule.
This allows you to use a short name, a fully qualified domain name (FQDN), or an IP address for the Computer Name field on the sign-in page.
For a computer that is not joined to an Active Directory domain, the cmdlet creates the rule using the computer name provided by the administrator.
To successfully connect to this machine, the end user must provide the computer name exactly as it appears in the rule.
If there are multiple computers with the same name on the network, then short name can resolve to more than one computer.
This can lead to ambiguity when establishing a connection.
For example, if a rule exists for the workgroup computer named «Server1» and a new computer named server1.contoso.com is joined to the network, validation using the authorization rules succeeds and Windows PowerShell Web Access attempts to establish a connection to the computer named «Server1».
It is not guaranteed that the connection is established with the specified workgroup computer; the attempt could be made on either the workgroup or the domain computer named «Server1».
To reduce ambiguity, it is recommended that you use the FQDN for the destination computer whenever possible to create an authorization rule.
The authorization rules evaluate the primary sign-in credential of the Windows PowerShell Web Access users, not the alternate credentials (the second set of credentials found in the Optional connection settings section of the sign-in page).
For an example of this, see Example 6.
Time-outs and unplanned disconnections
Windows PowerShell Web Access sessions time out. In Windows PowerShell Web Access running on Windows Server 2012, A time-out message is displayed to signed-in users after 15 minutes of session inactivity. If the user does not respond within five minutes after the time-out message is displayed, the session is ended, and the user is signed out. You can change time-out periods for sessions in the website settings in IIS Manager.
In Windows PowerShell Web Access running on Windows Server 2012 R2, sessions time out, by default, after 20 minutes of inactivity. If users are disconnected from sessions in the web-based console because of network errors or other unplanned shutdowns or failures, and not because they have closed the sessions themselves, the Windows PowerShell Web Access sessions continue to run, connected to target computers, until the time-out period on the client side lapses. The session is disconnected after either the default 20 minutes, or after the time-out period specified by the gateway administrator, whichever is shorter.
If the gateway server is running Windows Server 2012 R2, Windows PowerShell Web Access lets users reconnect to saved sessions at a later time, but when network errors, unplanned shutdowns, or other failures disconnect sessions, users cannot see or reconnect to saved sessions until after the time-out period specified by the gateway administrator has lapsed.
Возможности входа PowerShell 7
В этом разделе описаны возможности входа, доступные в версии 2.0.4 и более поздних версиях модуля EXO V2 в PowerShell 7.
Дополнительные сведения об операционных системах, поддерживаемых модулем EXO V2 в PowerShell 7, см. в разделе .
Дополнительные сведения о синтаксисе и параметрах см. в статье Connect-ExchangeOnline.
Интерактивные сценарии с использованием единого входа на основе браузера
Единый вход на основе браузера — это стандартный метод входа в PowerShell 7. Команда Connect-ExchangeOnline открывает страницу входа Azure AD в браузере, используемом по умолчанию. После ввода учетных данных в открывшемся сеансе PowerShell будут доступны старые командлеты Exchange Online и командлеты модуля EXO V2.
Если вы используете в команде параметр UserPrincipalName, значение UPN применяется на странице входа в браузере.
Вход на основе устройства
Используйте вход на основе устройства, если браузеры недоступны (поэтому вы не можете увидеть страницу входа).
Команда возвращает URL-адрес и уникальный код, связанный с сеансом. Откройте URL-адрес в браузере на любом компьютере и введите уникальный код. Когда вы выполните вход в веб-браузере, сеанс в окне PowerShell 7 пройдет проверку подлинности с помощью обычного потока проверки подлинности Azure AD, а командлеты Exchange Online импортируются через несколько секунд.
Встроенные учетные данные
Вы можете ввести свои учетные данные непосредственно в окне PowerShell, не переходя в браузер для единого входа.
Примечание
Этот метод не работает с учетными записями, в которых используется многофакторная проверка подлинности.
Этот метод является улучшением параметра Credential, так как вам не нужно локально хранить учетные данные в сценарии, и вы можете ввести учетные данные непосредственно в интерактивном сеансе PowerShell.
Examples
Example 2: Create a service that includes description, startup type, and display name
This command creates a service named TestService. It uses the parameters of to specify
a description, startup type, and display name for the new service.
Example 3: View the new service
This command uses to get the Win32_Service object for the new service. This
object includes the start mode and the service description.
Example 4: Set the SecurityDescriptor of a service when creating.
This example adds the SecurityDescriptor of the service being created.
The SecurityDescriptor is stored in the variable. The SecurityDescriptorSddl
parameter uses to set the SecurityDescriptor of the new service.
How to use PowerShell Web Access to manage Windows Server

(For more resources related to this topic, see here.)
All that is required to run the web-based Windows PowerShell console is a properly configured Windows PowerShell Web Access gateway, and a client device browser that supports JavaScript and accepts cookies.
Examples of client devices include laptops, tablet computers, web kiosks, computers that are not running a Windows-based operating system, and cell phone browsers. IT pros can perform critical management tasks on remote Windows-based servers from devices that have access to an Internet connection and a web browser.
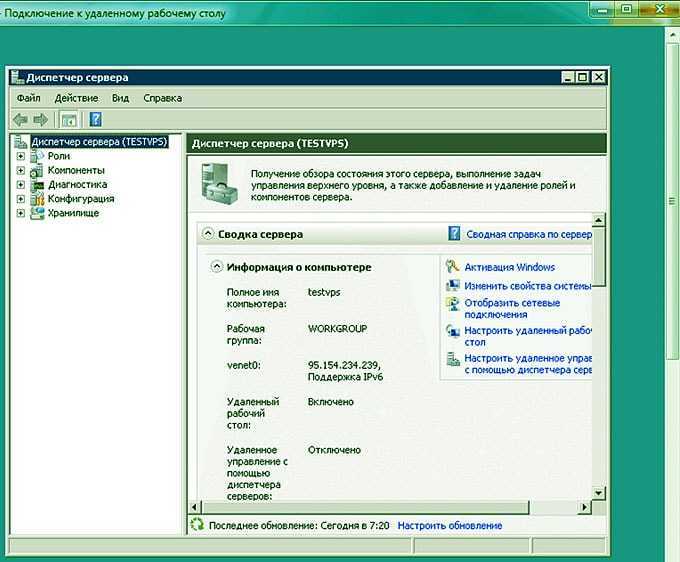
Users can access a Windows PowerShell console by using a web browser. When users open the secured Windows PowerShell Web Access website, they can run a web-based Windows PowerShell console after successful authentication, as shown in the following screenshot:
Here are the steps that I followed to test PSWA (PowerShell Web Access).
Description
The cmdlet starts an interactive session with a single remote computer.
During the session, the commands that you type run on the remote computer, just as if you were
typing directly on the remote computer. You can have only one interactive session at a time.
Typically, you use the ComputerName parameter to specify the name of the remote computer.
However, you can also use a session that you create by using the cmdlet for the
interactive session. However, you cannot use the , , or
cmdlets to disconnect from or re-connect to an interactive session.
Starting with PowerShell 6.0 you can use Secure Shell (SSH) to establish a connection to a remote
computer, if SSH is available on the local computer and the remote computer is configured with a
PowerShell SSH endpoint. The benefit an SSH based PowerShell remote session is that it works across
multiple platforms (Windows, Linux, macOS). For SSH based remoting you use the HostName
parameter set to specify the remote computer and relevant connection information. For more
information about how to set up PowerShell SSH remoting, see
PowerShell Remoting Over SSH.
To end the interactive session and disconnect from the remote computer, use the
cmdlet, or type .


