Перед установкой
Проверка подписи
$ gpg --keyserver-options auto-key-retrieve --verify archlinux-версия-x86_64.iso.sig
В качестве альтернативы, можно проверить подпись из установленного Arch Linux:
$ pacman-key -v archlinux-версия-x86_64.iso.sig
Примечание:
Подготовка установочного носителя
Установочный образ можно загрузить на конечном устройстве с помощью USB-накопителя, или сети (при помощи PXE) — следуйте соответствующей статье для подготовки установочного носителя.
Загрузка live-окружения
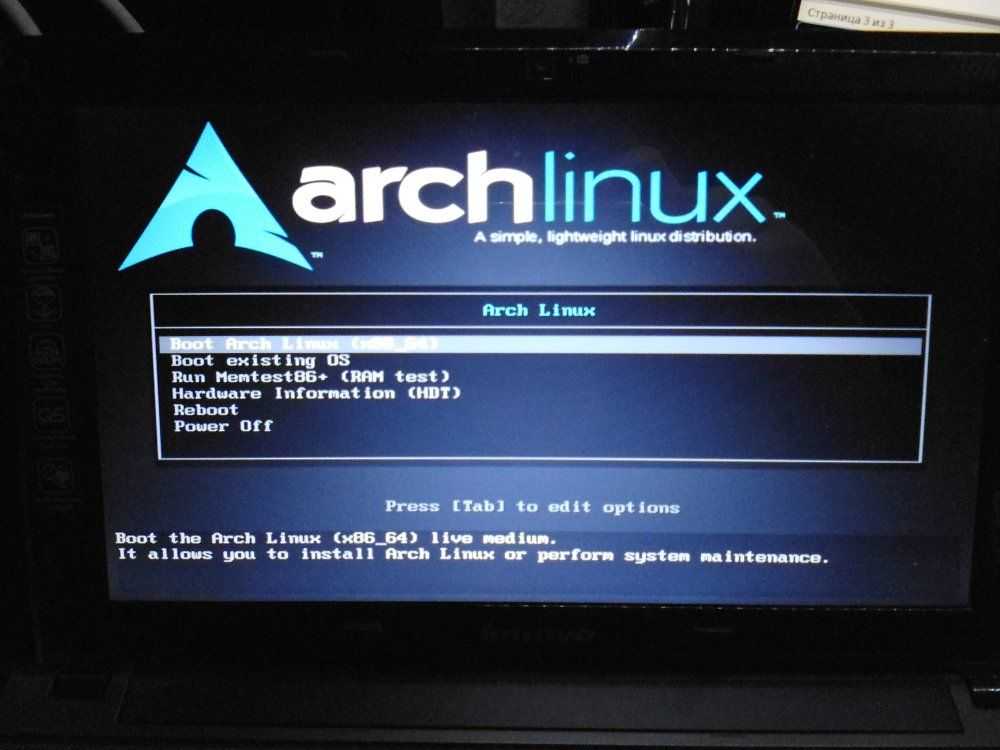
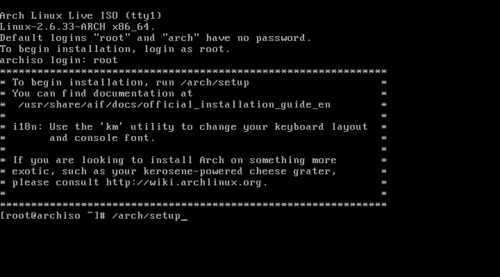
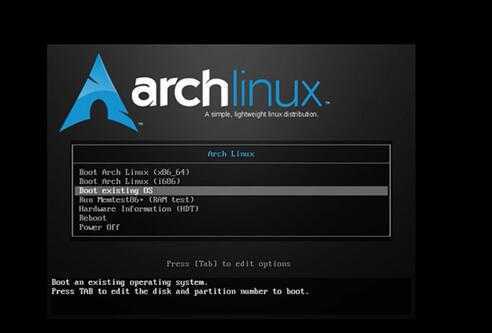
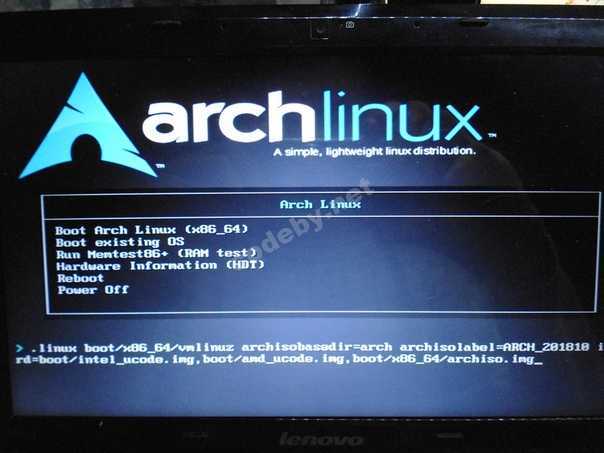
- Загрузите устройство с установочного носителя с Arch Linux. Обычно при включении компьютера нажимается специальная клавиша (иногда она указывается на заставке) во время фазы POST для выбора загрузочного устройства. Обратитесь к руководству вашей материнской платы для получения более подробных инструкций.
- Когда появится меню установочного носителя, выберите Arch Linux install medium и нажмите для входа в установочное окружение.
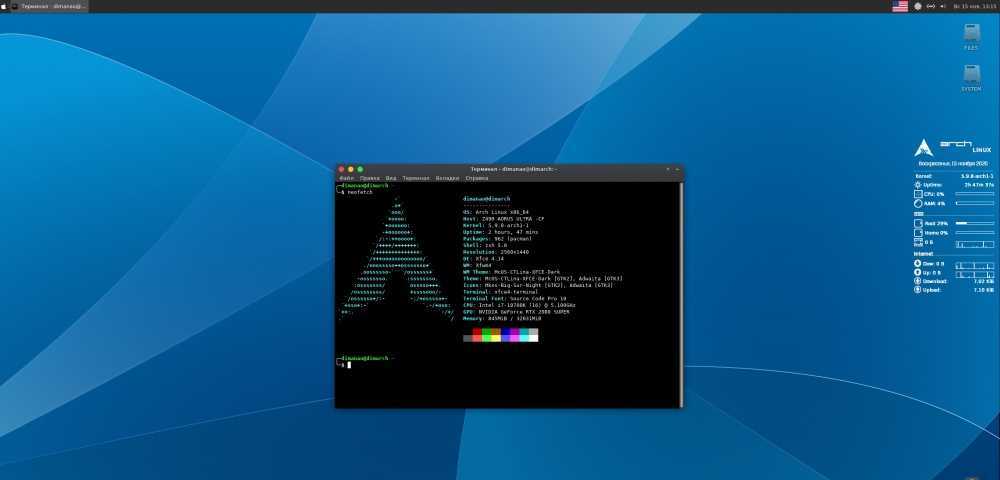
- Вы загрузитесь в первую виртуальную консоль в качестве root-пользователя и увидите приглашение командной оболочки Zsh.
Установка раскладки клавиатуры
По умолчанию используется раскладка консоли US. Чтобы посмотреть список доступных раскладок, запустите:
# ls /usr/share/kbd/keymaps/**/*.map.gz
Чтобы изменить раскладку, добавьте имя соответствующего файла к команде , не указывая полного пути и расширения. Например, чтобы выбрать русскую раскладку, запустите:
# loadkeys ru
расположены в каталоге и могут быть выбраны при помощи .
Проверка режима загрузки
Чтобы проверить режим загрузки, просмотрите содержимое каталога :
# ls /sys/firmware/efi/efivars
Если содержимое отображается без каких-либо ошибок, система загружена в режиме UEFI. Если же такого каталога не существует, возможно, система загружена в режиме BIOS (или CSM). Если система не загрузилась в желаемом режиме, обратитесь к руководству пользователя вашей материнской платы.
Соединение с интернетом
Для настройки сетевого соединения, выполните следующие действия:
- Убедитесь, что ваш обнаружен и включён, например, с помощью :
# ip link
- Если планируется использовать Wi-Fi, убедитесь, что беспроводная карта не заблокирована с помощью rfkill.
- Подключитесь к сети:
- Ethernet: подключите кабель.
- Wi-Fi: подключитесь к беспроводной сети с помощью iwctl.
- Настройте сетевые соединения:
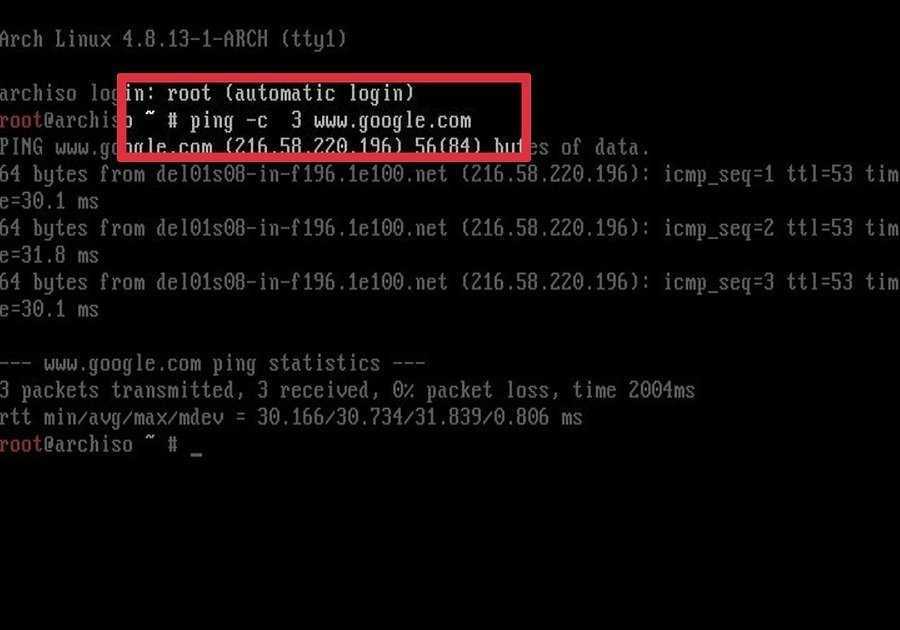
- Соединение можно проверить с помощью утилиты ping:
# ping archlinux.org
Примечание: Установочный образ по умолчанию запускает службы , и , но в установленной системе автозапуск будет необходимо настроить вручную.
Синхронизация системных часов
Чтобы удостовериться, что время задано правильно, используйте :
# timedatectl set-ntp true
Для проверки статуса службы используйте .
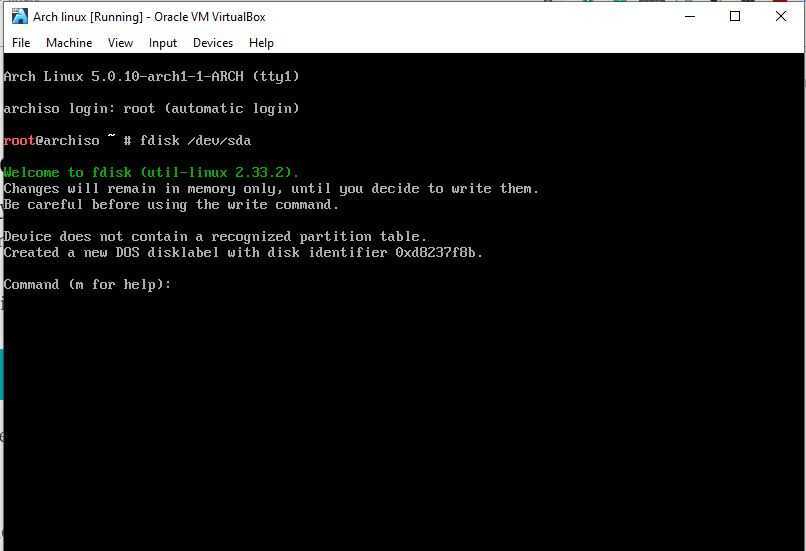
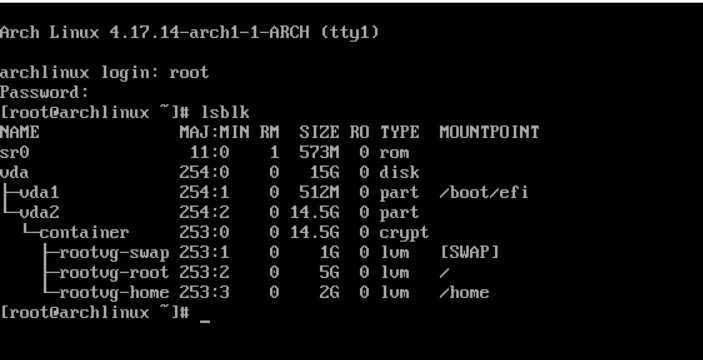
Разметка дисков
Когда запущенная система распознает накопители, они становятся доступны как блочные устройства, например, , или . Чтобы посмотреть их список, используйте lsblk или fdisk.
# fdisk -l
Результаты, оканчивающиеся на , и , можно игнорировать:
На выбранном накопителе должны присутствовать следующие разделы:
- Раздел корневого каталога
- Для загрузки в режиме UEFI также необходим системный раздел EFI
Если вы хотите создать составное блочное устройство для LVM, шифрование диска или RAID, сделайте это сейчас.
Примеры схем
| Точка монтирования | Раздел | Тип раздела | Рекомендуемый размер |
|---|---|---|---|
| Linux | Остаток | ||
| Linux swap | Более 512 МБ |
| Точка монтирования | Раздел | Рекомендуемый размер | |
|---|---|---|---|
| или | системный раздел EFI | 260–512 МБ | |
| Linux x86-64 root (/) | Остаток | ||
| Linux swap | Более 512 МБ |
Также смотрите .
Примечание:
- Для редактирования таблицы разделов используйте fdisk или parted, например, .
- Пространство подкачки можно расположить в для файловых систем, поддерживающих его.
Форматирование разделов
Когда разделы созданы, каждый из них необходимо отформатировать в подходящую файловую систему. Например, если корневой раздел обозначен и необходимо отформатировать его в Ext4, выполните:
# mkfs.ext4 /dev/sdX1
Если вы создали раздел для подкачки (swap), инициализируйте его с помощью утилиты :
# mkswap /dev/sdX2
# swapon /dev/sdX2
Для получения дополнительной информации смотрите раздел .
Монтирование разделов
Смонтируйте файловую систему корневого раздела в каталог , например:
# mount /dev/sdX1 /mnt
Используя создайте точки монтирования для всех остальных разделов (например, ) и примонтируйте соответствующие разделы.
В дальнейшем обнаружит смонтированные файловые системы и пространство подкачки.
Установка
Установите пакет .
В дополнение к нему, могут понадобиться пакеты из группы для некоторых способов настроек. О них рассказано в соответствующих разделах.


К тому же имеется группа , которая включает пакеты оконной системы Xorg и пакеты из группы , а также шрифты.
Совет: Вам, скорее всего, понадобится оконный менеджер или среда рабочего стола в дополнение к X.
Установка драйвера
Ядро Linux включает в себя видеодрайверы с открытым исходным кодом и поддержку аппаратного ускорения буфера кадров. Однако, для работы OpenGL и двухмерного ускорения в X11 требуется поддержка пользовательского ПО.
Сперва определите вашу видеокарту:
$ lspci | grep -e VGA -e 3D
Затем установите соответствующий драйвер. Вы можете поискать в базе данных пакетов полный список видеодрайверов с открытым исходным кодом:
$ pacman -Ss xf86-video
Xorg автоматически ищет установленные драйверы:
- Если он не может найти установленным необходимый драйвер для оборудования (перечислены ниже), тогда он сначала ищет драйвер fbdev ().
- Если и он не найден, тогда Xorg ищет общий драйвер vesa (), который поддерживает большое количество чипсетов, но не включает 2D или 3D ускорение.
- А если и vesa не найден, тогда X обратится к режиму KMS, который включает ускорение GLAMOR (смотрите ).
Для того, чтобы ускорение видео работало, и часто для того, чтобы разблокировать все режимы, в которых может работать GPU, требуется правильный видеодрайвер:
| Бренд | Тип | Драйвер | OpenGL | OpenGL (multilib) | Документация |
|---|---|---|---|---|---|
| AMD / ATI | Свободный | AMDGPU (Русский) | |||
| ATI (Русский) | |||||
| Intel | Свободный | Intel graphics (Русский) | |||
| NVIDIA | Свободный | Nouveau (Русский) | |||
| Проприетарный | NVIDIA (Русский) | ||||
| AUR | AUR | AUR |
Примечание:
- Если Вы пользуетесь ноутбуком с поддержкой NVIDIA Optimus, который использует интегрированную видеокарту вместе с дискретной, обратитесь к статье NVIDIA Optimus (Русский) или Bumblebee (Русский).
- Чтобы узнать доступные драйверы для графики Intel 4-го поколения и выше, смотрите статью .
Другие видеодрайверы можно найти в группе .
Во избежание проблем X следует запускать без драйверов с закрытым исходным кодом, которые обычно требуются только для расширенных возможностей, таких, как быстрый 3D рендеринг в играх. Исключением из этого правила являются недавние графические процессоры (особенно видеокарты NVIDIA), которые не поддерживаются драйверами с открытым исходным кодом.
AMD
| Архитектура GPU | Карты Radeon | Драйвер с открытым исходным кодом | Проприетарный драйвер |
|---|---|---|---|
| GCN 4и новее | варианты | AMDGPU (Русский) | AMDGPU PRO (Русский) |
| GCN 3 | AMDGPU (Русский) | Catalyst (Русский) /AMDGPU PRO (Русский) | |
| GCN 2 | AMDGPU (Русский)* / ATI (Русский) | Catalyst (Русский) | |
| GCN 1 | AMDGPU (Русский)* / ATI (Русский) | Catalyst (Русский) | |
| TeraScale 2&3 | HD 5000 — HD 6000 | ATI (Русский) | Catalyst (Русский) |
| TeraScale 1 | HD 2000 — HD 4000 | устаревший Catalyst (Русский) | |
| Старые | X1000 и старше | недоступен |
- *: Экспериментальный
Overview
Packages in Arch Linux are built using the makepkg utility and the information stored in a PKGBUILD file. When runs, it searches for a in the current directory and follows the instructions in it to acquire the required files and/or compile them to be packed within a package file (). The resulting package contains binary files and installation instructions ready to be installed by pacman.
An Arch package is no more than a tar archive, or ‘tarball’, compressed using , which contains the following files generated by makepkg:
- The binary files to install.
- : contains all the metadata needed by pacman to deal with packages, dependencies, etc.
- : contains information needed for reproducible builds. This file is present only if a package is built with pacman 5.1 or newer. See .
- : contains hashes and timestamps of the files, which are included in the local database so that pacman can verify the integrity of the package.
- : an optional file used to execute commands after the install/upgrade/remove stage. (This file is present only if specified in the .)
- : an optional file kept by the package maintainer documenting the changes of the package. (It is not present in all packages.)
Установка yaourt
yaourt — это обёртка для пакетного менеджера pacman, с некоторыми расширениями и поддержкой репозитория AUR.
Его нет в репозиториях pacman, но его можно поставить из AUR. Первым делом нужно установить yajl. Установите его с помощью pacman:
# pacman -S yajl
После этого необходимо установить пакет package-query. Для этого скачайте tarball: package-query.tar.gz


Перейдите в скачанную директорию с помощью cd.
cd ~Downloads
Распакуйте скачанный архив:
tar xzf package-query.tar.gz
Перейдите в распакованную директорию с помощью cd.
cd package-query
Соберите пакет с помощью makepkg
makepkg
И установите пакет(версия пакета может отличаться):
sudo pacman -U package-query-1.1-2-x86_64.pkg.tar.xz
Теперь приступим к установке самого yaourt.
Для этого скачайте tarball: yaourt.tar.gz
Перейдите в скачанную директорию с помощью cd.
cd ~Downloads
Распакуйте скачанный архив:
tar xzf yaourt.tar.gz
Перейдите в распакованную директорию с помощью cd.
cd yaourt
Соберите пакет с помощью makepkg
makepkg
И установите пакет(версия пакета может отличаться):
sudo pacman -U yaourt-1.2.2-1-any.pkg.tar.xz
Всё, теперь вы можете использовать yaourt, для установки пакетов из AUR. Он имеет идентичные pacman‘у параметры.
Пример установки пакета из AUR:
yaourt -S dropbox
Чтобы обновить все пакеты, включая пакеты из AUR, нужно использовать следующую команду:
yaourt -Syua
Послесловие
Мы получили свежеустановленный Arch Linux
без графического окружения. Далее в принципе настройка — дело вкуса.
В этом и весь arch, что он для тех, кто точно знает, что хочет.
Практически ничего нет из коробки. И это прекрасно! Вы строете свой конструктор,
как Вам хочется. Полная свобода действий. И не на кого спихнуть, что система
неудобная, или напихали ненужного софта. Единственный, кто тут может
что — то запачкать — это Вы сами. Более не на кого свалить вину. Ломать и
чинить систему тут нужно тоже самостоятельно.


Arch Linux не для всех, и в первую очередь не для тех, кто привык “требовать”
функционал, фичи, и кормление с ложки из коробки. Тут всегда есть выбор:
вкладывать время в саморазвитие через обучение и самостоятельное погружение в систему,
или возвращаться к Ubuntu, которая делает все за тебя. Но у такого подхода
есть большой плюс в том, что при четком понимании того, что хочешь от системы,
ты строишь ее по кирпичикам без лишних запчастей, под себя, под свои
персональные нужды и прихоти.
Composite
The Composite extension for X causes an entire sub-tree of the window hierarchy to be rendered to an off-screen buffer. Applications can then take the contents of that buffer and do whatever they like. The off-screen buffer can be automatically merged into the parent window or merged by external programs, called compositing managers. See the following article for more information: compositing window manager
Some window managers (e.g. Compiz, Enlightenment, KWin, Marco, Metacity, Muffin, Mutter, Xfwm) do compositing on their own. For other window managers, a standalone composite manager can be used.
List of composite managers
Picom — Compositor (a fork of Compton)
Xcompmgr — Composite window-effects manager
Unagi — Modular compositing manager which aims written in C and based on XCB
SIGNED PACKAGES
     When creating a package, you can optionally add a digital signature to
     the package.  You will need to have a certificate and corresponding pri-
     vate key -- together called an ``identity'' -- in one of your accessible
     keychains. To add a signature, specify the name of the identity using the
     --sign option. The identity's name is the same as the ``Common Name'' of
     the certificate.

     If you want to search for the identity in a specific keychain, specify
     the path to the keychain file using the --keychain option. Otherwise, the
     default keychain search path is used.

     pkgbuild will embed the signing certificate in the product archive, as
     well as any intermediate certificates that are found in the keychain. If
     you need to embed additional certificates to form a chain of trust
     between the signing certificate and a trusted root certificate on the
     system, use the --cert option to give the Common Name of the intermediate
     certificate. Multiple --cert options may be used to embed multiple inter-
     mediate certificates.

     The signature can optionally include a trusted timestamp. This is enabled
     by default when signing with a Developer ID identity, but it can be
     enabled explicitly using the --timestamp option. A timestamp server must
     be contacted to embed a trusted timestamp. If you aren't connected to the
     Internet, you can use --timestamp=none to disable timestamps, even for a
     Developer ID identity.

     Note that if you are going to create a signed product with the resulting
     package, using productbuild(1), there is no reason to sign the individual
     package.
Installation
Select the mirrors
Packages to be installed must be downloaded from mirror servers, which are defined in . On the live system, after connecting to the internet, reflector updates the mirror list by choosing 20 most recently synchronized HTTPS mirrors and sorting them by download rate.
The higher a mirror is placed in the list, the more priority it is given when downloading a package. You may want to inspect the file to see if it is satisfactory. If it is not, edit the file accordingly, and move the geographically closest mirrors to the top of the list, although other criteria should be taken into account.
This file will later be copied to the new system by pacstrap, so it is worth getting right.
Install essential packages
Use the script to install the package, Linux kernel and firmware for common hardware:
# pacstrap /mnt base linux linux-firmware
Tip:
- You can substitute for a kernel package of your choice, or you could omit it entirely when installing in a container.
- You could omit the installation of the firmware package when installing in a virtual machine or container.
The package does not include all tools from the live installation, so installing other packages may be necessary for a fully functional base system. In particular, consider installing:
- userspace utilities for the management of file systems that will be used on the system,
- utilities for accessing RAID or LVM partitions,
- specific firmware for other devices not included in (e.g. for ),
- software necessary for networking,
- a text editor,
- packages for accessing documentation in man and info pages: , and .
Installing and upgrading packages
Installing packages from the AUR is a relatively simple process. Essentially:
- Acquire the build files, including the PKGBUILD and possibly other required files, like systemd units and patches (often not the actual code).
- Verify that the and accompanying files are not malicious or untrustworthy.
- Run in the directory where the files are saved. This will download the code, compile it, and package it.
- Run to install the package onto your system.
Note: The AUR is unsupported, so any packages you install are your responsibility to update, not pacman’s. If packages in the official repositories are updated, you will need to rebuild any AUR packages that depend on those libraries.
Prerequisites
First ensure that the necessary tools are installed by installing the group in full which includes and other tools needed for compiling from source.
Tip: Use the flag when installing the group to skip packages you already have instead of reinstalling them.
Note: Packages in the AUR assume that the group is installed, i.e. they do not list the group’s members as build dependencies explicitly.


Next choose an appropriate build directory. A build directory is simply a directory where the package will be made or «built» and can be any directory. The examples in the following sections will use as the build directory.
Acquire build files
There are several methods for acquiring the build files for a package:
Clone its git repository, labeled «Git Clone URL» in the «Package Details» on its AUR page. This is the preferred method, an advantage of which is that you can easily get updates to the package via git pull.
-
$ git clone https://aur.archlinux.org/package_name.git
Download a snapshot, either by clicking the «Download snapshot» link under «Package Actions» on the right hand side of its AUR page, or in a terminal:
-
$ curl -L -O https://aur.archlinux.org/cgit/aur.git/snapshot/package_name.tar.gz
- Note: The snapshot file is compressed, and must be extracted (preferably in a directory set aside for AUR builds):
Acquire a PGP public key if needed
Check if a signature file in the form of .sig or .asc is part of the PKGBUILD source array, if that is the case, then acquire one of the public keys listed in the PKGBUILD array. Refer to for more information.
Build the package
Change directories to the directory containing the package’s PKGBUILD.
$ cd package_name
View the contents of all provided files. For example, to use the pager less to view do:
$ less PKGBUILD
Tip: If you are updating a package, you may want to look at the changes since the last commit.
- To view changes since the last git commit you can use .
- To view changes since the last commit using vimdiff, do . The advantage of vimdiff is that you view the entire contents of each file along with indicators on what has changed.
Make the package. After manually confirming the contents of the files, run makepkg as a normal user. Some helpful flags:
- / automatically resolves and installs any dependencies with pacman before building. If the package depends on other AUR packages, you will need to manually install them first.
- / installs the package if it is built successfully. This lets you skip the next step that is usually done manually.
- / removes build-time dependencies after the build, as they are no longer needed. However these dependencies may need to be reinstalled the next time the package is updated.
- / cleans up temporary build files after the build, as they are no longer needed. These files are usually needed only when debugging the build process.
Install the package
The package can now be installed with pacman:
# pacman -U package_name-version-architecture.pkg.tar.zst
Note:
- If you have changed your in , the name of the package file may be slightly different.
- The above example is only a brief summary of the build process. It is highly recommended to read the makepkg and ABS articles for more details.
Upgrading packages
In the directory containing the package’s PKGBUILD you must first update the files and changes by using the command
$ git pull
then follow the previous build and install instructions.