
Step 9: Increase Upload File Size Limit
The default maximum upload file size limit set by Nginx is 1MB. To allow uploading large files to your NextCloud server, edit the Nginx configuration file for NextCloud.
sudo nano /etc/nginx/conf.d/nextcloud.conf
We have already set the maximum file size in this file, as indicated by
client_max_body_size 512M;
You can change it if you prefer, like 1G.
client_max_body_size 1024M;
Save and close the file. Then reload Nginx for the changes to take effect.
sudo systemctl reload nginx
PHP also sets a limit of upload file size. The default maximum file size for uploading is 2MB. To increase the upload size limit, edit the PHP configuration file.
sudo nano /etc/php/7.4/fpm/php.ini
Find the following line (line 846).
upload_max_filesize = 2M
Change the value like below:
upload_max_filesize = 1024M
Save and close the file. Alternatively, you can run the following command to change the value without manually opening the file.
sudo sed -i 's/upload_max_filesize = 2M/upload_max_filesize = 1024M/g' /etc/php/7.4/fpm/php.ini
Then restart PHP-FPM.
sudo systemctl restart php7.4-fpm
Шаг 4 — Настройка блоков сервера (рекомендуется)
При использовании веб-сервера Nginx вы можете использовать блоки сервера (аналогичные виртуальным хостам в Apache) для инкапсуляции данных конфигурации и размещения на одном сервере нескольких доменов. Мы создадим домен your_domain, но вы должны заменить это имя собственным доменным именем. Чтобы узнать больше о настройке доменного имени в DigitalOcean, ознакомьтесь с документом «Введение в DigitalOcean DNS».
Создайте каталог , используя флаг для создания необходимых родительских каталогов:
Назначьте владельца каталога:
Разрешения корневых каталогов веб-сервера должны быть правильными, если вы не изменяли значение . Тем не менее вы можете проверить это с помощью следующей команды:
Создайте в качестве примера страницу , используя или свой любимый редактор:
Добавьте в страницу следующий образец кода HTML:
/var/www/your_domain/html/index.html
Сохраните файл и закройте его после завершения.
Создайте новый серверный блок в :
Вставьте следующий блок конфигурации, обновленный с учетом новых имен каталога и домена:
/etc/nginx/sites-available/your_domain
Сохраните файл и закройте его после завершения.
Активируйте файл, создав ссылку от него в каталог :
Теперь два серверных блока активированы и настроены отвечать на запросы на базе директив и :
- : будет отвечать на запросы и .
- : будет отвечать на любые запросы порта , не соответствующие двум другим блокам.
Чтобы избежать возможной проблемы с хэшированием памяти при добавлении дополнительных имен серверов, необходимо изменить одно значение в файле . Откройте файл:
Найдите директиву и удалите символ , чтобы убрать режим комментариев для строки:
/etc/nginx/nginx.conf
Проверьте ошибки синтаксиса:
Перезапустите Nginx, чтобы активировать изменения:
Теперь Nginx должен обслуживать ваше доменное имя. Вы можете проверить это, открыв в браузере адрес , после чего должны получить примерно следующее:

Adding Local DNS Entry
It’s recommended to edit the file on your Nextcloud server and add the following entry, so that Nextcloud itself won’t have to query the public DNS, which can improve the overall stability. If your Nextcloud server can’t resolve the hostname, then you may encounter a 504 gateway time out error.

![Установка nginx в ubuntu 20.04 [краткое руководство]](https://smartshop124.ru/wp-content/uploads/7/d/a/7da65b603d08800e7cd4d6c0d7b90287.jpeg)
127.0.0.1 localhost nextcloud.example.com
An IP address in the file can have multiple hostnames, so if you have other applications installed on the same box, you can also add other hostnames or sub-domains on the same line like this:
127.0.0.1 localhost focal ubuntu nextcloud.example.com collabora.example.com
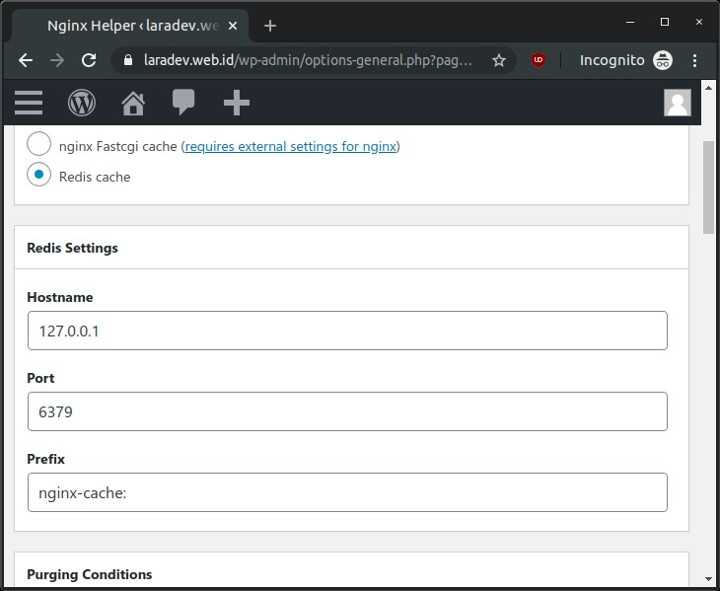
Step 10: Configure Redis Cache for NextCloud
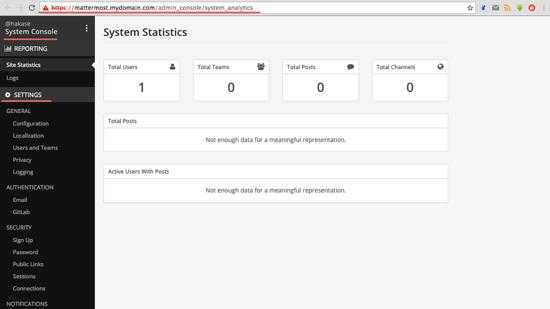
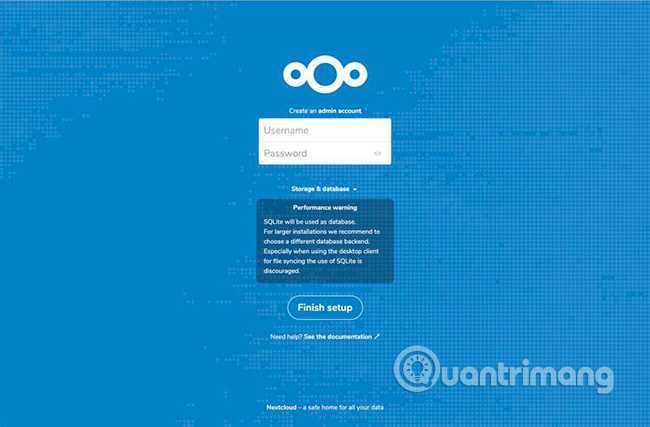
If you go to your NextCloud settings -> overview page, you might see the following warning:
No memory cache has been configured. To enhance your performance please configure a memcache if available.
We will enable memory caching for nextCloud by using Redis. Run the following command to install Redis server from Ubuntu repository.
sudo apt install redis-server
You can check the version with:
redis-server -v
Sample output:
Redis server v=5.0.7 sha=00000000:0 malloc=jemalloc-5.2.1 bits=64 build=636cde3b5c7a3923
Now we can check if redis server is running.
systemctl status redis
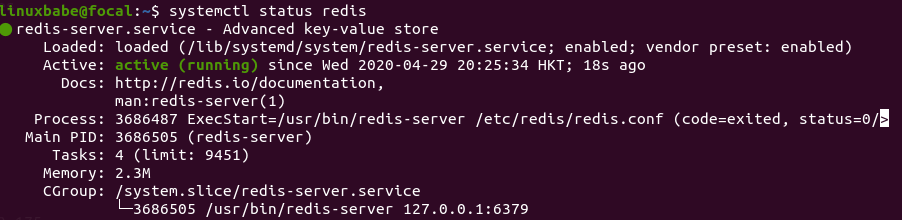
Hint: If the above command didn’t quit immediately, you can press the Q key to gain back control of the terminal.
From the above screenshot, we can see that it’s running and auto-start is enabled. If for any reason it’s not running, execute the following command:
sudo systemctl start redis-server
And if auto-start at boot time is not enabled, you can use the following command to enable it:
sudo systemctl enable redis-server
In order to configure Redis as a cache for nextCloud, we need to install the PHP extension for interfacing with Redis.
sudo apt install php-redis
Check if the extension is enabled.
php --ri redis

We can see that Redis extension is enabled. If it’s not enabled, run the following command:
sudo phpenmod redis
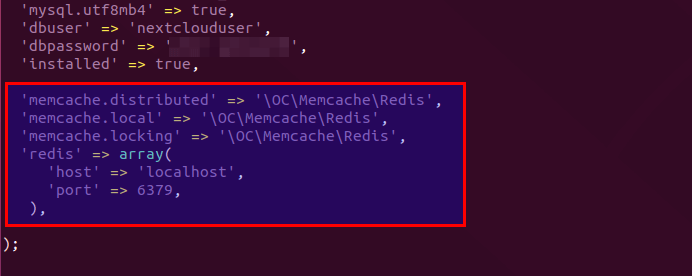
Next, edit nextCloud configuration file.
sudo nano /usr/share/nginx/nextcloud/config/config.php
Add the following lines above the ending line.
'memcache.distributed' => '\OC\Memcache\Redis',
'memcache.local' => '\OC\Memcache\Redis',
'memcache.locking' => '\OC\Memcache\Redis',
'redis' => array(
     'host' => 'localhost',
     'port' => 6379,
     ),
Save and close the file. Then restart Nginx and PHP-FPM.
sudo systemctl restart nginx php7.4-fpm
Now go to NextCloud settings -> overview page again and refresh the web page, the warning about memory caching should be gone.
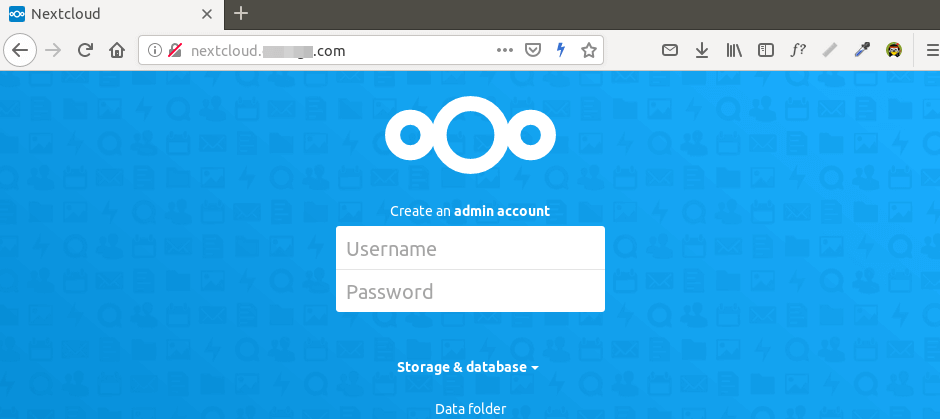
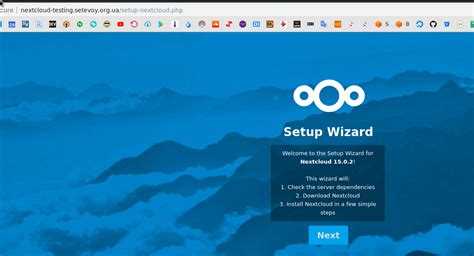
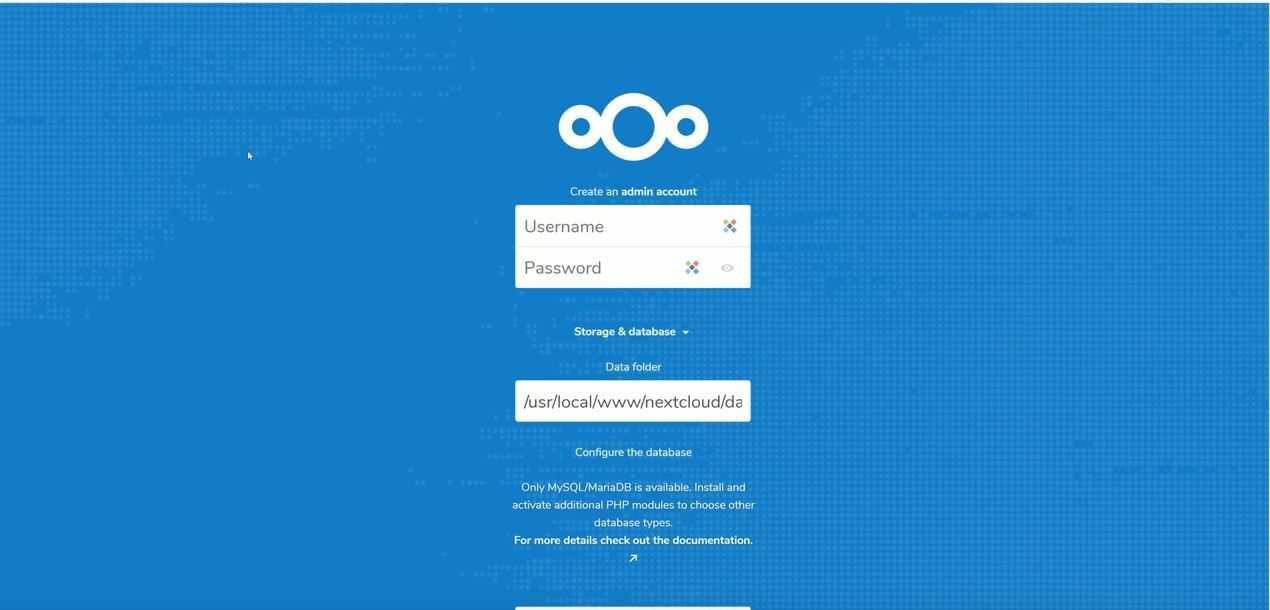
Step 5: Enable HTTPS
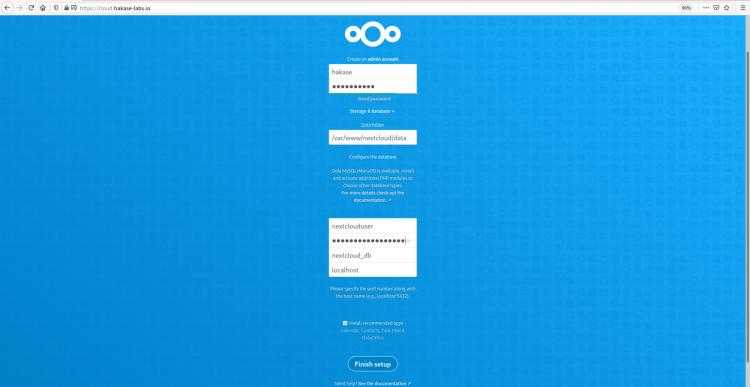
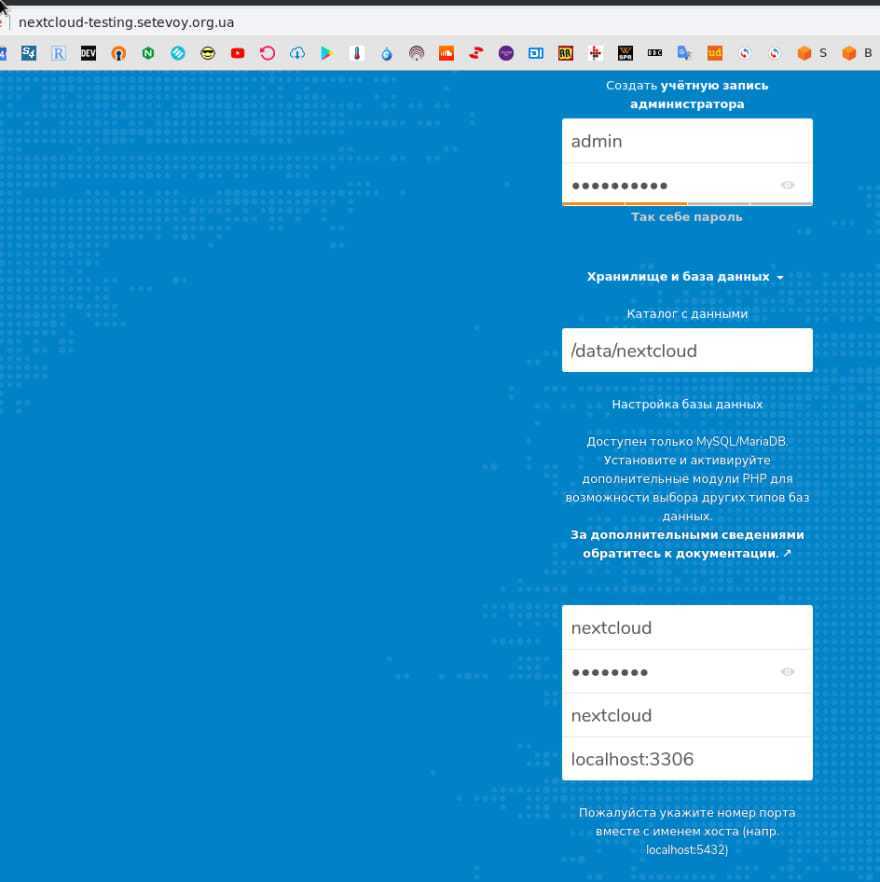
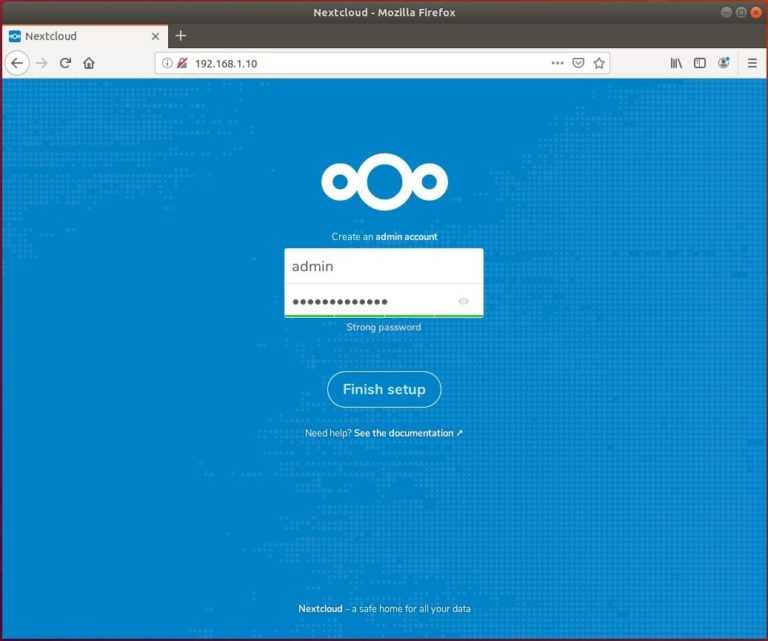
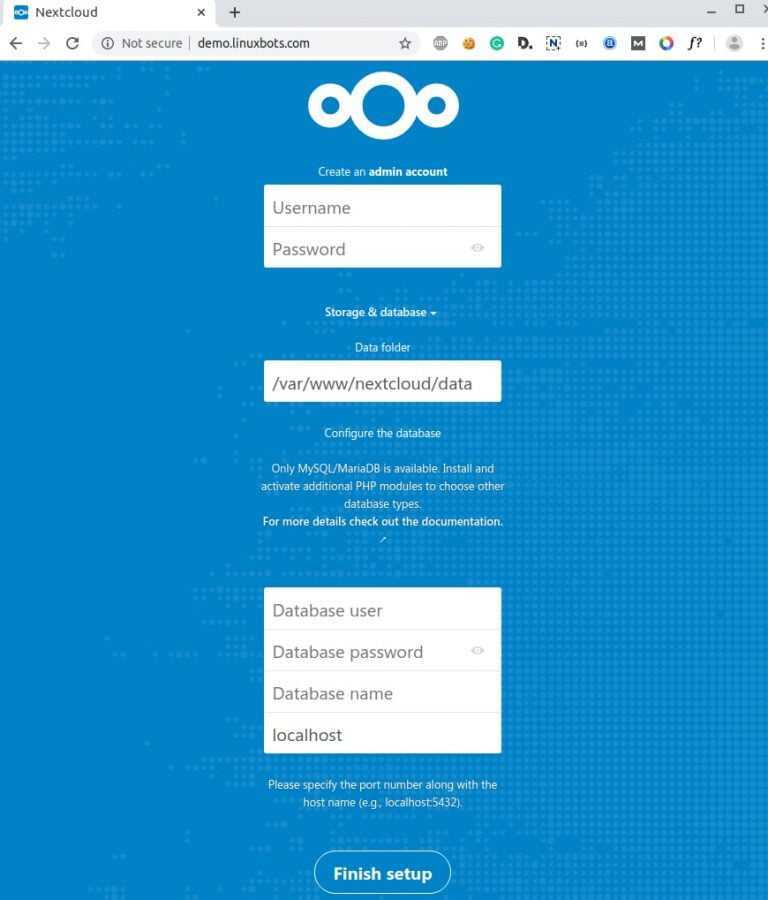
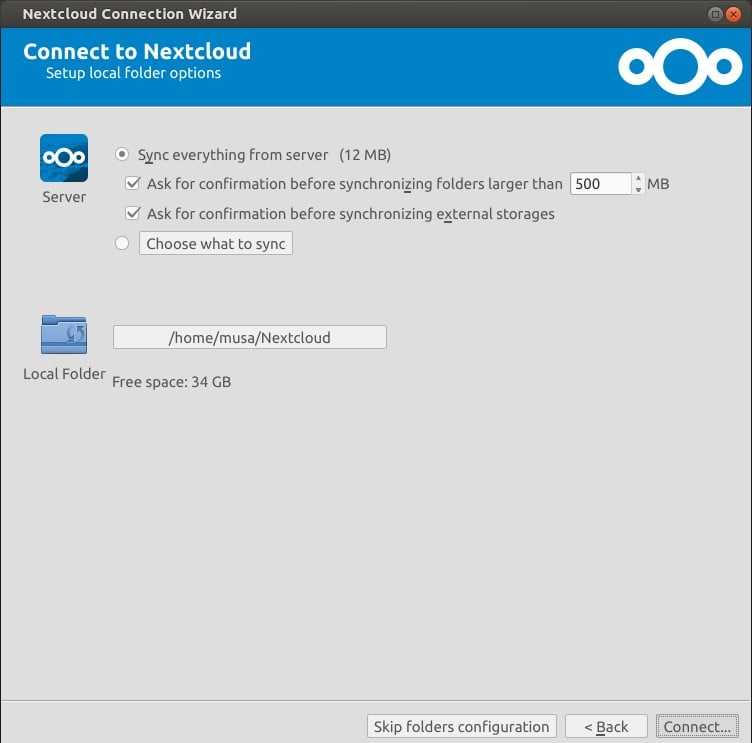
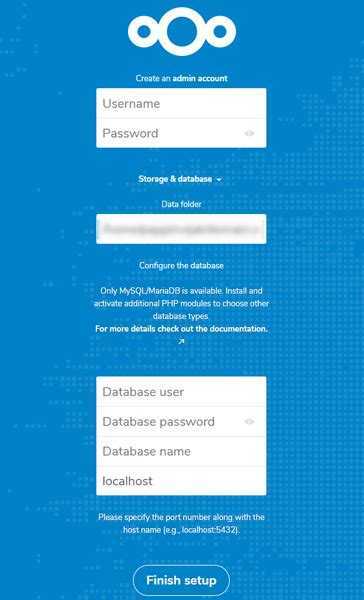
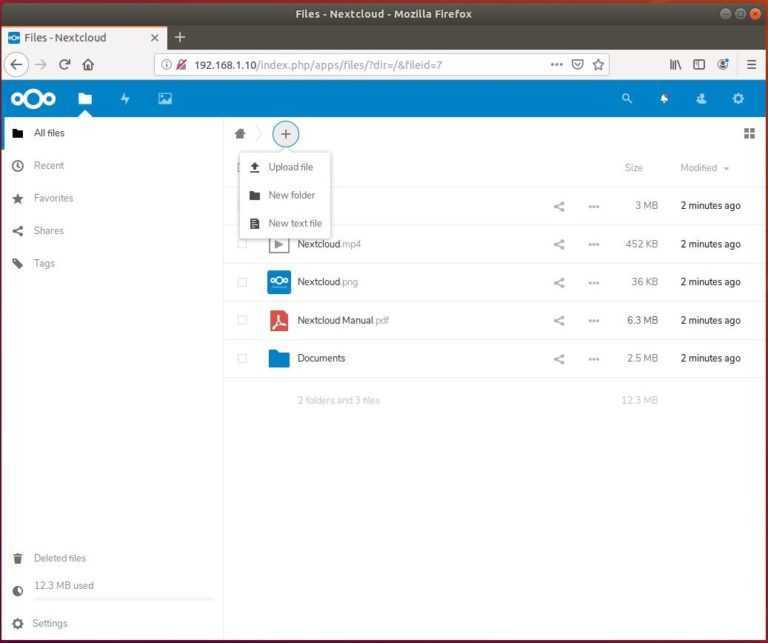
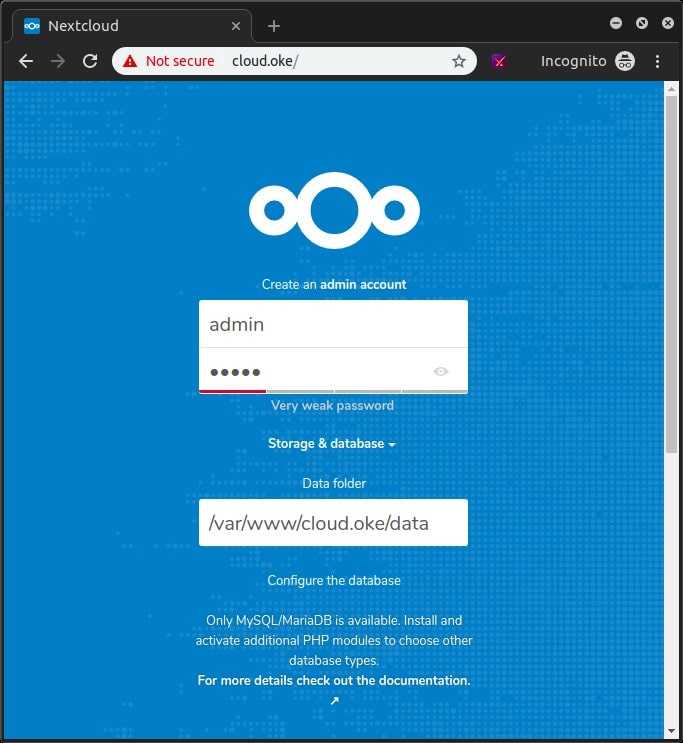
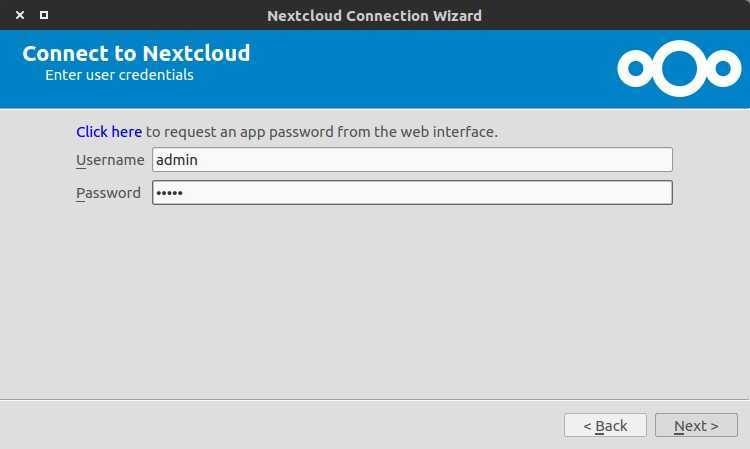
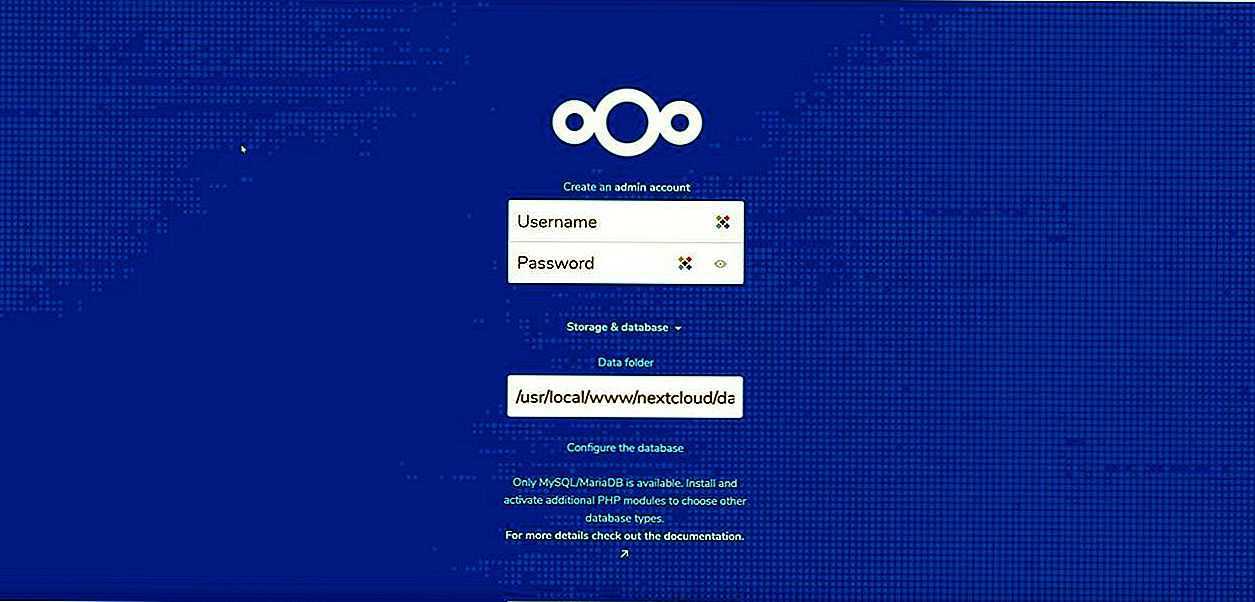
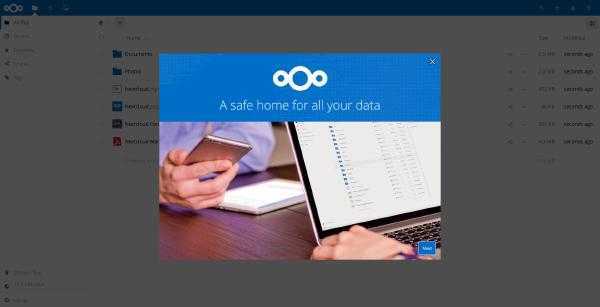
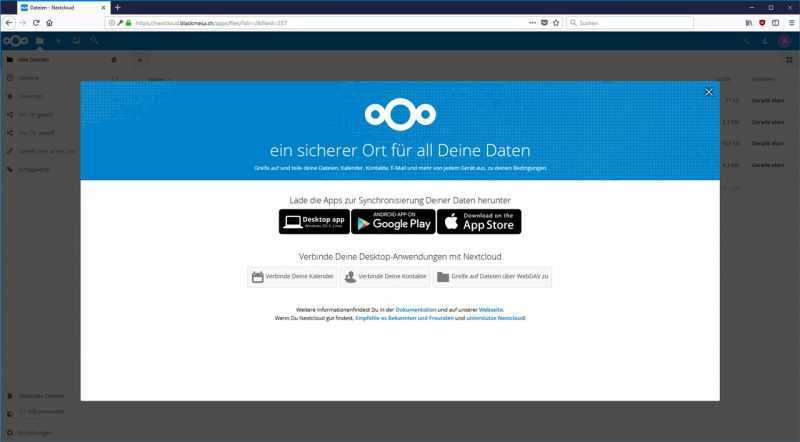
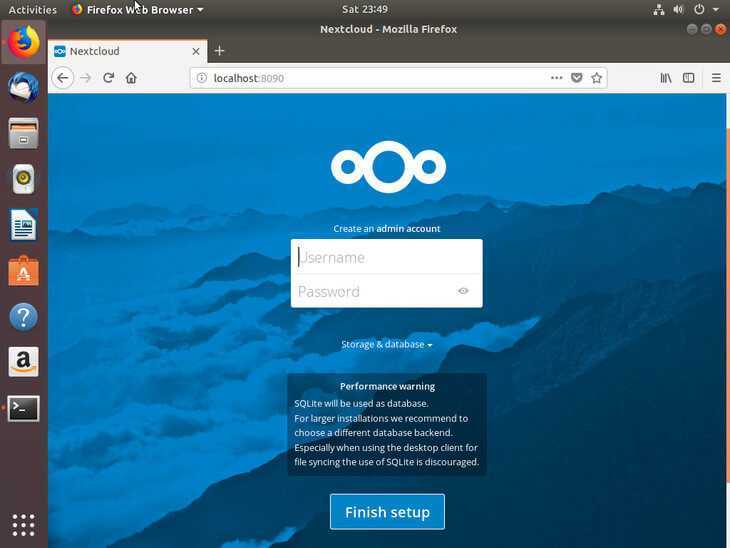
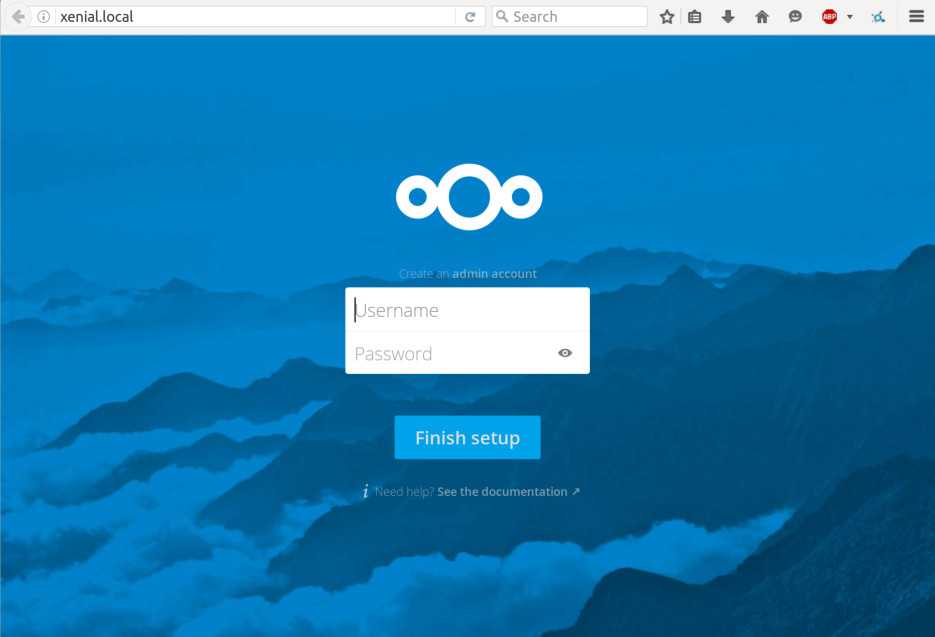
Now you can access the Nextcloud web install wizard in your web browser by entering the domain name for your Nextcloud installation.
nextcloud.example.com
If the web page can’t load, you probably need to open port 80 in firewall.
sudo iptables -I INPUT -p tcp --dport 80 -j ACCEPT
And port 443 as well.
sudo iptables -I INPUT -p tcp --dport 443 -j ACCEPT
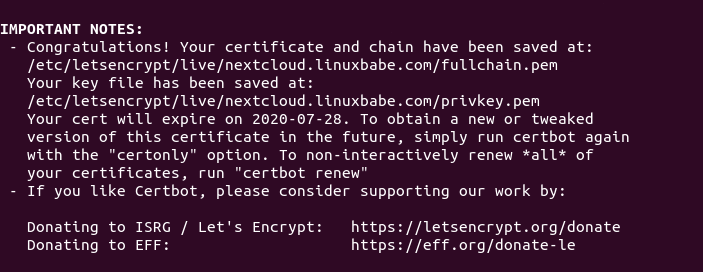
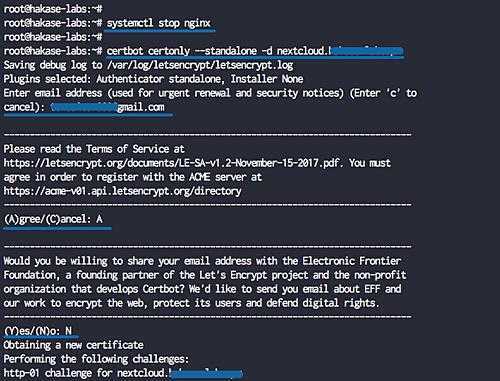
Before entering any sensitive information, we should enable secure HTTPS connection on Nextcloud. We can obtain a free TLS certificate from Let’s Encrypt. Install Let’s Encrypt client (certbot) from Ubuntu 20.04 repository.
sudo apt install certbot python3-certbot-nginx
is the Nginx plugin. Next, run the following command to obtain a free TLS certificate using the Nginx plugin.
sudo certbot --nginx --agree-tos --redirect --hsts --staple-ocsp --email -d nextcloud.example.com
Where:
- –nginx: Use the Nginx authenticator and installer
- –agree-tos: Agree to Let’s Encrypt terms of service
- –redirect: Enforce HTTPS by adding 301 redirect.
- –hsts: Enable HTTP Strict Transport Security. This defends against SSL/TLS stripping attack.
- –staple-ocsp: Enable OCSP Stapling.
- –email: Email used for registration and recovery contact.
- -d flag is followed by a list of domain names, separated by comma. You can add up to 100 domain names.
I found that Certbot may not be able to add HSTS header in the Nginx config file for Nextcloud. If you would like to enable HSTS (HTTP Strict Transport Security), then edit the file.
sudo nano /etc/nginx/conf.d/nextcloud.conf
We can then add the following line in the SSL server block to enable HSTS header. (If it’s already there, then your configuration are fine.)
add_header Strict-Transport-Security "max-age=31536000" always;
Also, you can enable HTTP2 protocol by adding the option , which will speed up webpage loading.
listen 443 ssl http2; # managed by Certbot
Like below.
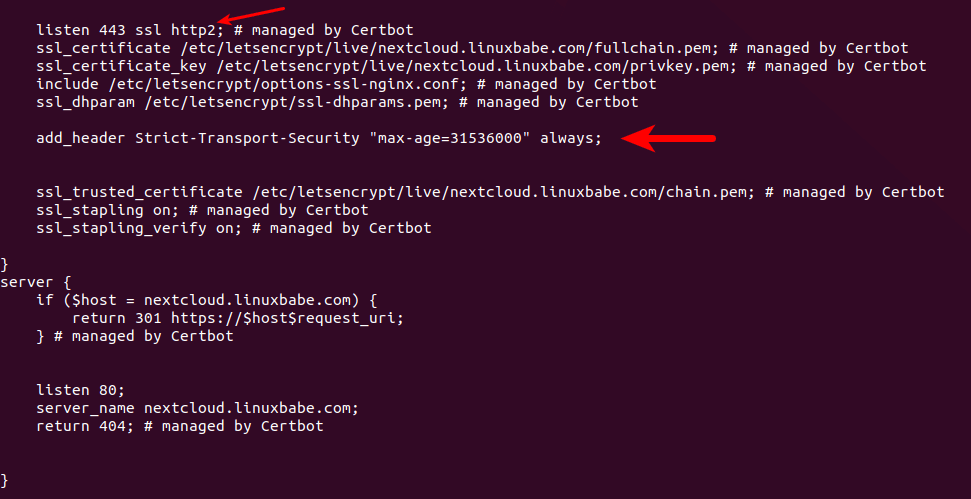
Save and close the file. Then text Nginx configurations.
sudo nginx -t
If the test is successful, reload Nginx for the change to take effect.
sudo systemctl reload nginx
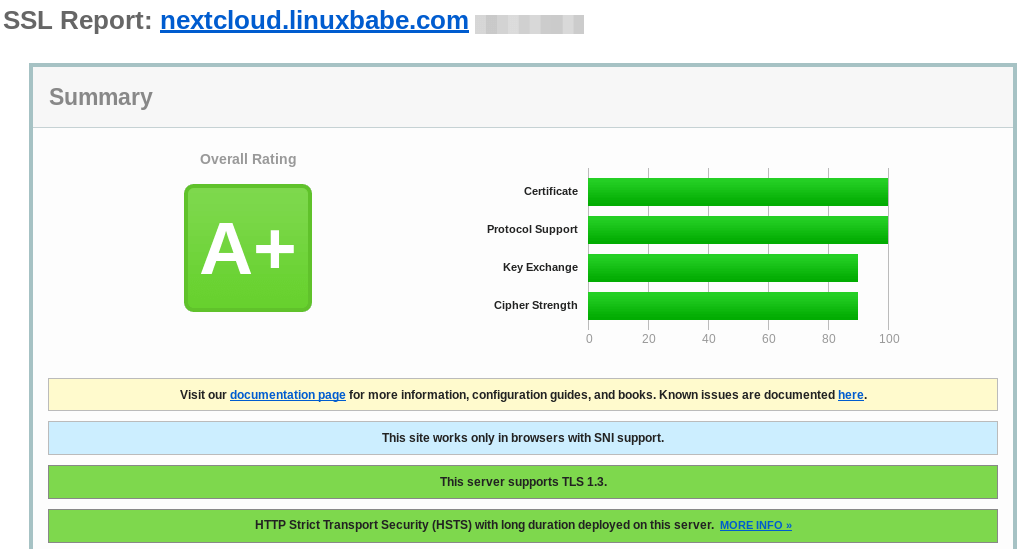
The above configuration will get A+ score on SSL test.
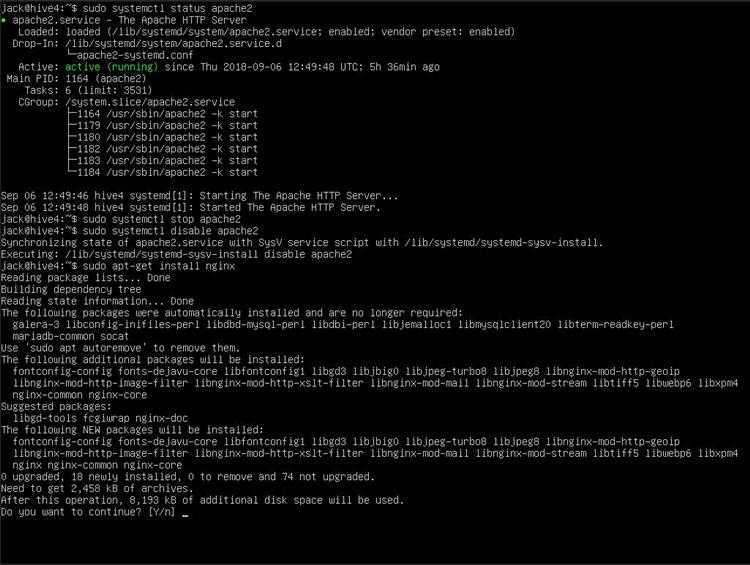
Шаг 4 — Управление процессом Nginx
Теперь, когда Nginx установлен и мы убедились в его работоспособности, ознакомимся с некоторыми базовыми командам для управления нашим веб-сервером.
Для остановки веб-сервера используйте команду:
Для запуска остановленного веб-сервера наберите:
Для перезапуска веб-сервера можно использовать следующую команду:
Если вы вносите изменения в конфигурацию Nginx, часто можно перезапустить его без закрытия соединений. Для этого можно использовать следующую команду:
По умолчанию Nginx настроен на автоматический старт при запуске сервера. Если такое поведение веб-сервера вам не нужно, вы можете отключить его следующей командой:
Для повторного включения запуска Nginx при старте сервера введите:
Step 2 — Removing Old and Insecure Cipher Suites
HTTP/2 has a of old and insecure ciphers, so we must avoid them. Cipher suites are cryptographic algorithms that describe how the transferred data should be encrypted.
The method you’ll use to define the ciphers depends on how you’ve configured your TLS/SSL certificates for Nginx.
If you used Certbot to obtain your certificates, it also created the file which contains ciphers which aren’t strong enough for HTTP/2. Modifying this file will unfortunately prevent Certbot from applying updates in the future, so we’ll just tell Nginx not to use this file and we’ll specify our own list of ciphers.
Open the server block configuration file for your domain:
Locate the line that includes the file and comment it out:
your_domain’>/etc/nginx/sites-available/your_domain
Below that line, add this line to define the allowed ciphers:
your_domain’>/etc/nginx/sites-available/your_domain
Save the file and exit the editor.
If you used self-signed certificates or used a certificate from a third party and configured it according to the prerequisites, open the file in your text editor:
Locate the following line:
/etc/nginx/snippets/ssl-params.conf
Modify it so it looks like this:
/etc/nginx/snippets/ssl-params.conf
Save the file and exit your editor.
Once again, check the configuration for syntax errors:
If you see any errors, address them and test again.
Once you see no syntax errors, restart Nginx:
With the server restarted, let’s verify that it works.
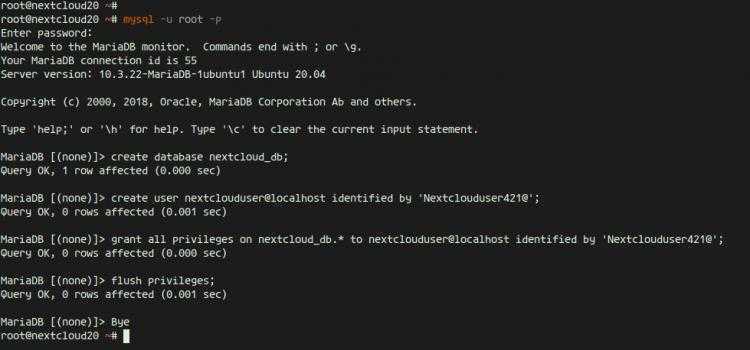
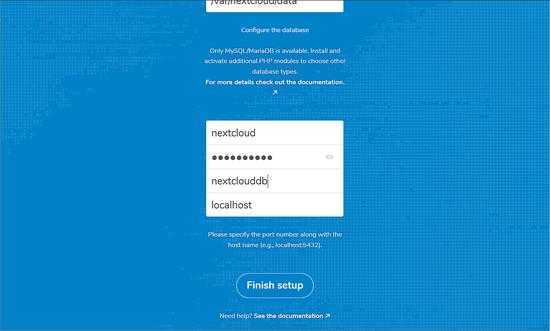
Step 2: Create a Database and User for Nextcloud in MariaDB Database Server
Log into MariaDB database server with the following command. Since MariaDB is now using plugin to authentication user login, there’s no need to enter MariaDB root password. We just need to prefix the command with .
![Установка nginx в ubuntu 20.04 [краткое руководство] | digitalocean](https://smartshop124.ru/wp-content/uploads/6/a/0/6a0001f7b86a0192476b247a00ce79c5.jpeg)


sudo mysql
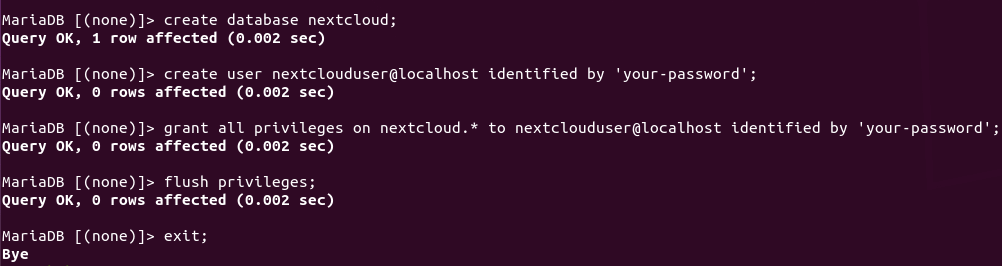
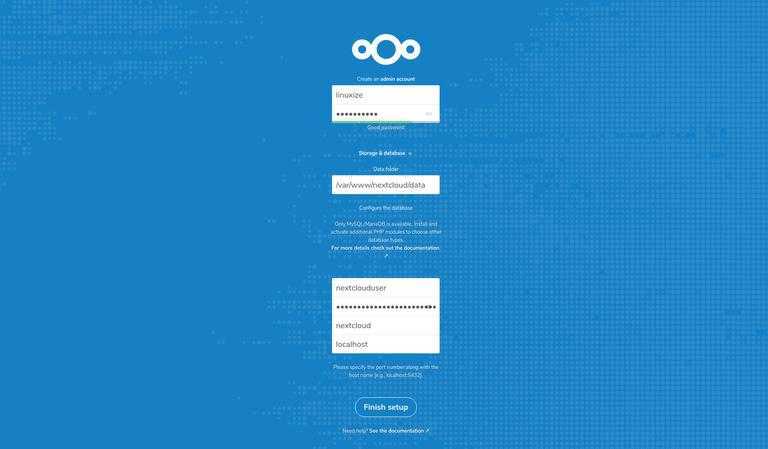
Then create a database for Nextcloud. This tutorial name the database nextcloud. You can use whatever name you like.
create database nextcloud;
Create the database user. Again, you can use your preferred name for this user. Replace with your preferred password.
create user nextclouduser@localhost identified by 'your-password';
Grant this user all privileges on the database.
grant all privileges on nextcloud.* to nextclouduser@localhost identified by 'your-password';
Flush privileges and exit.
flush privileges;

exit;
Step 3: Install PHP for Processing
We now have Nginx installed to serve our pages and MySQL installed to store and manage our data. However, we still don’t have anything that can generate dynamic content. We can use PHP for this.
Since Nginx does not contain native PHP processing like some other web servers, we will need to install , which stands for “fastCGI process manager”. We will tell Nginx to pass PHP requests to this software for processing.
We can install this module and will also grab an additional helper package that will allow PHP to communicate with our database backend. The installation will pull in the necessary PHP core files. Do this by typing:
Configure the PHP Processor
We now have our PHP components installed, but we need to make a slight configuration change to make our setup more secure.
Open the main configuration file with root privileges:
What we are looking for in this file is the parameter that sets . This will be commented out with a semi-colon (;) and set to “1” by default.
This is an extremely insecure setting because it tells PHP to attempt to execute the closest file it can find if the requested PHP file cannot be found. This basically would allow users to craft PHP requests in a way that would allow them to execute scripts that they shouldn’t be allowed to execute.
We will change both of these conditions by uncommenting the line and setting it to “0” like this:
/etc/php/7.0/fpm/php.ini
Save and close the file when you are finished.
Now, we just need to restart our PHP processor by typing:
This will implement the change that we made.
Шаг 6 — Тестирование подключения к базе данных для PHP (необязательно)
Если вы хотите проверить, может ли PHP подключаться к MySQL и выполнять запросы для базы данных, вы можете создать тестовую таблицу с шаблонными данными и запрашивать ее содержимое из скрипта PHP. Прежде чем сделать это, нам нужно создать тестовую базу данных и нового пользователя MySQL с правильной настройкой для доступа к ней.
На момент написания этого руководства родная библиотека MySQL PHP не поддерживает , метод аутентификации по умолчанию для MySQL 8. Мы должны создать нового пользователя с помощью метода аутентификации для подключения к базе данных MySQL из PHP.
Мы создадим базу данных с именем example_database и пользователя с именем example_user, но вы можете использовать и другие имена.
Вначале необходимо подключиться к консоли MySQL с помощью учетной записи root:
Чтобы создать новую базу данных, запустите следующую команду в консоли MySQL:
Теперь вы можете создать нового пользователя и предоставить ему полный набор прав для только что созданной вами базы данных.
Следующая команда создает нового пользователя с именем , используя в качестве метода аутентификации по умолчанию. Следующая команда определяет пароль этого пользователя как , но вы можете заменить его на безопасный пароль по вашему выбору.
Теперь нам нужно предоставить этому пользователю разрешение для базы данных :
В результате пользователь example_user получит полный набор привилегий для базы данных example_database, но не будет обладать возможностью создания или изменения других баз данных на сервере.
Теперь закройте оболочку MySQL:
Вы можете проверить наличие у нового пользователя необходимых разрешений, выполнив повторный вход в консоль MySQL, на этот раз используя учетные данные вашего собственного пользователя:
Обратите внимание на флаг в этой команде, который будет запрашивать пароль, который вы задаете при создании пользователя example_user. После входа в консоль MySQL убедитесь, что у вас есть доступ к базе данных example_database:. Результат будет выглядеть следующим образом:
Результат будет выглядеть следующим образом:
Далее мы создадим тестовую таблицу с именем todo_list. Из консоли MySQL запустите следующее выражение:
Теперь добавьте несколько строк содержимого в тестовую таблицу. Возможно, вам потребуется несколько раз повторить следующую команду, используя разные значения:
Чтобы подтвердить, что данные были успешно сохранены в таблицу, запустите следующую команду:
Вывод должен выглядеть так:
Убедившись в том, что у вас есть надлежащие данные в тестовой таблице, вы можете закрыть консоль MySQL:
Теперь вы можете создать скрипт PHP, который будет подключаться к MySQL и запрашивать ваше содержимое. Создайте новый файл PHP в пользовательской корневой веб-директории в предпочитаемом вами редакторе. Мы будем использовать :

Следующий скрипт PHP подключается к базе данных MySQL и запросам по содержимому таблицы todo_list, выводя результаты в список. Если существует проблема подключения к базе данных, будет выдана ошибка. Скопируйте это содержимое в скрипт :
/var/www/your_domain/todo_list.php
Сохраните и закройте файл после завершения редактирования.
Теперь вы можете получить доступ к этой странице в веб-браузере, посетив доменное имя или публичный IP-адрес, настроенный для вашего веб-сайта, добавив в конце:
Вы должны увидеть примерно следующую страницу, отображающую содержимое, которое вы добавили в тестовую таблицу:

Это означает, что ваша среда PHP готова к подключению и взаимодействию с вашим сервером MySQL.
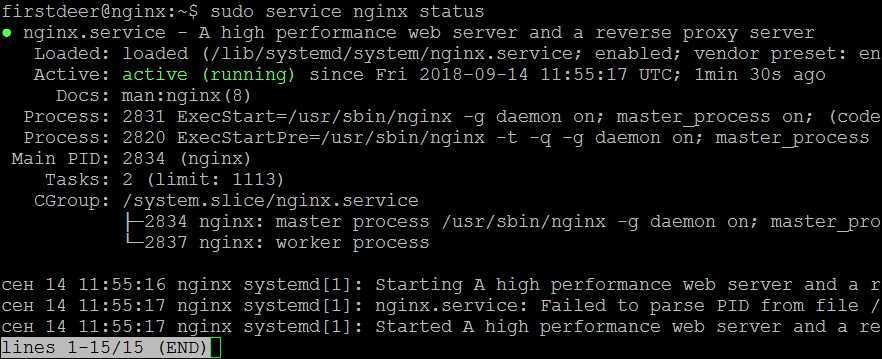
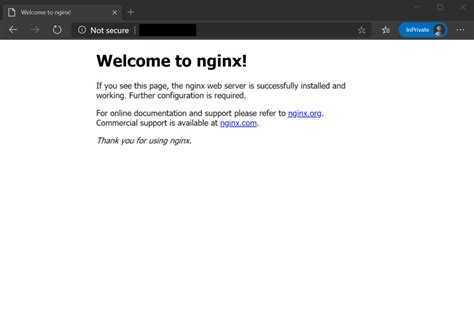
Шаг 3 — Проверка работы веб-сервера
После завершения процесса установки Ubuntu 18.04 запустит Nginx автоматически. Таким образом веб-сервер уже должен быть запущен.
Мы можем убедиться в этом выполнив следующую команду:
Как видно из вывода выше, сервис запущен и работает. Тем не менее, убедимся в его полной работоспособности путём запроса веб-страницы.
Для этого мы можем проверить, отображается ли веб-страница Nginx, доступная по умолчанию при вводе доменного имени или IP адреса сервера. Если вы не знаете публичного IP адреса сервера, вы можете найти этот IP адрес несколькими способами.
Попробуйте набрать эту команду в терминале вашего сервера:
В результате будет выведено несколько IP адресов. Попробуйте вставить каждый из них в браузер.
Другим способом определить свой IP адрес будет проверка, как ваш сервер виден из Интернета:
Наберите полученный IP адрес или доменное имя в вашем веб-браузере.
Вы должны увидеть страницу Nginx по умолчанию.
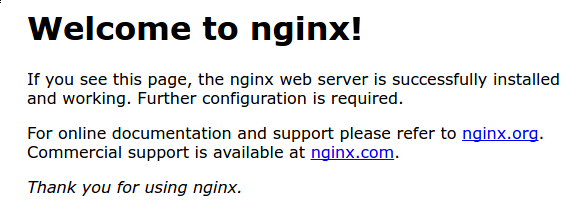
Если вы видите подобную страницу в своём браузере, вы успешно установили Nginx.
1: Установка Nginx
Пакет Nginx доступен в стандартном репозитории системы Ubuntu.
Поскольку это первое взаимодействие с системой пакетирования apt в текущей сессии, нужно обновить индекс пакетов. После этого можно установить Nginx.
После этого пакетный менеджер установит веб-сервер и все его зависимости.
2: Настройка брандмауэра
Прежде чем запустить Nginx, нужно настроить брандмауэр для поддержки трафика этого сервиса. Во время установки Nginx регистрируется как сервис в ufw, потому разрешить трафик веб-сервера очень просто.
Откройте список профилей ufw:
Как видите, в списке есть три профиля Nginx:
- Nginx Full: этот профиль открывает порт 80 (незашифрованный сетевой трафик) и 443 (зашифрованный трафик TLS/SSL).
- Nginx HTTP: профиль для незашифрованного трафика HTTP на порт 80.
- Nginx HTTPS: профиль для зашифрованного трафика TLS/SSL на порт 443.
Рекомендуется выбрать наиболее строгий профиль веб-сервера. Однако, поскольку на сервере ещё не настроен SSL, мы можем настроить только порт 80.
Чтобы включить профиль, введите:
Убедитесь в том, что профиль включен:
Команда должна сообщить, что трафик HTTP разрешен:
Step 4 — Enabling HTTP Strict Transport Security (HSTS)
Even though your HTTP requests redirect to HTTPS, you can enable HTTP Strict Transport Security (HSTS) to avoid having to do those redirects. If the browser finds an HSTS header, it will not try to connect to the server via regular HTTP again for a given time period. No matter what, it will exchange data using only encrypted HTTPS connection. This header also protects us from protocol downgrade attacks.

Open the Nginx configuration file in your editor:
Add this line to the file to enable HSTS:
/etc/nginx/nginx.conf
The is set in seconds. The value is equivalent to 6 months.
By default, this header is not added to subdomain requests. If you have subdomains and want HSTS to apply to all of them, you should add the variable at the end of the line, like this:
/etc/nginx/nginx.conf
Save the file, and exit the editor.
Once again, check the configuration for syntax errors:
Finally, restart the Nginx server to apply the changes.
Создание настроек для нескольких сайтов
После настройки основного сайта рекомендуем Вам составить список сайтов и определить, какой сайт должен открываться по IP-адресу сервера (если он один). Затем в директории /etc/nginx/sites-available создать файлы с сайтами, заполнить их настройками и сохранить их. Так как сервер учитывает только настройки из директории /etc/nginx/sites-enabled, то необходимо создать символическую ссылку на файл:
$ ln -s /etc/nginx/sites-available/имя_сайта
/etc/nginx/sites-enabled/имя_сайта
Это позволит Вам отключать сайт на время без удаления его конфигурационного файла. Проверить конфигурацию NGINXпосле работ можно командой:
$ sudo nginx -t
Если вывод содержит «syntax is ok» и «test is successful», то можно применить настройки, написав команду:
$ sudo service nginx reload


