
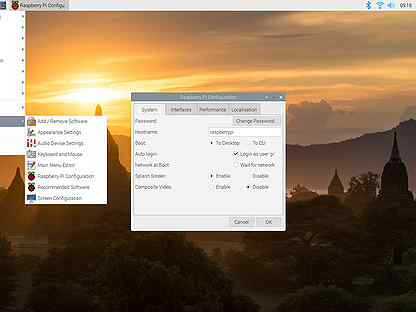
Настройте Ubuntu MATE
Безопасно извлеките карту microSD из компьютера, затем вставьте ее в Raspberry Pi.
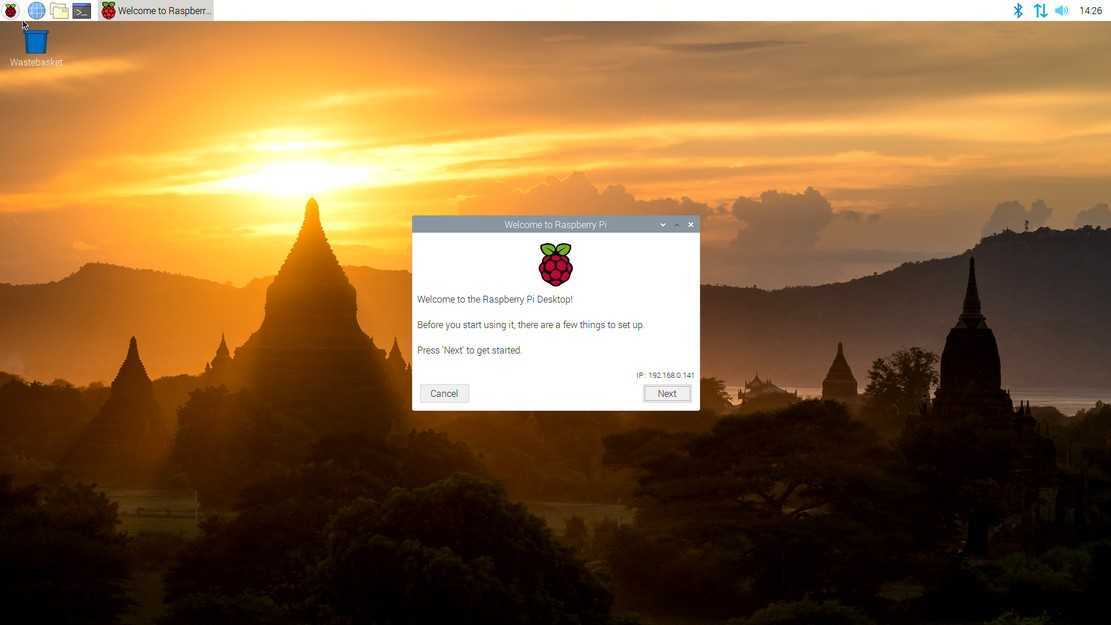
Затем подключите кабель питания, клавиатуру, мышь и монитор к Raspberry Pi. Начнется установка Ubuntu MATE. Эти экраны настройки говорят сами за себя и будут вам знакомы, если вы уже использовали Ubuntu.
Выберите свой язык, сеть Wi-Fi и местоположение. Затем Ubuntu MATE попросит вас установить имя пользователя и пароль. Обязательно запишите их в безопасном месте, прежде чем продолжить.
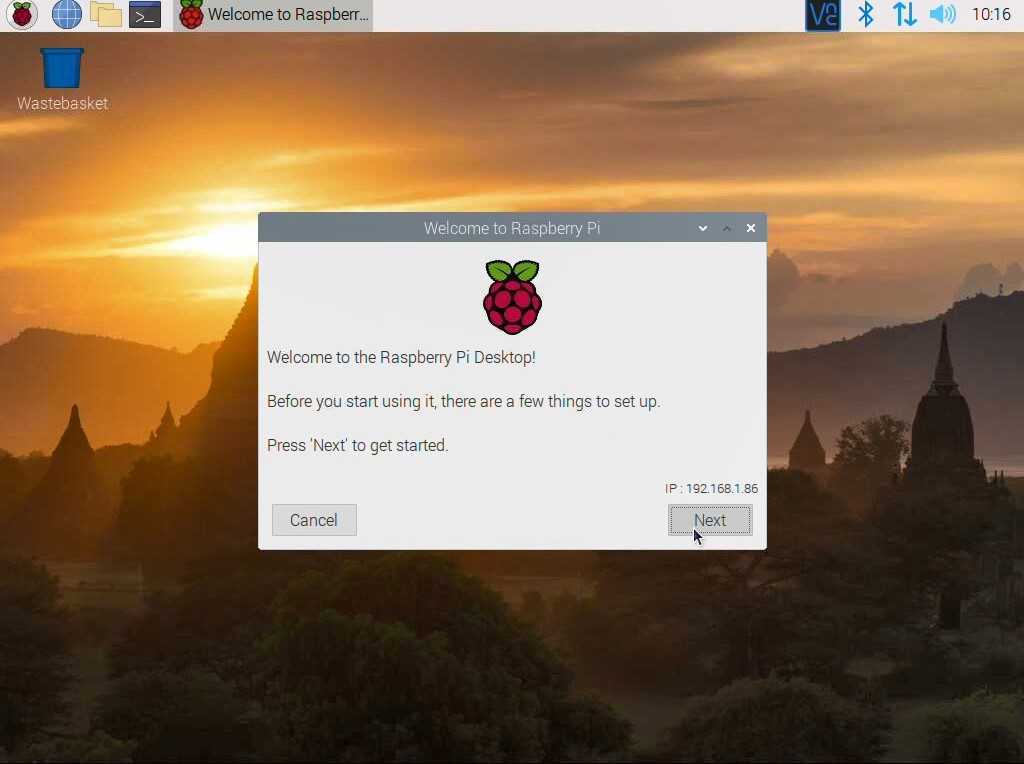
После завершения установки загрузится рабочий стол Ubuntu MATE. ОС отобразит приветственное сообщение и предложит вам обзор возможностей Ubuntu. Убедитесь, что прошли через это, если вы раньше не использовали рабочую среду MATE.
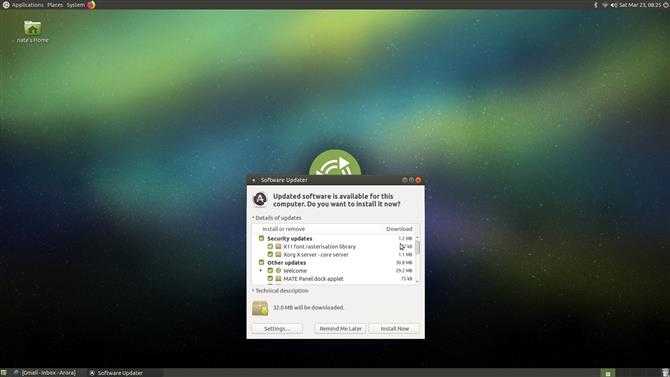
Убедитесь, что вы обновили Ubuntu MATE для последних приложений и патчей
Какую версию Ubuntu выбрать?
Пользователи Linux и, в частности, Ubuntu знают, что существует несколько версий этой системы. Они отличаются друг от друга окружением рабочего стола.
Устанавливать на Raspberry Pi Ubuntu следует такую, которая отличается небольшим потреблением ресурсов. К ним относятся:
- Ubuntu MATE;
- Xubuntu;
- Lubuntu.
Выбрать можно любую, исходя из предпочтений. Принцип их установки во всех случаях практически идентичен. Поэтому можно рассмотреть его на примере версии MATE – системы, в которой в качестве графической оболочки используется форк Gnome 2.
Причина, по которой не стоит устанавливать обычную Ubuntu на Raspberry Pi заключается в том, что она достаточно тяжелая. В 2017-м году Canonical перешла на GNOME 3, а он по минимуму требует 1 гигабайт ОЗУ, и даже при наличии такого объема работать с системой не очень комфортно.
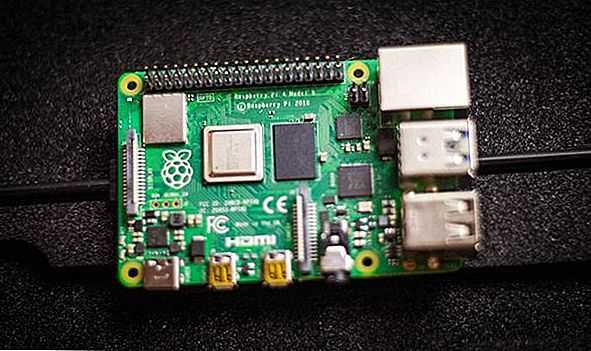
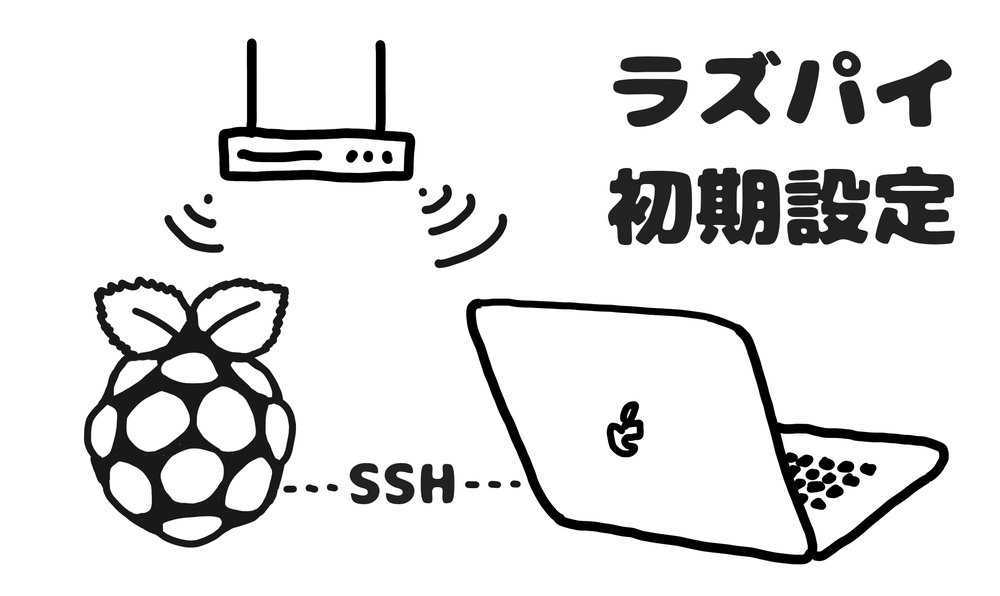
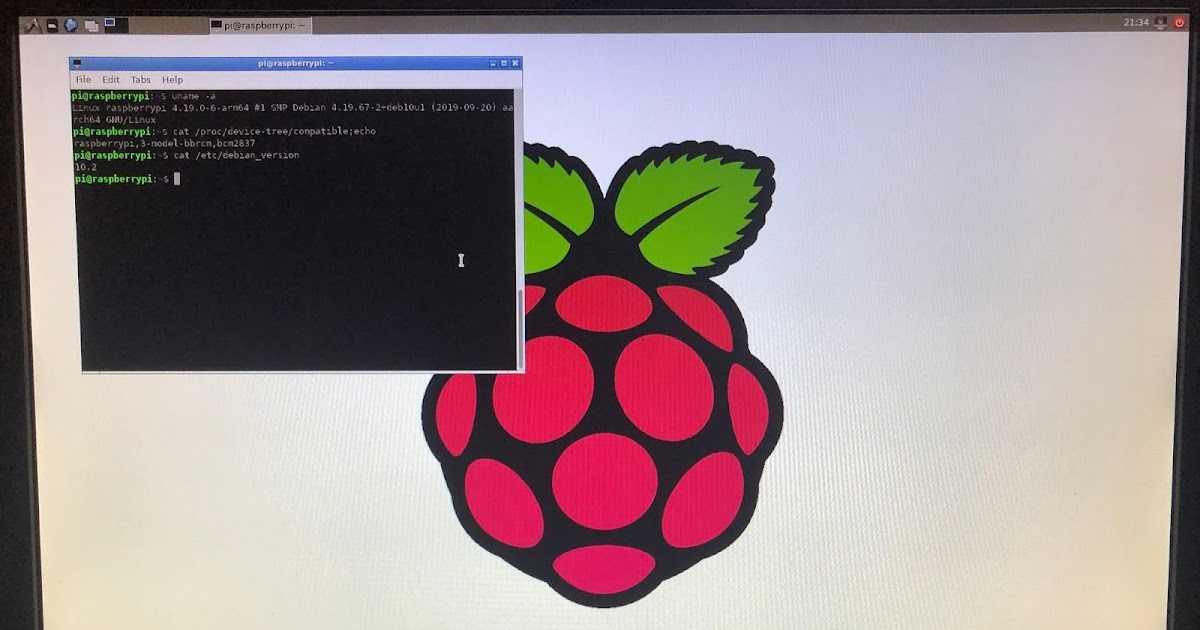
First ssh connection to the Raspberry Pi 4
Connect to the Pi wish ssh
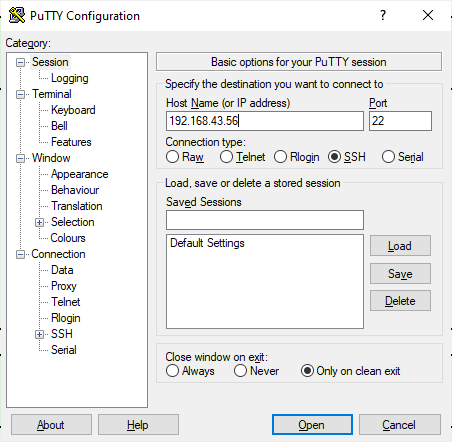
If you’re on Windows (older than Windows 10 with October 2018 update), use a program such as Putty.
Put the IP address of the Pi and click on “Open”.
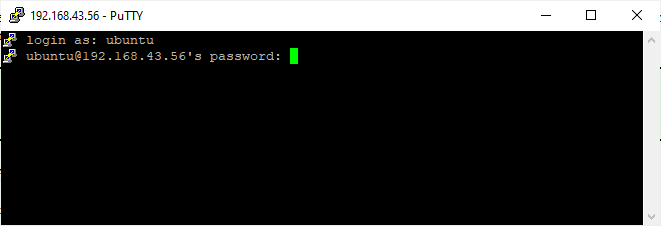
You’ll be asked to give username and password. Simply use “ubuntu” twice.
If you’re on Linux (or Windows 10 recently updated), simply connect to the Pi from a terminal, with the ssh command line tool: , and use “ubuntu” for the password.
Password change
The first time you connect to your Pi, you will be asked to change the default password (“ubuntu”).
Once done, the connection will be closed.
$ ssh ubuntu@192.168.43.57
The authenticity of host '192.168.43.57 (192.168.43.57)' can't be established.
ECDSA key fingerprint is SHA256:rNDFgb1H2GiIhNPJ7oYI5963+/vbob2HOY1W4FakG/0.
Are you sure you want to continue connecting (yes/no/)? yes
Warning: Permanently added '192.168.43.57' (ECDSA) to the list of known hosts.
ubuntu@192.168.43.57's password:
You are required to change your password immediately (administrator enforced)
Welcome to Ubuntu 20.04 LTS (GNU/Linux 5.4.0-1008-raspi aarch64)

 * Documentation:  https://help.ubuntu.com
 * Management:     https://landscape.canonical.com
 * Support:        https://ubuntu.com/advantage

  System information as of Wed Apr  1 17:26:14 UTC 2020

  System load:  0.1               Temperature:            57.9 C
  Usage of /:   6.1% of 28.95GB   Processes:              133
  Memory usage: 13%               Users logged in:        0
  Swap usage:   0%                IPv4 address for wlan0: 192.168.43.57

0 updates can be installed immediately.
0 of these updates are security updates.


The programs included with the Ubuntu system are free software;
the exact distribution terms for each program are described in the
individual files in /usr/share/doc/*/copyright.

Ubuntu comes with ABSOLUTELY NO WARRANTY, to the extent permitted by
applicable law.

WARNING: Your password has expired.
You must change your password now and login again!
Changing password for ubuntu.
Current password:
New password:
Retype new password:
passwd: password updated successfully
Connection to 192.168.43.57 closed.
Now, you can connect to your Pi again, using “ubuntu” as the username, and the new password you’ve just set.
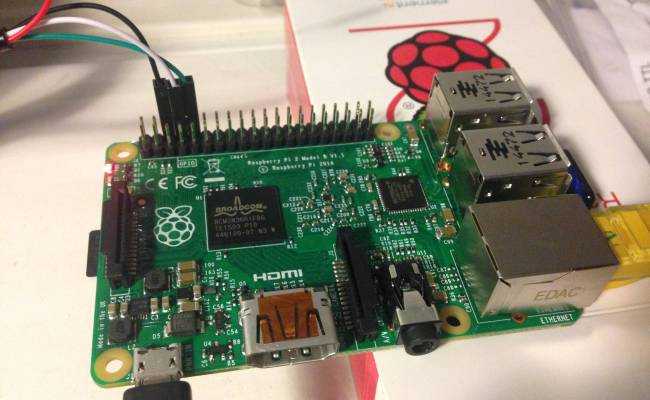
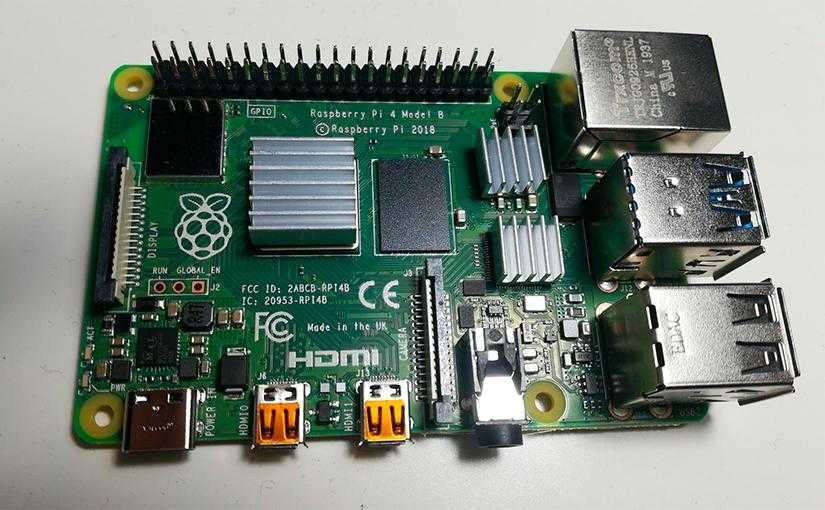
Особенности покупки Raspberry Pi
Если вы собираетесь купить этот одноплатный компьютер, учтите следующие особенности:
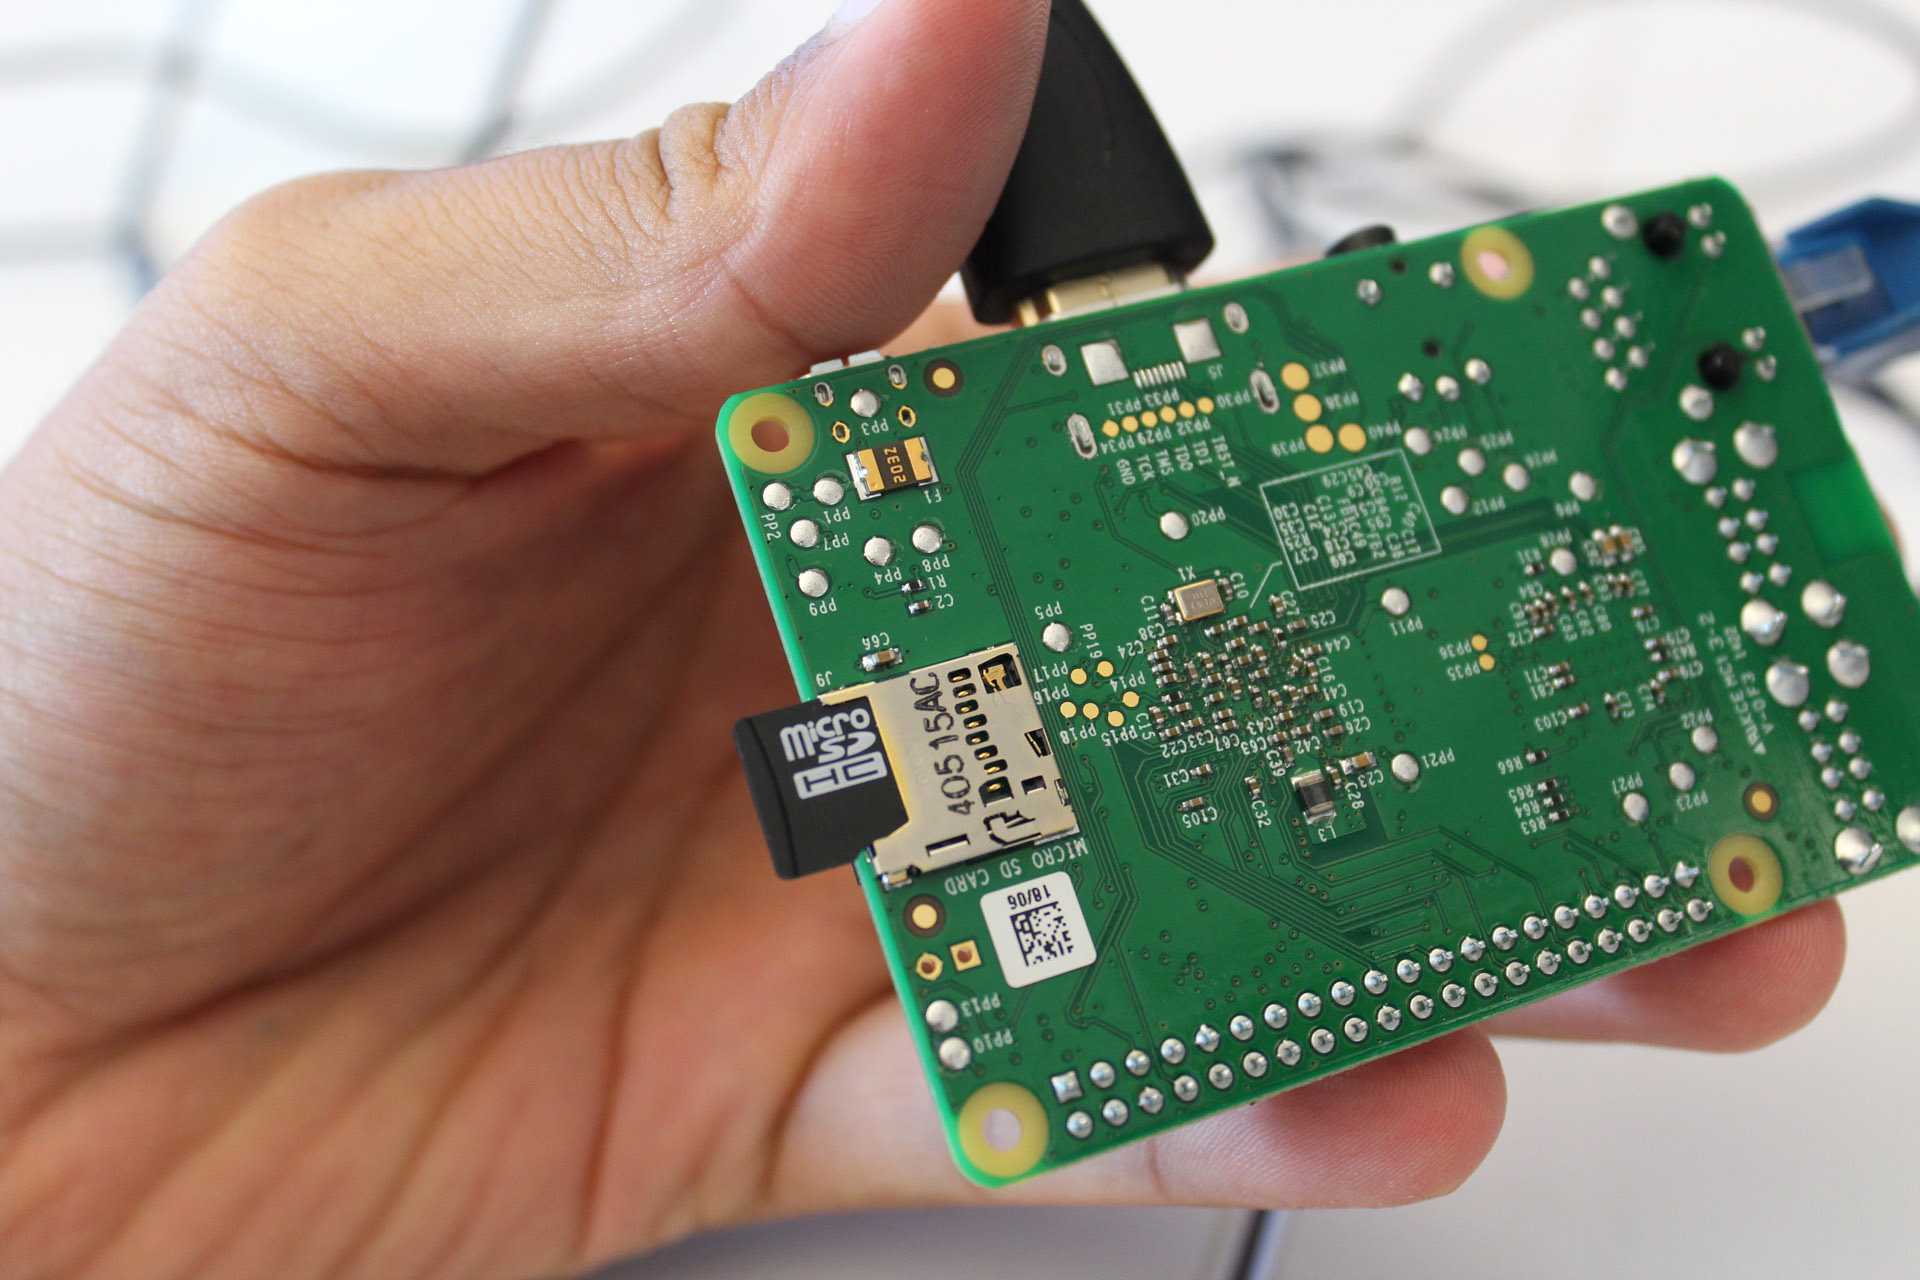
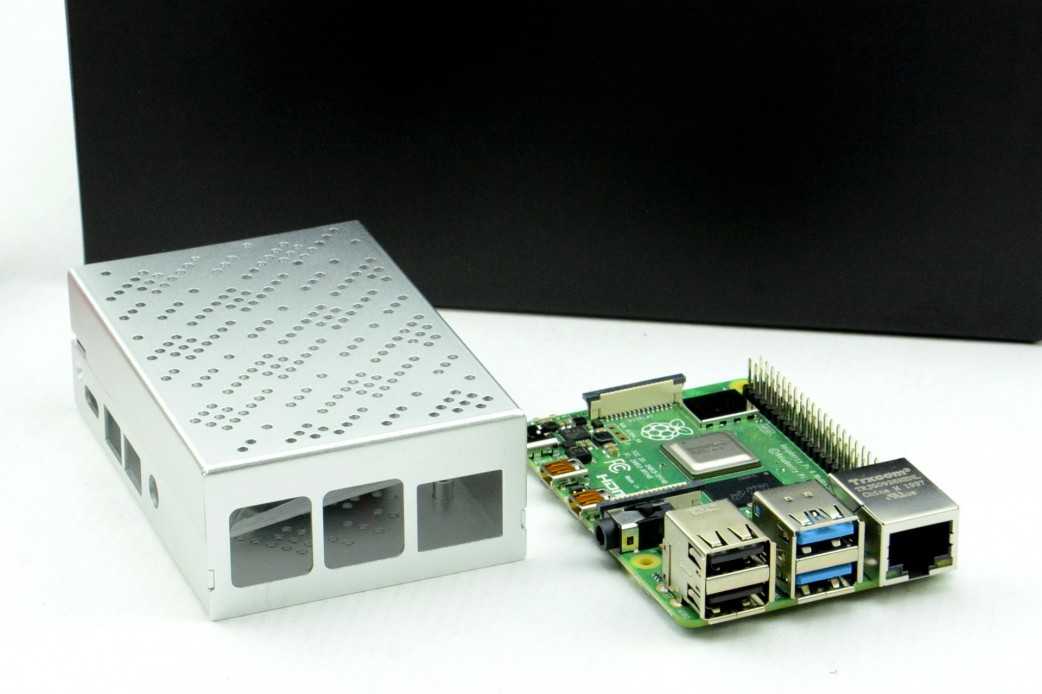
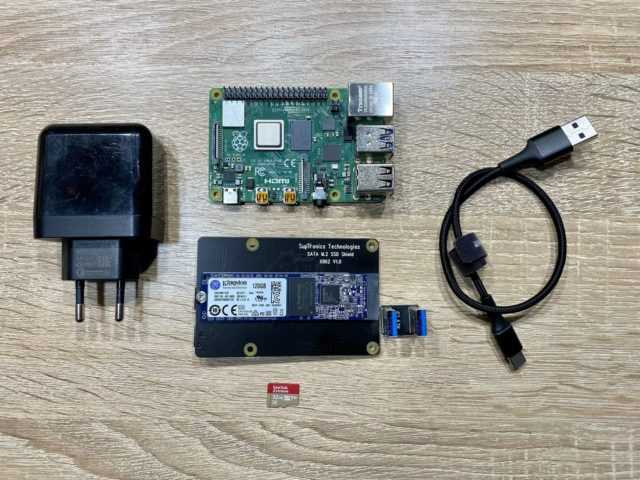
Карта памяти microSD
Raspberry Pi, кроме разновидности Compute Module, не имеет встроенной постоянной (флеш) памяти. В этой памяти будет размещен образ операционной системы, прикладное программное обеспечение, а также данные, необходимые для их работы. Поэтому необходимо будет купить также карту памяти microSD. Емкости 4 ГБайт достаточно для простейших применений, но мы советуем использовать карту размером от 8 ГБайт.
Источник питания
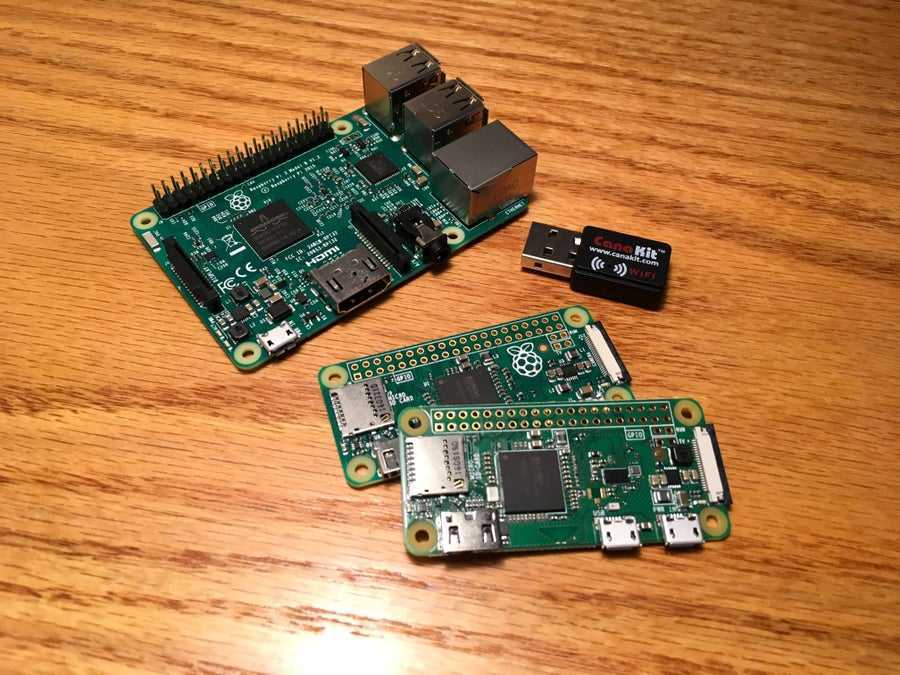
Raspberry Pi продается без источника питания. Источник питания должен быть оснащен разъемом micro-USB, как у источников питания современных сотовых телефонов. Однако нужно учитывать, что не каждая зарядка для телефона подойдет для питания Raspberry Pi. Например, для питания Raspberry Pi 3 model B изготовитель советует использовать источник питания от надежного производителя, рассчитанный на ток до 2,5А. Для разновидности Zero можно использовать более слабый источник. Учитывайте, что многое зависит от количества и мощности подключенных USB-устройств и плат расширения, а также от того, используется ли беспроводная передача данных по Wi-Fi или Bluetooth.
Корпус
Raspberry Pi продается без корпуса. В ряде случаев корпус вам не нужен, если вы собираетесь встроить этот одноплатный компьютер в какое-либо изделие, имеющее собственный корпус. Можно также сделать корпус самостоятельно из подручных предметов, или даже напечатать его на 3D-принтере — в Сети вы найдете множество готовых 3D-моделей корпусов для «малинки». 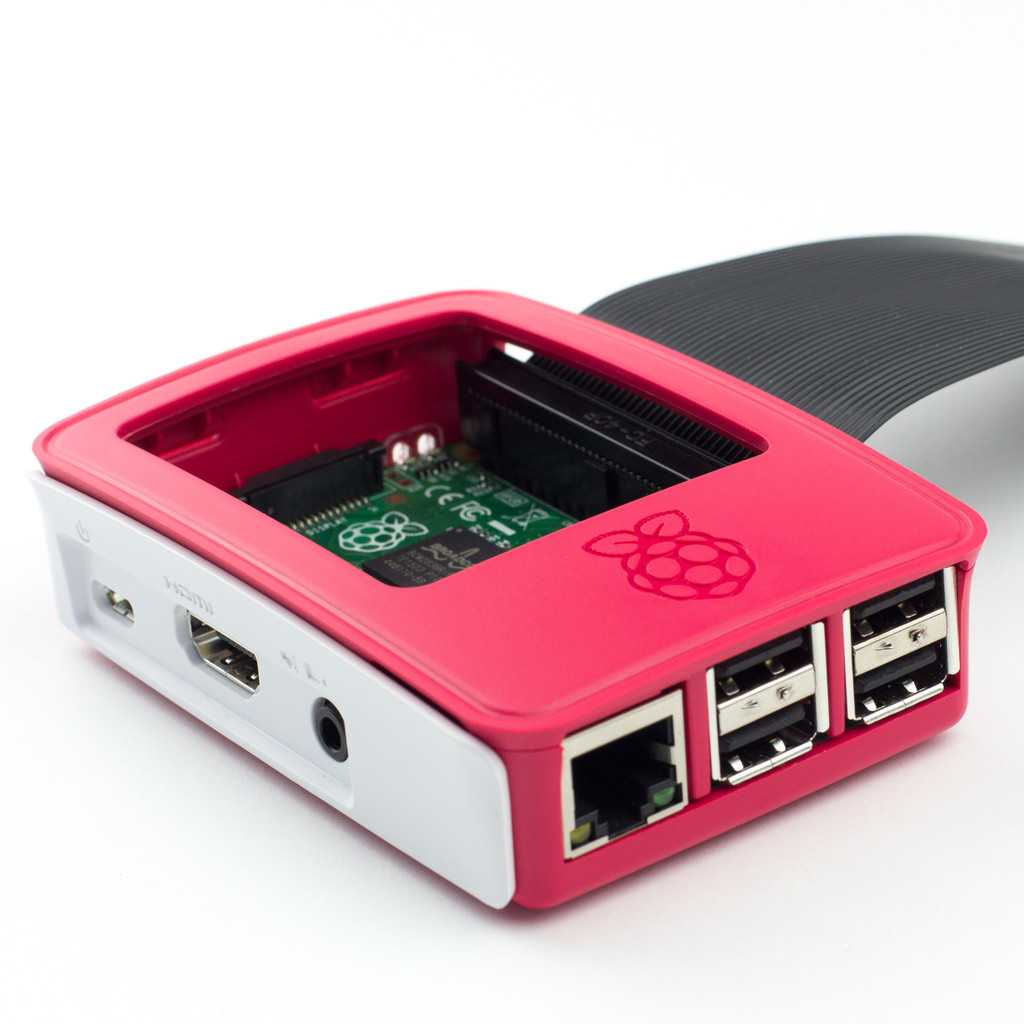 Если же ваш случай не относится к перечисленным выше, то купите вместе с Raspberry Pi корпус. Учтите, что корпус для разновидности Zero не подойдет для Raspberry Pi 3 model B. Обратное может быть как верным, так и нет — читайте внимательно описания. Также при выборе корпуса учитывайте:
- будете ли вы подключать платы расширения: это влияет на высоту корпуса;
- будете ли вы подключать камеру: есть корпуса, где уже предусмотрено место для установки камеры;
- будете ли вы подключать экран: есть корпуса, где уже предусмотрено место для установки экрана;
- будете ли вы подключать к разъему ввода-вывода общего назначения (GPIO) Raspberry Pi какие-либо устройства, расположенные вне корпуса, например, датчики, светодиоды, кнопки, экраны и т.п.: есть корпуса с прорезями для проводов, идущих к разъему GPIO.
Часы реального времени
Raspberry Pi не имеет встроенных часов реального времени. Это означает, что после каждого выключения питания часы останавливаются. Для некоторых применений Raspberry Pi это не имеет значения. В случае, если для вашего случая точное время на компьютере является необходимым, рассмотрите следующие возможности:
- каждый раз после включения устанавливать время вручную. Это самый неудобный способ;
- настроить постоянное подключение Raspberry Pi к сети интернет по Wi-Fi, Ethernet, 2G/3G/4G GSM-модему или Bluetooth. В этом случае через несколько минут после запуска Raspberry Pi и установления соединения с сетью интернет произойдет автоматическая установка часов в правильное значение;
- купить и установить особую плату расширения, например, RasClock, на которой расположены часы реального времени и батарейка;
- купить и установить особую плату расширения, например, UPS Pico, которая будет работать как источник бесперебойного питания для вашего Raspberry Pi. К такой плате подключается аккумуляторная батарея, которая будет питать ваш встраиваемый компьютер в то время, пока будет недоступно электричество от сетевого источника питания.
Raspberry Pi как домашний или рабочий компьютер
Если вы хотите купить Raspberry Pi для использования в качестве рабочего или домашнего компьютера, вам также понадобятся:
- клавиатура с подключением через USB или Bluetooth;
- мышь с подключением через USB или Bluetooth;
- монитор или телевизор с подключением по HDMI или DVI, в последнем случае вам потребуется также переходник с HDMI на DVI.
Дополнительные принадлежности
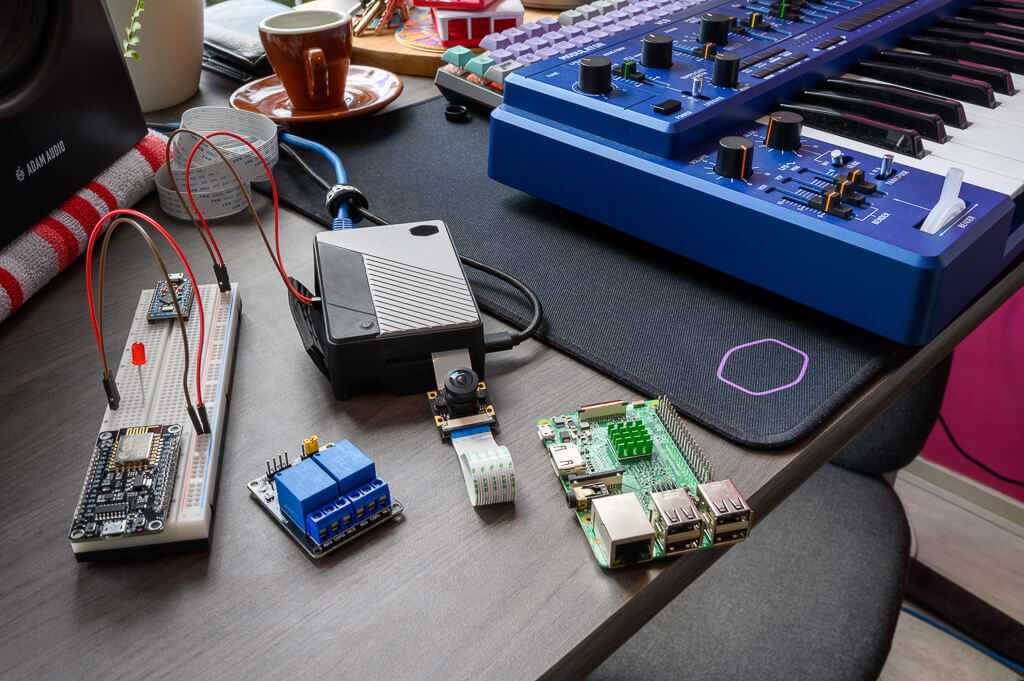
Как правило, в магазинах, где можно купить Raspberry Pi, продаются также различные дополнительные устройства и принадлежности: платы расширения, датчики, камеры, экраны, соединительные провода, перемычки и т.п. Не забудьте купить эти принадлежности вместе с Raspberry Pi.
Настраивать
Зарегистрироваться
Для использования Ubuntu Core требуется учетная запись SSO. Перейдите на эту страницу и зарегистрируйтесь. Вход в Ubuntu Snappy Core с вашей учетной записью привяжет и зарегистрирует вашу учетную запись на Pi.
Импортировать ключ SSH
После регистрации учетной записи в Ubuntu следующим шагом будет импорт ключа SSH, чтобы при входе в Ubuntu Core SSH работал правильно. Если у вас уже есть открытый ключ SSH (находится в ~ / .ssh и заканчивается на .pub), вставьте его содержимое в эта страница здесь.
В противном случае прочтите наше руководство по созданию ключей SSH. Следуйте только той части статьи, которая посвящена генерации ключей. Игнорируйте раздел, в котором рассказывается, как импортировать ключ. Вместо этого скопируйте содержимое id_rsa.pub, расположенного в ~ / .ssh, на страница Ubuntu.
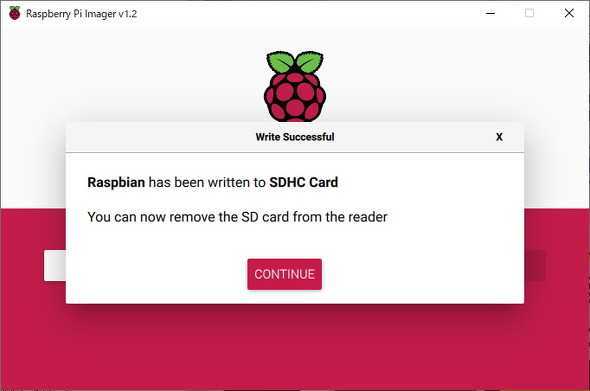
Создать установочный носитель
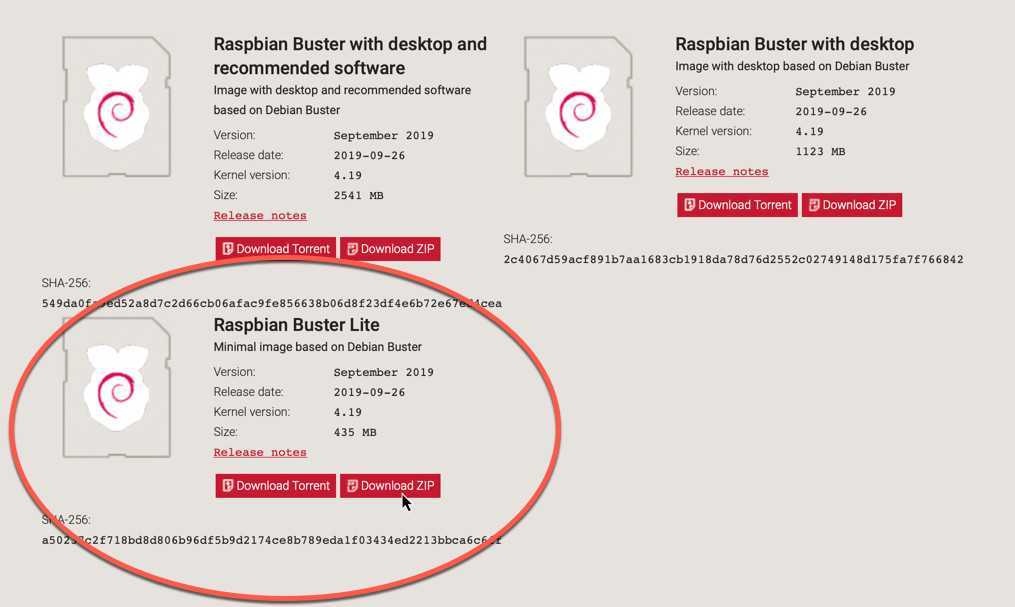
Когда вы импортировали свой открытый ключ SSH, следующим шагом будет создание установочного носителя. Загрузите последнюю версию Ubuntu Core для Raspberry Pi 2 или же Raspberry Pi 3. Затем подключите карту Micro SD к компьютеру.
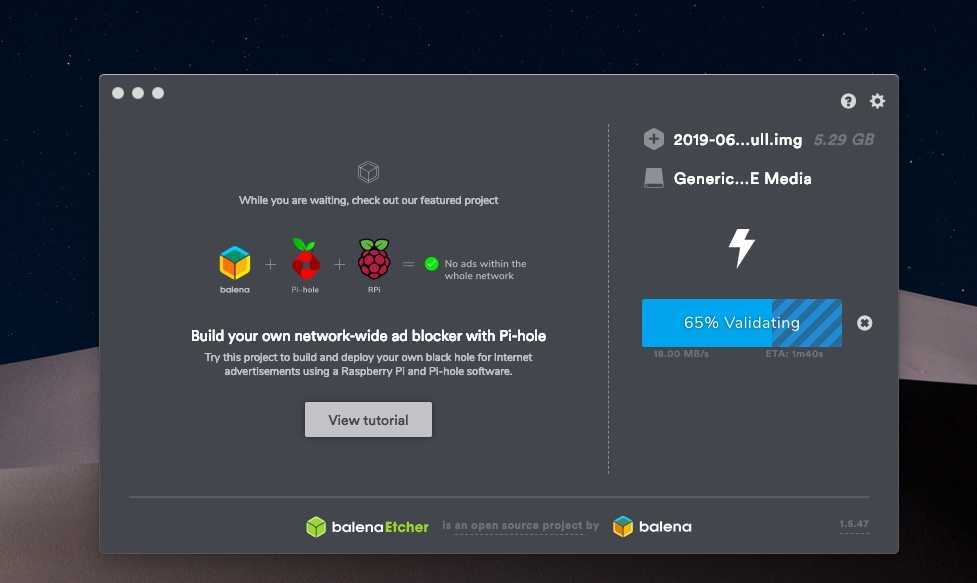
Запишите установочный носитель с помощью Etcher.
Extract the Ubuntu image
You’ll need a decompression utility like The Unarchiver for macOS or 7-Zip for Windows 10. The Unarchiver is available free from the App Store to extract the .xz file.
Once the utility is installed, simply double-click the file in your downloads to extract the image (.img) file.
For Windows, go to the to install the application. Click on ‘Download’, choose ‘Save’. Go to ‘Downloads’ in File Explorer. Double click on the ‘7-Zip’ file. Choose ‘Install’.
Once the installation is complete, right-click on the Ubuntu MATE file. Select ‘7-Zip’. Choose ‘Extract Files’ and then click ‘Ok’. The file will now be extracted.
You’ll need to format your microSD card so it uses the FAT32 filesystem
Booting and installation
Before booting the installer it’s worth taking a bit of time to plan how you want the system to work. The installed system could use the linux-raspi2 kernel with flash-kernel (recommended), or the generic kernel with grub2. These require different partition mount points, and possibly the use of boot parameters.
The installer partitioner wants to create by default a GPT partition table which is unbootable on the Pi. To change this to a MBR/msdos partition table you can use the boot parameter:
partman-partitioning/default_label=msdos
Once you are ready, insert the device containing the bootloader files (plus the dd’d USB flash drive if that’s what you’ve done) into the Raspberry Pi and power on! Make your selection at the grub2 menu, adding any installer boot parameters before the ‘ — ‘ as necessary. Note, once you’ve made your selection via the grub menu, there can be a long blank screen interval before the installer shows on the screen.
Linux-raspi2 kernel with flash-kernel
To use flash-kernel use the boot parameter:
grub-installer/skip=true
At the partitioning stage, the pi’s fat partition should be given the mount point /boot/firmware.
Currently the installer cannot be made to install linux-raspi2 kernel. As a consequence the installer is likely to fail at the installing bootloader stage. If this happens drop to a shell using the installer menu option. From here
mount -o bind /dev /target/dev
#This next command turns the screen black.  Wait for the cursor to appear in the bottom left of the screen.
#Install the meta package linux-raspi2 if you need the header packages
apt-install linux-image-raspi2
umount /target/dev
exit
If you’ve booted the installer using a HWE kernel then it is recommended you postpone until after you’ve rebooted into your system and have removed the generic-hwe kernel packages.
Complete the installation by manually copying the Pi’s GPU firmware/bootloader files to the fat partition. You’ll also need to setup a config.txt and cmdline.txt. Remove the generic kernel packages once successfully booted.
Generic kernel with grub2
At the partitioning stage set the bootable flag on the pi’s fat partition and use the mount point /boot/efi. The Raspberry Pi cannot boot from an EFI partition type (a fat partition with the esp flag set). If the debian installer sets a partition to this type, then after the install use gParted to remove the esp flag so that it is bootable on the Pi.
Complete the installation by manually copying the Pi’s GPU firmware/bootloader files to the fat partition and copy u-boot as before to act as uefi.
Recovering a system using the generic kernel
This maybe required if the installing bootloader stage fails and has been skipped.
You could re-run the installer, selecting the rescue option. Alternatively, if you are familiar with grub2 and are using the generic kernel then the installed system can be booted directly with the installer grub2 files. For example, boot the installer but at the grub2 command-line interface prompt:
ls
set root=(hd1,msdos2)
ls /
linux /boot/vmlinuz root=/dev/mmcblk0p2 ro
initrd /boot/initrd.img
boot
To install grub2:
#pass the --removable or --no-nvram options to grub-install
sudo grub-install --no-nvram
sudo update-grub
Unofficial images
These Raspberry Pi 3 images are built by Ryan Finnie using modified packages in a PPA (ppa:ubuntu-raspi2/ppa-rpi3), and are not supported directly by Canonical.
Raspberry Pi 3 B+ (2018) functionality is not yet available with these images.
-
Raspberry Pi 3: ubuntu-18.04-preinstalled-server-armhf+raspi3.img.xz (4G image, 296M compressed)
Updated 2018-04-28 (18.04 LTS)
-
Raspberry Pi 3: ubuntu-16.04-preinstalled-server-armhf+raspi3.img.xz (4G image, 252M compressed)
Updated 2018-04-21 (16.04.4 LTS)
-


That’s all, folks!
You are done! Up and running on Ubuntu Server.
For more details about Raspberry Pi specific packages included with this image and further customisations, such as accelerated video drivers and optional package repositories, you can refer to the .
You also might want to install some software on your Pi. Ubuntu has extensive repositories available, that you can browse at packages.ubuntu.com. You can also use the snap command to install snap packages. The Snap Store is where you can find the best Linux open source and proprietary apps to install on your Raspberry Pi and get started with any project!
Was this tutorial useful?
Thank you for your feedback.
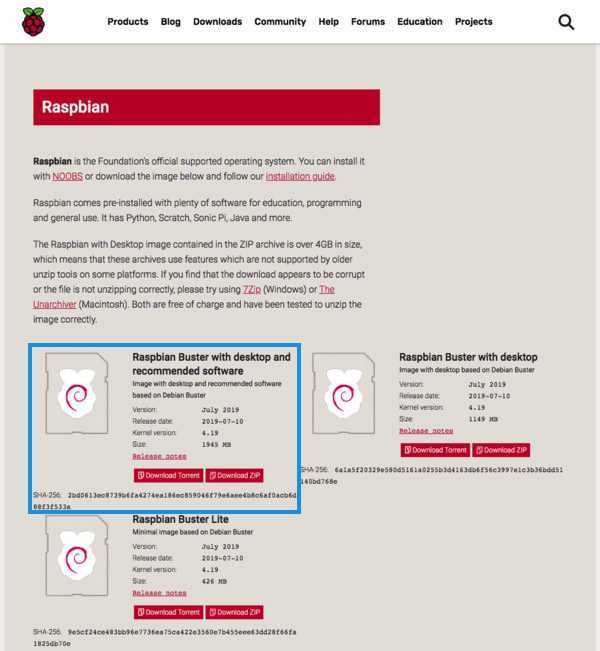
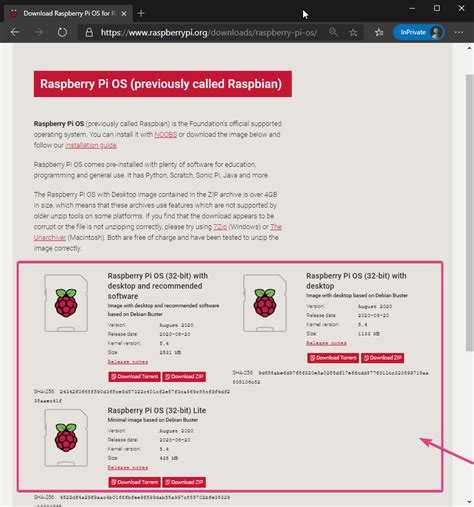
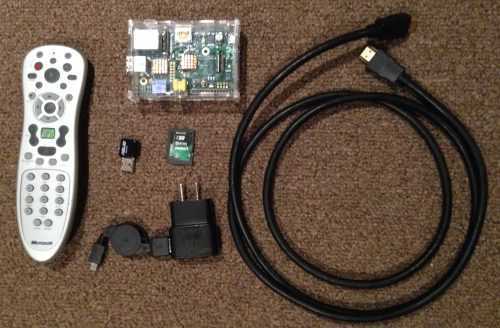
Что такое NOOBS?
 Сама Raspberry Pi не поставляется с операционной системой. Для этого вам понадобятся NOOBS. Это менеджер операционной системы, который упрощает загрузку, установку и настройку вашего Raspberry Pi. Когда вы впервые загружаете NOOBS, у вас будет выбор из нескольких операционных систем. Какие операционные системы доступны, зависит от модели Raspberry Pi, которую вы используете. В этом руководстве мы будем придерживаться наиболее распространенных операционных систем, доступных на новейших моделях Raspberry Pi. Прямо сейчас, это Raspbian, OSMC, OpenELEC, Windows IoT Core и RISC OS. При первой загрузке NOOBS приветствует вас с выбором операционных систем. Вы можете установить столько, сколько захотите, ну разумеется то число которое поместится на вашей SD-карте. Давайте разберемся, какой из этих вариантов лучше всего подходит для ваших конкретных планов в отношении вашего Малины Пи.
4 – Manjaroif(typeof __ez_fad_position!=’undefined’){__ez_fad_position(‘div-gpt-ad-raspberrytips_com-large-mobile-banner-1-0’)};
Manjaro is a distribution I discovered recently on Raspberry PiIt’s working very well and I like it
Manjaro is based on Arch Linux, a rare system on Raspberry PiBut it’s cool, it allows us to test and learn new thingsIts goal is to be a fast and user-friendly distribution
Manjaro is available in various flavors with the most known desktop environments (XFCE, GNOME, KDE, Cinnamon, LXDE, Mate, …)You can also start with a minimal version (named Architect) where you can install only what you need and configure everything
Manjaro is available on Raspberry Pi 4, and I highly recommend using it to enjoy this system in graphic modeYou can download the system images And I have a step-by-step tutorial on how to install Manjaro on your Raspberry Pi. You can also watch the video version of this tutorial just below:
https://www.youtube.com/watch?v=l9ky_cAy-dQVideo can’t be loaded because JavaScript is disabled: Manjaro 21 Review: Installation and first steps on a Raspberry Pi 4 (https://www.youtube.com/watch?v=l9ky_cAy-dQ)
Установка Raspbian на Raspberry Pi 3
Рекомендованной операционной системой для Raspberry Pi 3 является Raspbian. Именно ее 90% всех новых пользователей данной платформы устанавливают после покупки устройства. Но при этом новички не всегда понимают, как именно инсталлируется данный дистрибутив и что нужно сделать после его первого запуска.
Почему Raspbian – лучшее решение для «Малины»
Raspbian – это модификация популярнейшего дистрибутива GNU/Linux Debian. Он имеет множество отличительных особенностей от своего прародителя. Со всеми ими можно ознакомиться в официальной «Вики» проекта. А здесь есть смысл перечислить только основные из них:
- Возможность работы на ARM-процессорах.
- Наличие в комплекте всех необходимых драйверов.
- Хорошая оптимизация под сравнительно *Небольшой объем ОЗУ.
- Поддержка GPIO «из коробки».
Что понадобится для инсталлирования ОС на «Малину»
В первую очередь необходимо рассмотреть вопрос, касающийся того, что потребуется для того, чтобы установить на Raspberry Pi 3 Raspbian.
Помимо самой платы, потребуется еще и:
- Компьютер и кардридер.
- Блок питания на 5 Вольт и USB/MicroUSB кабель;
- Набор ПО.
- Мышь и клавиатура, подключаемые по USB.
- Монитор/телевизор.
- HDMI-кабель.
- Отформатированная в FAT32 MicroSD-карточка (класс скорости – 4 и выше, объем – от 4 гигабайт).
Процесс установки и настройки Raspbian
Существует несколько вариантов установки Raspbian на Raspberry Pi 3. Первый – использование утилиты NOOBS, второй – запись содержимого образа прямо на карточку. Применение специального приложения позволяет выбрать ОС. В рассматриваемом же случае требуется просто поставить Raspbian. Поэтому описываться будет второй вариант.
- Для начала нужно скачать дистрибутив с сайта Raspbian.org и вставить MicroSD-карточку в кардридер.
- Затем при помощи утилиты Win32DiskImager (или какой-то другой с аналогичным функционалом) потребуется записать образ на флэшку. Делается это легко – указывается путь к скаченному дистрибутиву; выбирается буква, под которой система примонтировала «диск», а затем нажимается Write.
- Когда прогресс-бар полностью заполнится и программа сообщит об успешном окончании процесса записи, можно будет вынуть карту из кардридера и вставить её в «Малину». Затем останется только включить одноплатник, предварительно подключив к нему монитор и периферию.
Настройка Raspbian после установки
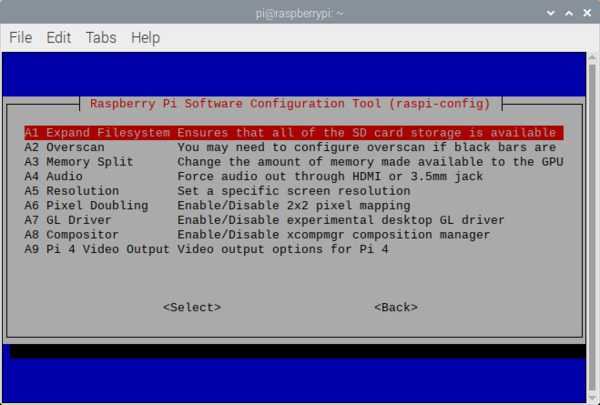
После первого включения RPi загрузится не рабочий стол, а встроенная в систему утилита Configuration Tool. В ней достаточно сделать одну вещь – определить подходящее окружение рабочего стола. Для этого нужно перейти к третьему пункту, нажать Enter и определить из списка подходящий вариант. Рекомендуется использовать LXDE, так как это достаточно удобное и самое легкое окружение. Затем останется вернуть в основное меню и нажать на Done. Система перезагрузится.
После загрузки она спросит реквизиты доступа. Стандартными в Raspbian являются: логин – pi, пароль – raspbian. Писать их нужно именно маленькими буквами.После авторизации Raspbian загрузит рабочий стол. Теперь можно пользоваться всеми возможностями системы. Также может потребоваться дополнительная настройка Raspbian на Raspberry Pi Для этого следует обратиться к официальной документации системы. Следует отметить, что многие инструкции для Debian подходят и для Raspbian.Как возможно убедиться, ответ на вопрос «как установить Raspbian на Raspberry Pi 3?» является довольно простым. Фактически процесс записи системы для этого одноплатника является даже более легким делом, чем инсталлирование Windows на обычный компьютер. Поэтому с этим может справиться даже ребенок. А весь процесс, в свою очередь, отнимает не более получаса чистого времени.
10 – RecalBox
Recalbox is the last Retro gaming system I want to recommend in this list.Like Retropie and Lakka, it allows you to play old games on your Raspberry Pi (NES, SNES, Atari, etc.).If you are a bit lost with all these options, I recommend you to read my comparative here, but Recalbox is a great option to consider.
Here is a short video overview of this system (not the latest version, but you will understand the concept):
https://www.youtube.com/watch?v=H7bDGqJn31sVideo can’t be loaded because JavaScript is disabled: RECALBOX 4 0 0 Final (https://www.youtube.com/watch?v=H7bDGqJn31s)
RecalBox is a younger system than Retropie, but with different featuresSo, you have to try it to make your own choiceFor example, I really like that everything is integrated in the interface (you don’t need to use Raspi-config or the Retropie setup script for example)
You can read my complete beginner’s guide for Recalbox hereOr download the Recalbox image directly on the official websiteRaspberry Pi 4 is not yet supported, so you have to stay with Lakka for now if you want to play on Pi 4
The ROMs you can use on Recalbox are the same as on Retropie, so you can follow the same tips to easily find ROMs online.
6 – Lakkaif(typeof __ez_fad_position!=’undefined’){__ez_fad_position(‘div-gpt-ad-raspberrytips_com-leader-2-0’)};
You probably recognize this well-known interface which is inspired from the PlayStation 4But it’s Lakka! A Retro-gaming system on Raspberry PiLike Retropie you have many emulators available on it and can install your games easily
The Lakka systems runs on LibreElec and uses RetroArch for the graphical interfaceI have added it in this list because it’s available on Raspberry Pi 4, so it’s a good alternative to Retropie at the momentAnd I also like the intuitive usage for many things (PSX games are working directly, on/off button for many options, etc.)
If you want to discover this retro-gaming system, you can read my tutorial here on how to install and use Lakka. It’s an operating system with many qualities, but there are a few hidden features you can easily miss without reading it.Downloads links are on the official website here
Upgrade Ubuntu Server to Ubuntu Desktop
The main benefit of using Ubuntu rather than Raspberry Pi OS is the Desktop interface, so let’s look at how to install it on Ubuntu Server.
Choose your desktop environment
If you want to install a desktop environment, you have to make a choice between 4 alternatives:
- Gnome: the default interface on Ubuntu Desktop
- KDE (Kubuntu)
- LXDE (Lubuntu)
- XFCE (Xubuntu)
It mainly depends on your tastes, so I’ll let you choose the one you prefer.But on a performance level, LXDE and XFCE are probably faster than Gnome and KDE.If you have a Raspberry Pi 4 with 4 GB RAM, it’s probably not a big deal, but on older models, it’s something to consider.
Installation
For each desktop environment there is a specific meta package to install:
- Gnome: ubuntu-desktop
- KDE: kubuntu-desktop
- LXDE: lubuntu-desktop
- XFCE: xubuntu-desktop
To install it, use apt:
You can add the –no-install-recommends option to avoid the installation of all the default packages (like OpenOffice).It will require half the download time and the size of the disk space to install:
In my case, I’m a player, and I choose Gnome with all default packages:
Now you have time to take a coffee, the installation process will take a little time.I lost the SSH connection during the installation, so it’s probably better to do the installation directly on the screen, but I didn’t run into any issues, after a reboot my installation was complete:
Master Python on Raspberry PiSale: 10% off today.Get the eBook.Do more with your Raspberry Pi, learn the useful concepts and take the shortcuts.You miss half of the fun of using a Raspberry Pi if you don’t know anything about Python.Download here
First impressions
After the reboot, the login screen shows up.Choose the Ubuntu user and enter the same password you have set on the Server version.The desktop appears:The Gnome desktop environment on Ubuntu 19.10 / Raspberry Pi version
The interface isn’t very responsive on Gnome, but it works pretty well.And I suppose it’s probably better on XFCE without all the default packages.
I was surprised to see that even applications that I consider heavy, like Firefox, work well on this system:
If I had to update my post “Can a Raspberry Pi really Replace your Desktop PC?“, it’s probably the system I would choose for this.
Wi-Fi
As I previously mentioned, the Wi-Fi isn’t working with the Desktop interface.I don’t understand why, probably because the Network Manager is not compatible or something like that.There probably is a solution as this is working without the interface, but I didn’t find it.

The only way I managed to get Wi-Fi working is by using a USB dongle.As it was not working with all my Wi-Fi adapters, I give you the reference here if needed.My Dlink USB adapter (this one on Amazon) was the only working option. It’s a basic model, nothing fancy, but it works very well on Raspberry Pi (any operating system I tried).
Once detected, you can configure the Wi-Fi settings from the network icon on the top right of the desktop (pick a SSID in the list and follow the wizard).Let me know if you find another solution, I would edit this part.
Other settings
Ubuntu is one of the most used systems in the world, so you’ll find help effortlessly on Internet.But just to get you started:
- All the apps are available by clicking on the dots icon at the bottom left of the screen:
- From here, you can scroll to find the app you want or use the search engine.
- All the configuration settings are in the “Settings” app:
- To install a new software you can start the “Ubuntu Software” app in the left panel. It works like an app store on smartphone.
- You can also use apt in a terminal if you prefer:Many Raspberry Pi packages are available, like Python libraries and more. And you can probably add new repositories to expand the possibilities.
If you have any comment, suggestion or just want to chat with us about this tutorial,you can post your messages in the community on Patreon. See you there!


