Arduino vs. Raspberry Pi: Sensors
While Raspberry Pi and Arduino devices have several interface ports, connecting analog sensors to Arduino devices is a more straightforward process. The micro-controller can easily interpret and respond to a wide range of sensor data using the code you put on it, which is excellent if you intend to repeat a series of commands or react to sensor data as a means of making adjustments to servos and devices.
Raspberry Pi boards, on the other hand, require software to interface with these sorts of devices, which isn’t always what you need if you’re just trying to water plants effectively or keep your beer cold. Using both in a project isn’t all that uncommon. The Arduino device could act as a control board that executes commands issued by the Raspberry Pi’s software before the sensor information is fed back for recording or acknowledgment.
Pocket C.H.I.P.
Pocket C.H.I.P. — это комплект из одноплатного компьютера C.H.I.P. Pro и платы расширения с физической QWERTY-клавиатурой, сенсорным экраном с разрешением 480×272 пикселя и аккумулятором на 3000мАч.
По техническим характеристикам C.H.I.P. находится на одном уровне с другими миниатюрными одноплатниками вроде Raspberry Pi Zero: на плате распаяно 512 Мб оперативной памяти, а в качестве процессора задействован Allwinner R8 (1 ядро Cortex-A8, 1 ГГц).
Вся фишка устройства именно в плате расширения, превращающей C.H.I.P. в наладонный компьютер. И пусть в плане технических характеристик он не выдерживает конкуренции даже с бюджетными Android-смартфонами за 50-70 долларов, полноценный Linux на борту и обширные возможности кастомизации делают Pocket C.H.I.P. очень интересным вариантом.
Опять-таки тут присутствует физическая клавиатура, чего в современных мобильных устройствах днем с огнем не сыщешь. А к контактам GPIO в верхней части устройства можно подключить дополнительные электронные компоненты или какие-нибудь датчики.
Если фантазия не включается совсем и разумного применения Pocket C.H.I.P. не находится, то, на худой конец, его можно использовать просто как эмулятор старой 8-битной приставки. Сами разработчики намекают на такой вариант применения, обильно эксплуатируя стилистику «неоновых восьмидесятых» как на своем сайте, так и в оформлении самого устройства.
Где купить: getchip.com
Код Arduino
Для простоты я покажу вам здесь, только как считывать температуру и влажность воздуха с датчика DHT11 и как дистанционно мигать светодиодом. Для вашего реального проекта вам понадобится что-то более сложное, что можно сделать только с Raspberry Pi. Если вы хотите начать с простого, то вот схема:
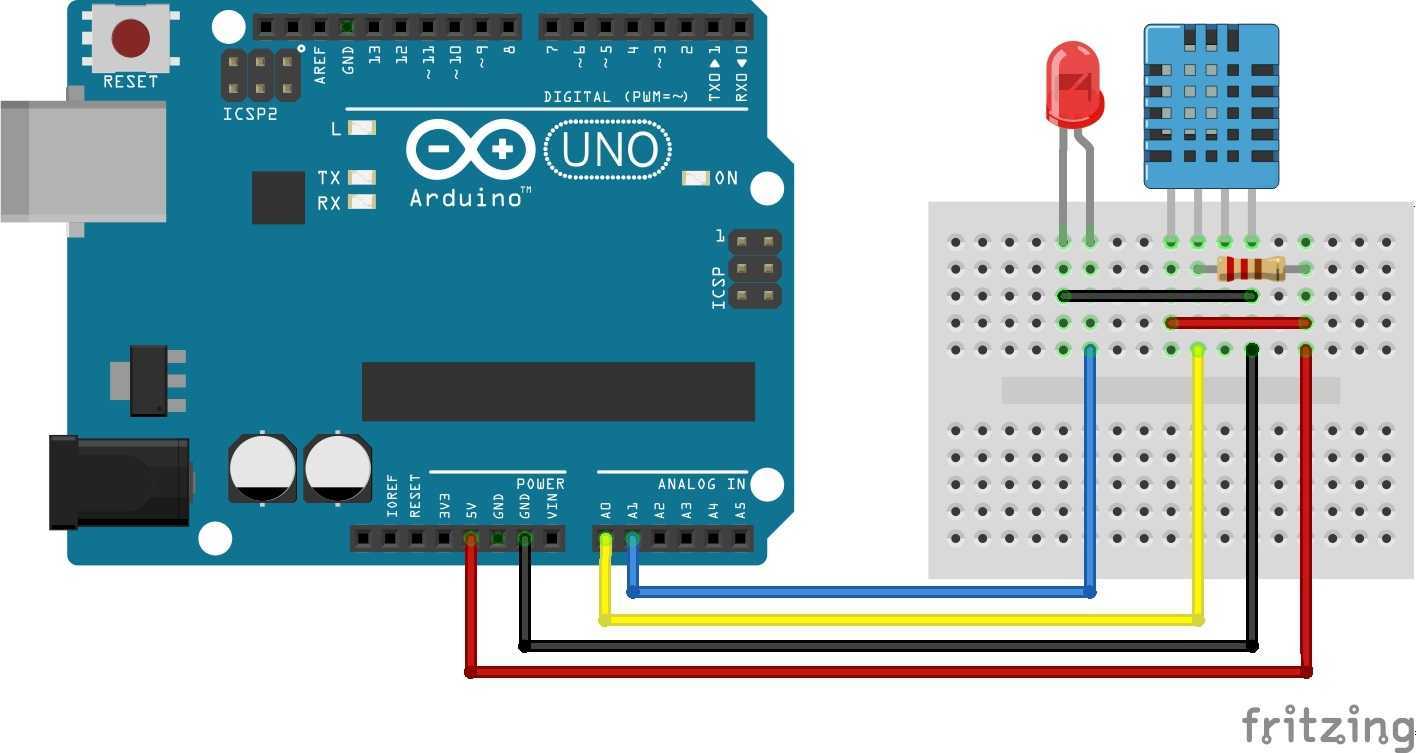 Подключение датчика и светодиода к Arduino
Начнем с основ. Данные передаются по последовательному порту со скоростью передачи 9600 бит/с. В основной функции мы читаем последовательный порт и проверяем, что пришло. Если мы приняли строку «thl«, это означает, что нам нужно отправить через последовательный порт данные с датчиков. Чтобы эта функция работала правильно, мы используем цикл и отправляем данные снова и снова, пока не получим «ok«, чтобы узнать, что данные достигли сервера. Если мы получим строку «led«, то просто начнем мигать светодиодом. Здесь вы можете добавить любую функцию и строку, которую захотите, – просто не забудьте использовать «thl» для отправки данных.
Что вам нужно знать, так это то, что мы отправляем данные в форме JSON (JavaScript Object Notation). JSON – это открытый формат для передачи объектов данных. Мы используем его, потому что можем легко использовать эти данные в с помощью javascript. Чтобы использовать его, нам понадобится библиотека под названием ArduinoJson, которую вы можете найти в архиве, ссылка на который будет в конце статьи. Функция «» делает то, что подразумевает ее название: она передает данные через последовательный порт в формате JSON. Чтобы добавить данные, вам просто нужно добавить строку внутри этой функции, которая выглядит так:
где «» выглядит так:
Вот и всё, что касается Arduino. Ниже вы можете увидеть точный код, который написан для этого конкретного случая, с датчиком DHT11 и светодиодом.
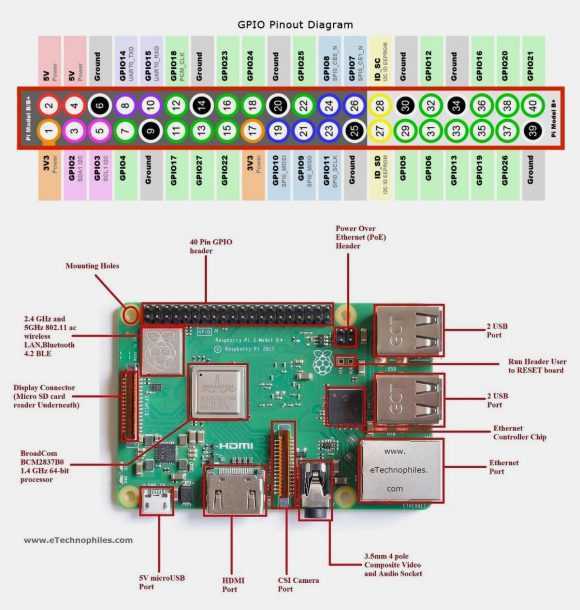
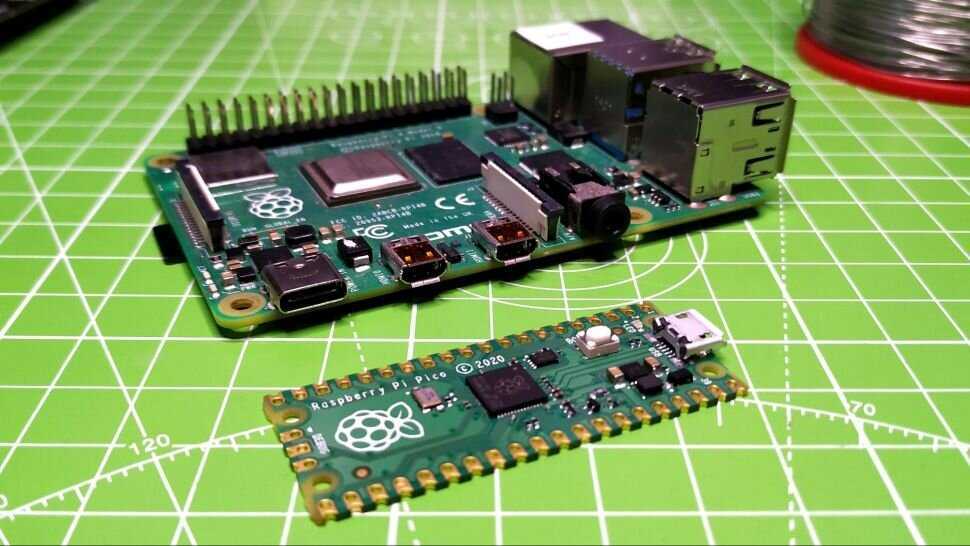
Functionality and GPIO of Raspberry Pi Pico vs Arduino
(Image credit: Tom’s Hardware)
The Raspberry Pi Pico introduces a new form factor to the Raspberry Pi ecosystem, a 40 pin ‘DIP’ style PCB. All 40 pins are broken out to standard pads and, around the perimeter, there are castellations which can be used to solder the Pico to a carrier board in a similar fashion to surface mount electronics.
The DIP package is nothing new, Arduino boards such as the Micro have been using it for years. The DIP package can be soldered into a carrier board, placed into a breadboard or stacked atop compatible addons. It is a more convenient package compared to the Raspberry Pi and Arduino Uno style layouts which favour a larger layout. Adopting the DIP layout, the Raspberry Pi Pico provides us with an easy to use form factor which is easy to embed into a project.
The Raspberry Pi Pico GPIO offers plenty of digital IO, three analog inputs and multiple I2C, SPI and UART connections. But what the Pico also offers are a series of programmable IO (PIO) pins which can be configured to simulate other interfaces / protocols such as WS2812 “NeoPixels”, they can also be used to offload complex tasks to a background process. All of this from a $4 board means the Raspberry Pi Pico is a low cost “Swiss Army knife” of GPIO pins.
Winner: Raspberry Pi Pico
Banana Pi BPI-M3
Banana Pi BPI-M3 — флагманское устройство линейки Banana Pi — второй по популярности линейки подражателей Raspberry Pi (на первом месте стоит Orange Pi).
Сердцем устройства стал восьмиядерный процессор Allwinner A83T (8 ядер Cortex-A7, 1,8 Ггц) и 2 Гб оперативной памяти стандарта DDR3. Из сетевых интерфейсов имеется гигабитный Ethernet, а также модули Bluetooth и Wi-Fi 2,4 Ггц диапазона.
Операционная система (Android или Linux) может быть размещена на распаянном 8 Гб модуле eMMC-памяти или на microSD-карте, а SATA-коннектор позволяет подключить к плате жесткий диск без всяких переходников.
Из полезных мелочей присутствует ИК-порт и распаянный прямо на плате микрофон — его можно увидеть чуть левее GPIO.
Где купить: AliExpress
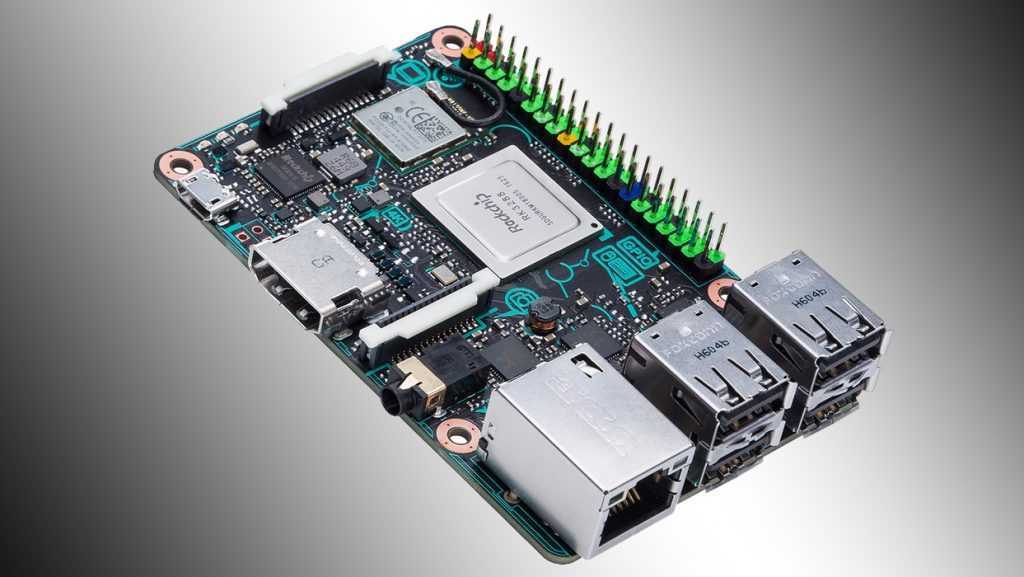
Asus Tinker Board
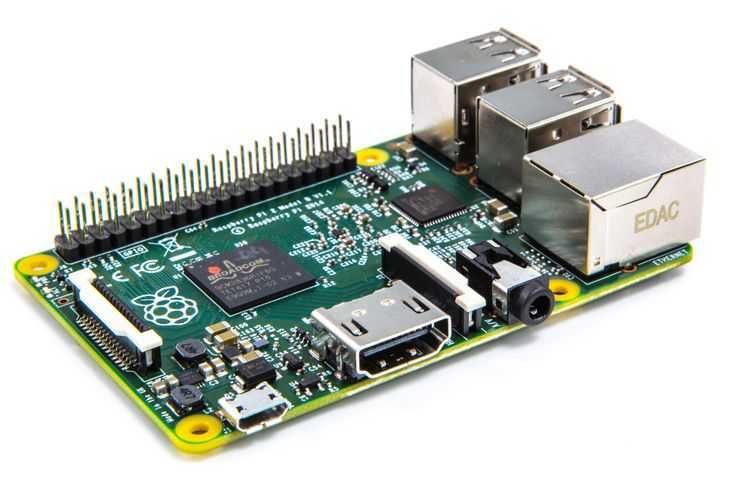
Asus Tinker Board — относительно новый «убийца Raspberry Pi», анонсированный компанией Asus в начале этого года.
Tinker Board построен на базе четырехъядерного процессора Rockchip RK3288, оснащен 2 Гб оперативной памяти стандарта DDR3 и гигабитным Ethernet-адаптером.
Габариты микрокомпьютера и распайка элементов на печатной плате практически полностью копируют Raspberry Pi 3 — по словам производителя это сделано намеренно, чтобы обеспечить полную совместимость с выпускаемыми для Raspberry Pi аксессуарами.
По основным своим техническим характеристикам Tinker Board получился вдвое мощнее Raspberry Pi 3, это же подтверждают и синтетические тесты: практически во всех из них девайс от Asus демонстрирует вдвое большую производительность в сравнении с «малинкой».
Пожалуй, именно таким мог бы быть микрокомпьютер Raspberry Pi 4, если бы его выпускали в 2017 году.
Где купить: AliExpress
На мой взгляд, вышеперечисленные 8 моделей — лучшие альтернативы Raspberry Pi 3 из тех, что можно найти и без особых проблем купить через интернет на данный момент.
Тем не менее, в качестве первого одноплатного ПК я все же рекомендую брать Raspberry Pi. Ее мощь не в железе, а в крупном, нарабатывавшемся годами пользовательском сообществе, в котором можно получить ответ практически на любой свой вопрос. В то время как с остальными одноплатниками так или иначе придется разбираться самостоятельно.

Так что в качестве первого одноплатного компьютера — только Raspberry Pi. А если захочется большего, то присмотритесь к моделям из этого списка.
Arduino vs. Raspberry Pi: общие результаты
Arduino
-
Не компьютер. На самом деле это плата микроконтроллера.
-
Не имеет заметных процессорных ядер и ограниченных портов ввода / вывода и опций.
-
Может заряжаться через USB или разъем питания.
-
Может быть запрограммирован с помощью Arduino Web Editor или Arduino IDE.
Raspberry Pi
-
Это компьютер. Хотя это известно как микрокомпьютер.
-
Последняя версия имеет 4 ядра обработки и широкий спектр портов ввода / вывода и опций.
-
Можно заряжать только через порт USB-C.
-
Может быть запрограммирован с любой из 9 возможных операционных систем. Рекомендуемый метод называется Raspbian и основан на Linux Debian.
Основное различие между Arduino и Raspberry Pi заключается в том, что Arduino — это не компьютер, а Raspberry Pi — это компьютер. Но они могут как программировать, так и управлять другими устройствами для выполнения определенных задач, и они оба могут научить вас программировать.
Arduinos на самом деле не имеет настоящих процессорных ядер и может быть запрограммирован через онлайн-редактор или программное обеспечение Arduino IDE. Raspberry Pi 4 имеет четыре ядра и есть девять возможных операционных систем, которые можно использовать для его программирования, в зависимости от проекта, над которым вы работаете.
Рекомендуемая операционная система для Pi называется Raspbian. Поскольку Arduinos не являются компьютерами, они лучше подходят для более простых задач, таких как управление освещением. Raspberry Pis может делать более сложные вещи, такие как создание игр, мобильных приложений или веб-сайтов.
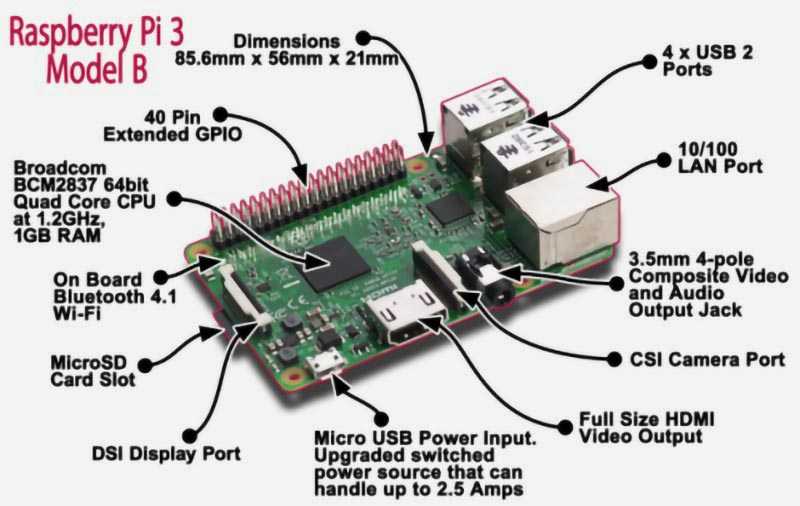
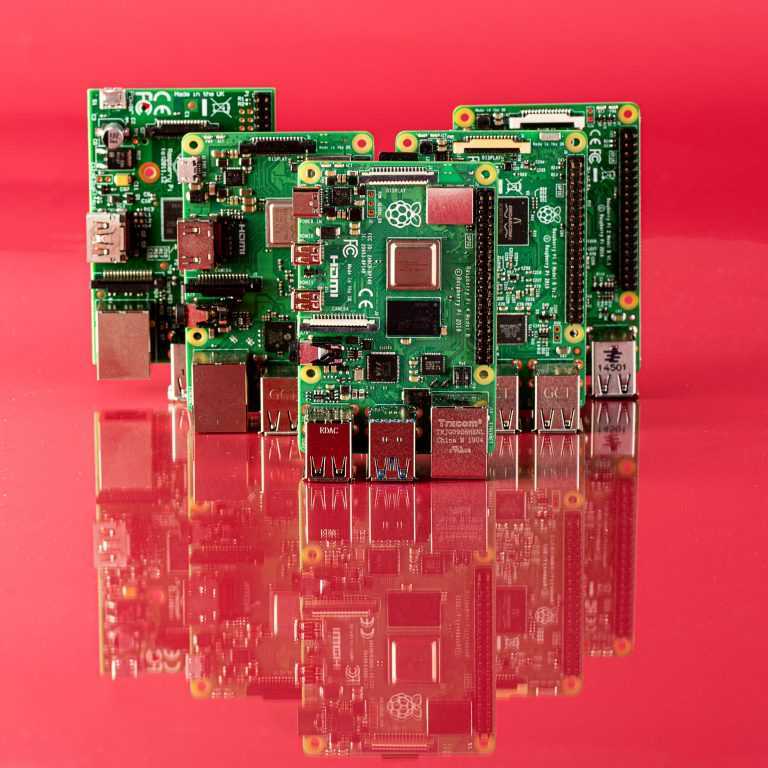
Третье поколение Raspberry Pi 4. Первая “малинка” в клавиатуре
Развитие модельного ряда популярных одноплатников продолжается и сегодня. В актуальном поколении представлено четыре модели под разные задачи и цели.
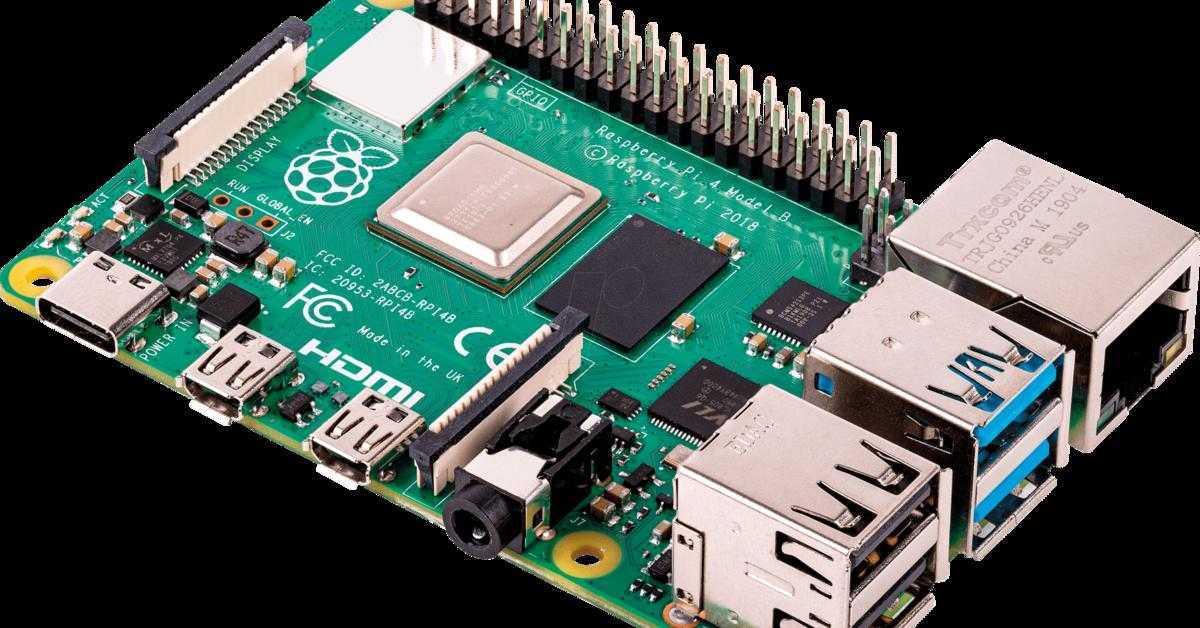
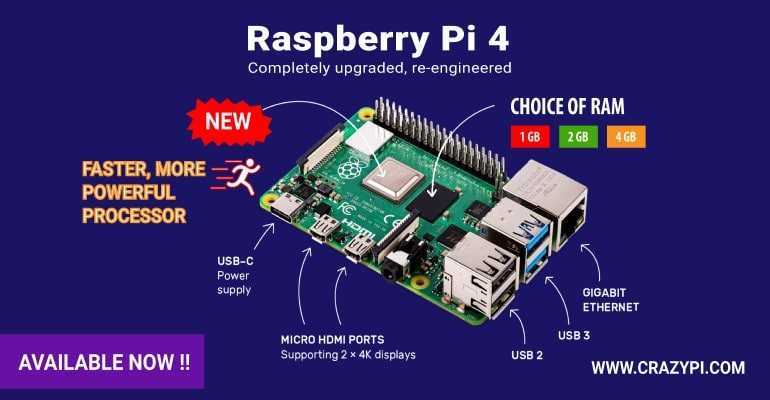
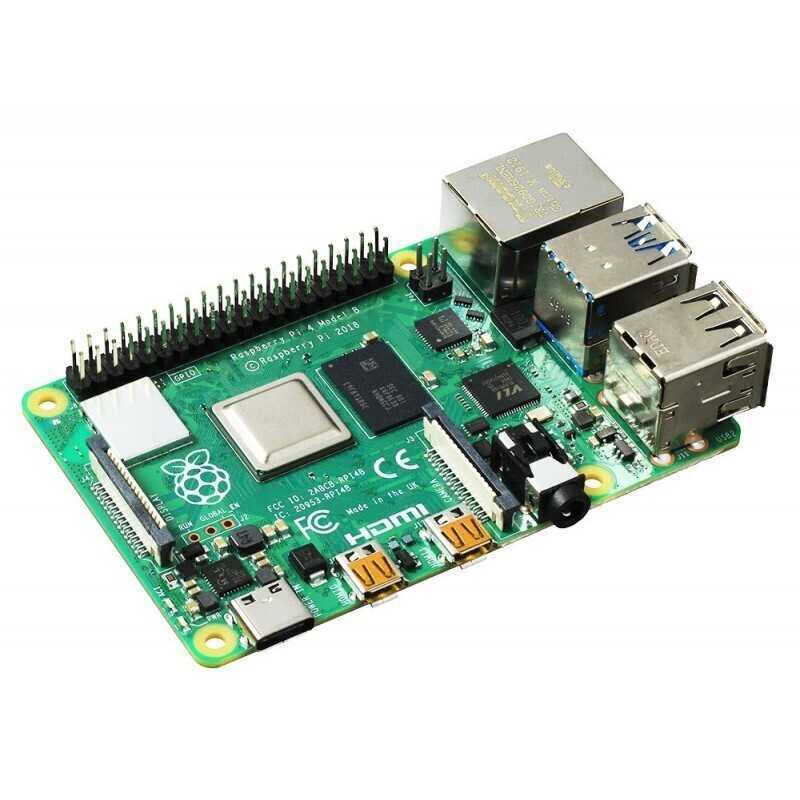
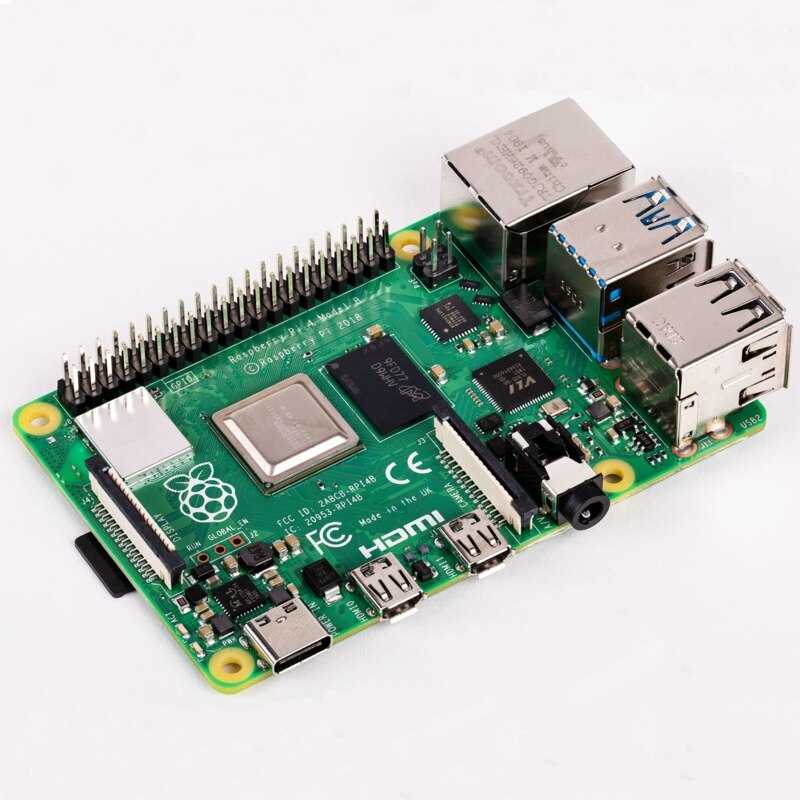
◉ Летом 2019 года стартовали продажи нового “флагмана” Raspberry Pi 4B. Модель получила долгожданный апгрейд и более технологичную начинку.
Сердцем устройства стал 4-ядерный чип Cortex-A72 (ARM v8), который работает на частоте 1,5 ГГц. Впервые появились разные модификации платы с отличающимся объемом оперативной памяти. Пользователям стали доступны модели с памятью 2, 4 и 8 ГБ.
Один полноразмерный порт HDMI заменили на пару microHDMI. Каждый разъем способен выводить картинку в разрешении до 4K. Питания подается через современный Type-С.
На плате распаян гигабитный LAN-порт, Wi-Fi 802.11ac и Bluetooth 5.0.
Стоимость самой актуальной на данный момент “малинки” составляет от $35 до $75.
◉ Осенью 2020 года в линейке “малинок” появилось самое необычное пополнение. Новый гаджет под названием Compute Module 4 стал самой топовой в плане возможности расширения платой и при этом являлся одним из самых компактных одноплатников.
Производительность схожа с предыдущей моделью Raspberry Pi 4, здесь есть аналогичный 4-ядерный процессор Cortex-A72 с частотой 1.5 ГГц и от 1 до 8 ГБ оперативной памяти. На плате распаяны Wi-Fi 802.11aс и Bluetooth 5.0.
Отличают от всех остальных предшественников новый модуль его размеры и позиционирование. Это компактная плата, которая предназначена для встраивания в небольшие схемы или гаджеты и расширения при помощи пары более прогрессивных разъемов. Для подключения используются два 100-контактных разъема Hirose DF40C-100DS-0.4V.

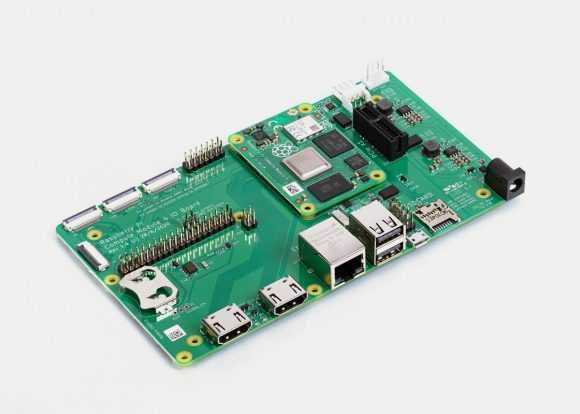

Компактная модель Compute Module 4 с платой расширения Compute Module 4 IO Board
Это позволяет подключать к Compute Module 4, например, совместимые платы с разъемом PCIe или накопители NVMe. Для получения более привычного набора из 40-пинового разъема, сетевого LAN-интерфейса и классических USB нужно использовать плату расширения Compute Module 4 IO Board.
Стоимость нового одноплатника составляет $25.
◉ Интересным решением стал выпуск самой простой на данный момент модели устройства Raspberry Pi Pico в начале 2021 года. Это еще более компактная плата, чем линейка Zero, которая лишена большей части разъемов и портов.
Она строится на базе 2-ядерного чипа ARM Cortex M0+ с частотой работы 133 МГц. На плате доступно всего 264 КБ оперативной и 2 МБ постоянной памяти.
На торце расположен один разъем USB-для подключения к другим компьютером или гаджетам. Плата не является полноценным компьютером, как все другие “малинки”.
Это гораздо более простой микроконтроллер, который больше схож с популярными платами Arduino. На Pico можно загрузить исполняемый код для управления другими устройствами или умными девайсами.
Привычный для модельного ряда 40-пиновый разъем упразднили, разместив по периметру платы аналогичную контактную область. Это не так удобно с точки зрения быстрого монтажа компонентов, но при этом предоставляет более гибкие возможности модернизации модели.
Цена микроконтроллера составляет всего $4.
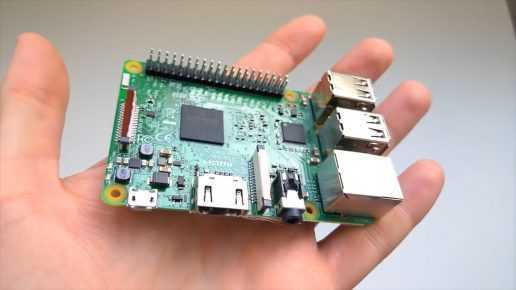
◉ Самой последней представленной на данный момент новинкой Raspberry является компактный модуль Raspberry Pi Zero 2 W. Это обновленный компьютер размером с обычную флешку, который неплохо прокачали по сравнению с предшественником.
Вычислительная мощность обеспечивается 4-ядерным 64-разрядным чипом ARM Cortex-A53 с частотой 1 ГГц. На борту 512 МБ оперативной памяти, модуль Wi-Fi с поддержкой частоты 2.4 ГГц и Bluetooth 4.2.
Благодаря переходу на 64-битную архитектуру новая модель “зеро” стала производительнее почти в четыре раза. При этом цена новинки составляет всего $15.
◉ Еще одной новинкой 2021 года в модельном ряду “малинок” стала Raspberry Pi 400. Это первый полноценный десктопный компьютер, который выпускается в корпусе со встроенной клавиатурой.
В таком виде гаджет может выполнять роль простенького ПК для студентов или школьников. Достаточно подключить такую “клаву” к монитору и можно организовать временное рабочее место для школьника или самому пересесть на удаленную работу.
Компьютер может работать не только на специальных сборках Linux, но и на ARM-версии новой Windows 11. Для офисных задач или учебного процесса подходит идеально.
Raspberry Pi vs Arduino: Cost Analysis
With the latest models, Raspberry Pi tends to be a bit more expensive than Arduino boards. The Arduino Uno R3 cost less than $20 while a Raspberry Pi 4 cost at least $50. So, price can play a role in your final choice.
There is also one thing I didn’t explain: both devices exist in several models, with different price points. So if you compare the cheapest from one brand to the most powerful of another, you may come to a wrong conclusion.
The problem is that we can’t really compare Arduino and Raspberry Pi from a price point of view. You don’t have the same components on each, so I don’t think it’s a good idea to base your choice on the price only. The intent must be more import.
Anyway, I will still give you a few examples so you can have a better idea on what to expect for each family:
| Arduino Nano | Arduino Uno | Arduino Uno WiFi | |
|---|---|---|---|
| Specifications | 16Mhz CPU, 16KB Flash, 1KB SRAM, USB | 16Mhz CPU, 32KB Flash, 2KB SRAM, USB | 16Mhz CPU, 48KB Flash, 6KB SRAM, USB |
| Release date | 2008 | 2010 | 2018 |
| Dimensions (mm) | 43 x 19 | 69 x 53 | 69 x 53 |
| Average price | $20 | $20 | $60 |
| Amazon link | More details | More details | More details |
Arduino models prices and specs
These are just a few examples to give you an idea. You can find more expensive models if you want a board with a specific component in order to avoid adding extensions, but overall the price stays pretty low. If you want to find other options, just browse the Amazon results here.
Here are now a few examples of Raspberry Pi models:
| Raspberry Pi Pico | Raspberry Pi Zero | Raspberry Pi 4B | |
|---|---|---|---|
| Specifications | 133 Mhz CPU, 2MB Flash, 264KB SRAM, USB | 1Ghz CPU, 512MB RAM, Mini HDMI, Mini USB, Wi-Fi/Bluetooth | Quad-Core 1.5Ghz CPU, 2 to 8GB RAM, Dual Micro HDMI, 4x USB, Ethernet, Wi-Fi/Bluetooth |
| Release date | 2021 | 2017 | 2019 |
| Dimensions (mm) | 51 x 21 | 65 x 30 | 85 x 56 |
| Average price | Under $10 | $25 | Between $50 and $90 |
| Amazon link | More details | More details | More details |
Raspberry Pi model prices and specs
The Raspberry Pi catalog also includes other models, but these three give a great overview on what you can expect. The Pico is the only microcontroller in the family, the Zero is the cheapest Raspberry Pi option and the Raspberry Pi 4B is a high-end model. I don’t include the Raspberry Pi 400 here, that targets the desktop users. If you are reading this, I suppose you intend to build circuits with your device, not just use it a desktop replacement.

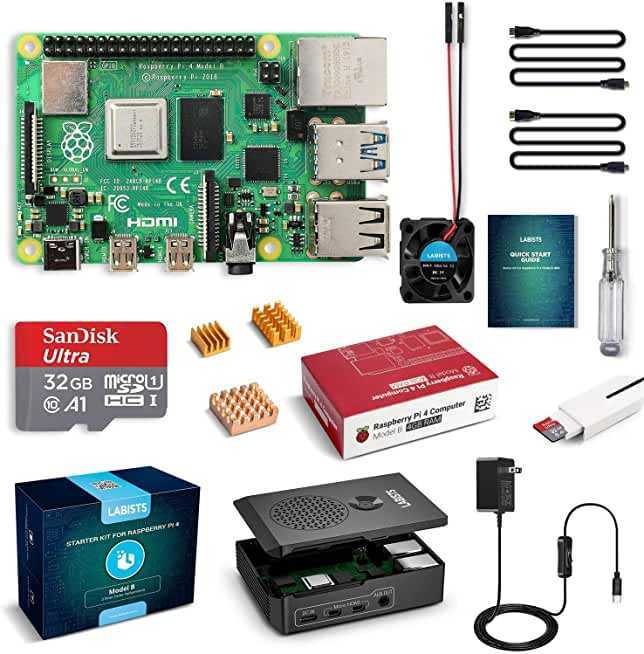
In both cases, don’t forget that the prices are only for the main board. You’ll do nothing with a Raspberry Pi motherboard only, or an Arduino without any additional component (wires, resistors, LEDs, servos, etc.). A Raspberry Pi will require at least an SD card (add $20 minimum). For an Arduino you may also need a USB cable to plug it to your computer and a power supply or battery pack.Looking for starter kits is a good idea if you don’t have anything yet.
Overall, Arduino and Raspberry Pi are cheap devices, and the price shouldn’t be the main criteria for your decision. By comparing only the device price, we also forget to consider the additional accessories. If the budget is important for you, please add everything you’ll need to make a smarter decision.
You may also like:
- 25 awesome Raspberry Pi project ideas at home
- 15 best operating systems for Raspberry Pi (with pictures)
- My book: Master your Raspberry Pi in 30 days
Raspberry Pi vs. Arduino: pros and cons
To sum up, here are the pros and cons of Raspberry Pi and Arduino
Raspberry Pi
Pros
- Linux operating system that allows you to do a lot of things directly without additional hardware
- Open to a lot of programming languages, compatible with Linux computers at least
- More powerful (correct RAM and CPU)
- More GPIO pins available
- Easy to start if you know things about Linux
- Networking (Ethernet and WiFi directly available)
Cons
- Linux operating system (harder to start for beginners)
- Only the software is open-source
- Need more power to run
- More expensive
Master your Raspberry Pi in 30 daysSale: 10% off today.Download the eBook.Uncover the secrets of the Raspberry Pi in a 30 days challenge.Learn useful Linux skills and practice multiples projects.Get it Now!
Pros
- Cheaper (half price approximatively for the main board only)
- Easy to start for beginners (no need to master Linux)
- Robust (no bugs or issues with the operating system)
- Smaller (with no shields, but it could grow fast)
- Open source
- Low power architecture
Cons
- Low memory and storage
- No integrated Internet connectivity (could be added with shields)
- Less powerful
- Useless without other modules (you can do a lot of projects only with the Raspberry Pi board, but almost none with the Arduino alone)
Arduino vs. Raspberry Pi: Networking
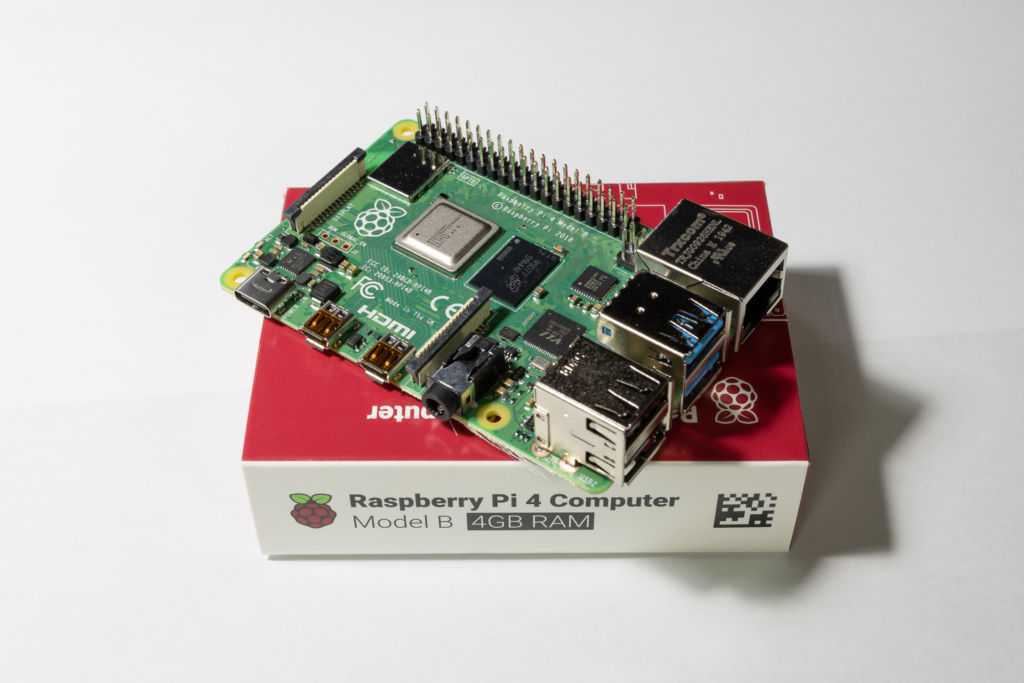
The Raspberry Pi 4 Model B has both a built-in Ethernet port and Wi-Fi 5 connectivity, which allows easy access to any network with little setup. Once you’re connected, you can use the operating system to connect to web servers, process HTML, or post to the internet. You can even use it as a VPN or print server.
Unfortunately, Arduino devices typically aren’t built for network connectivity directly out of the box. Though it’s possible, they require a bit more tinkering to set up a proper connection. You’ll need an extra chip (shield) outfitted with an Ethernet port, and you’ll need to do some wiring and coding to get everything up and running just right, which is enough of a process in itself that some vendors sell comparable Arduino devices with a built-in Ethernet component.
Hardware
When you look at an Arduino next to a Raspberry Pi, it’s very clear that the hardware differs quite a bit between the two. Let’s break it down.
Power
The Arduino’s power supply requirements are very simple; you can plug it into your computer or a battery pack, and it will start running code immediately. If the power is disconnected, it will stop; there’s no need to run a shut-down process. The Raspberry Pi, on the other hand, because it has a more full-featured computing system in place, should be shut down like a regular computer, and can be damaged by power cuts.
Both the Arduino and the Raspberry Pi have a very low power draw, and can be run for a very long time without using much electricity.
Connectivity
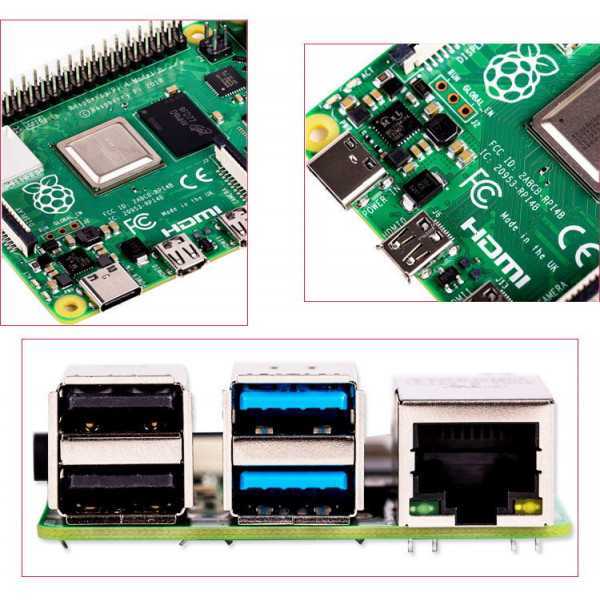
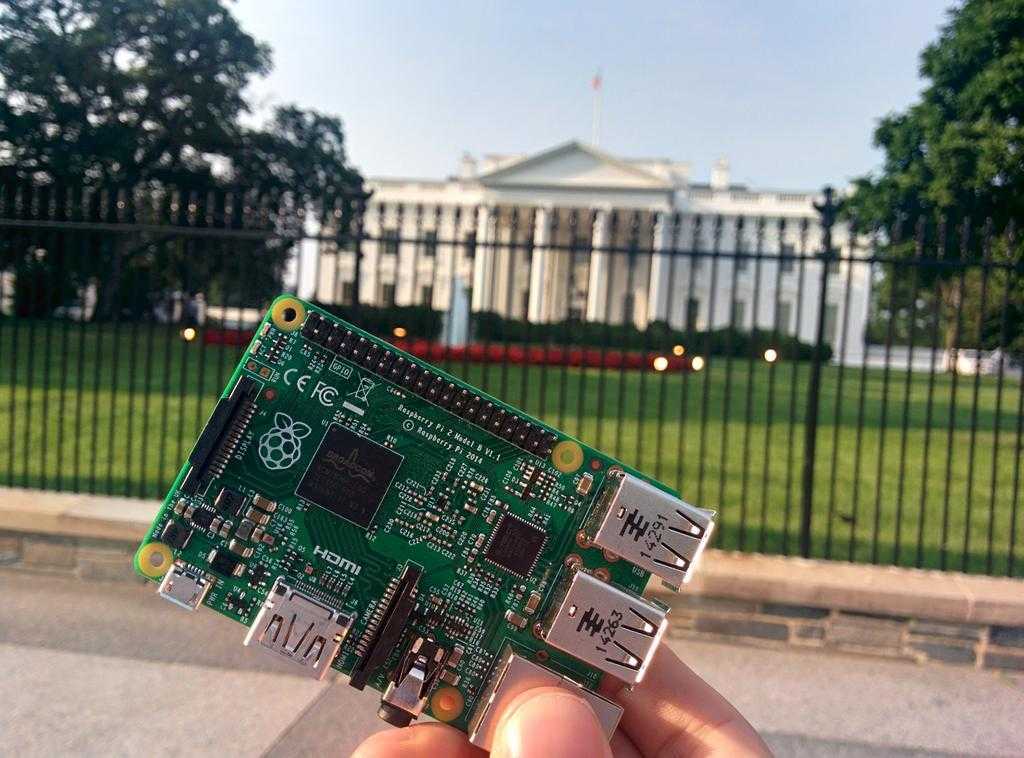
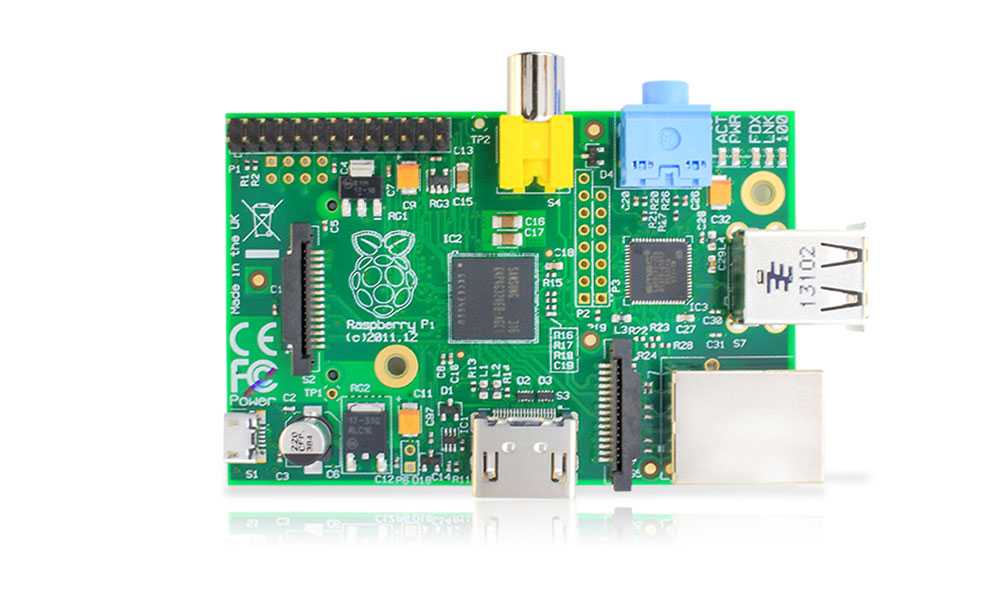
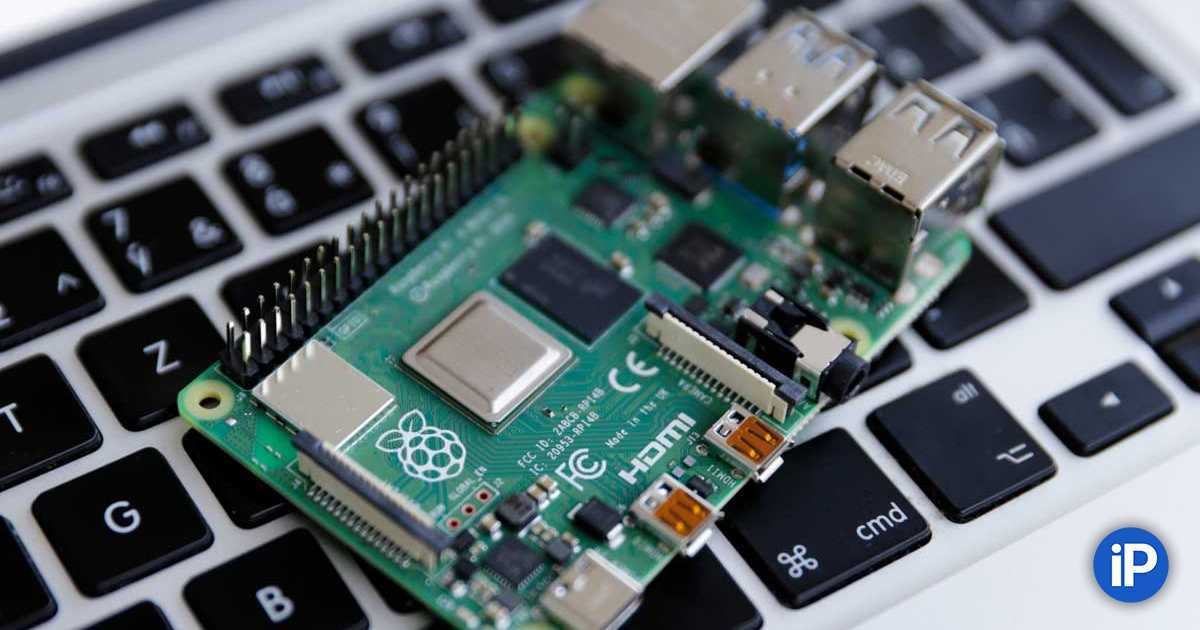
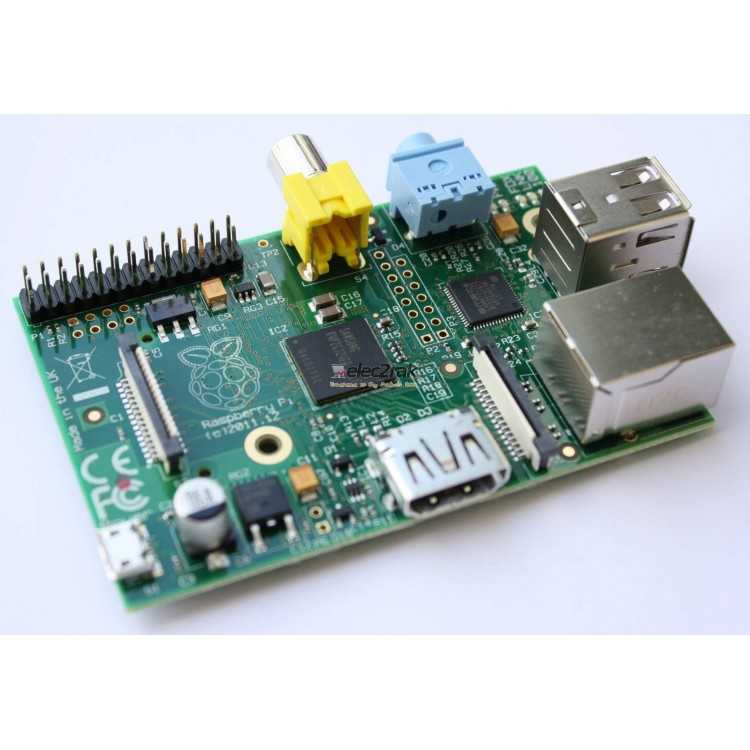
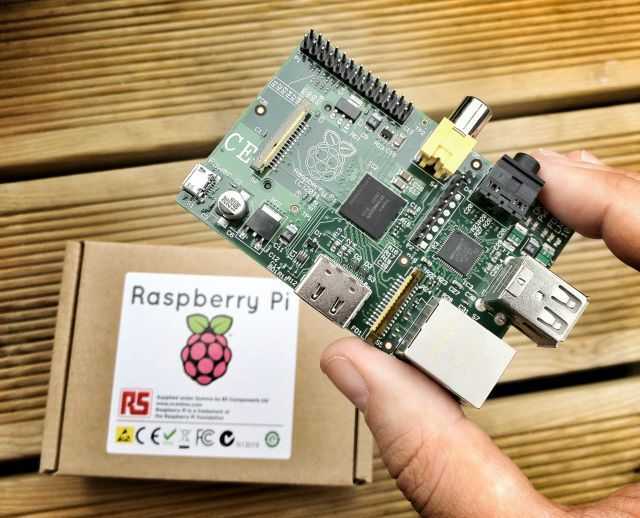
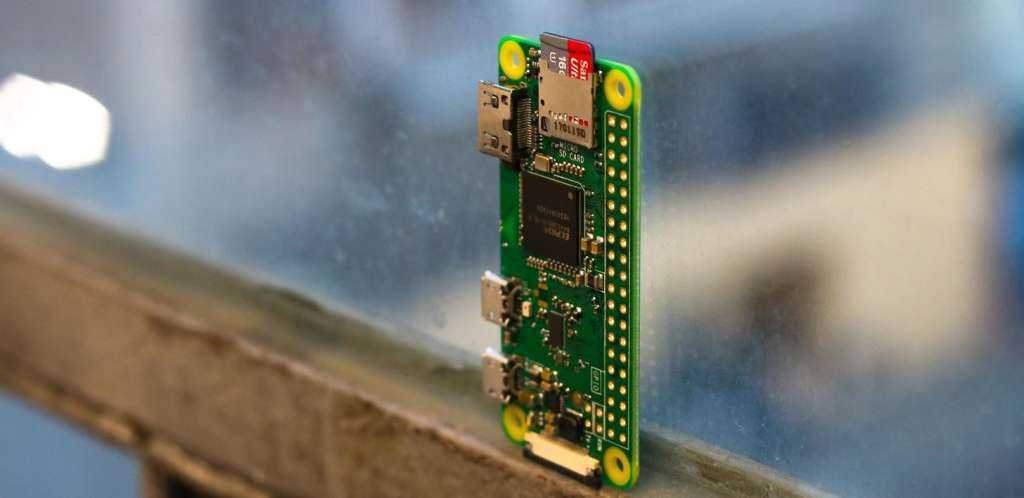
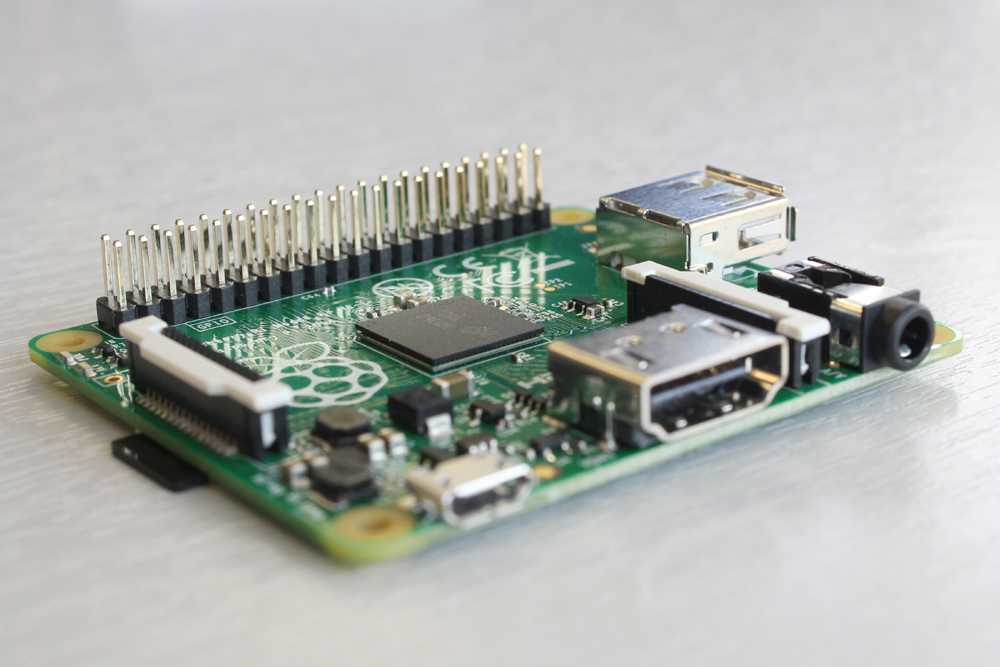
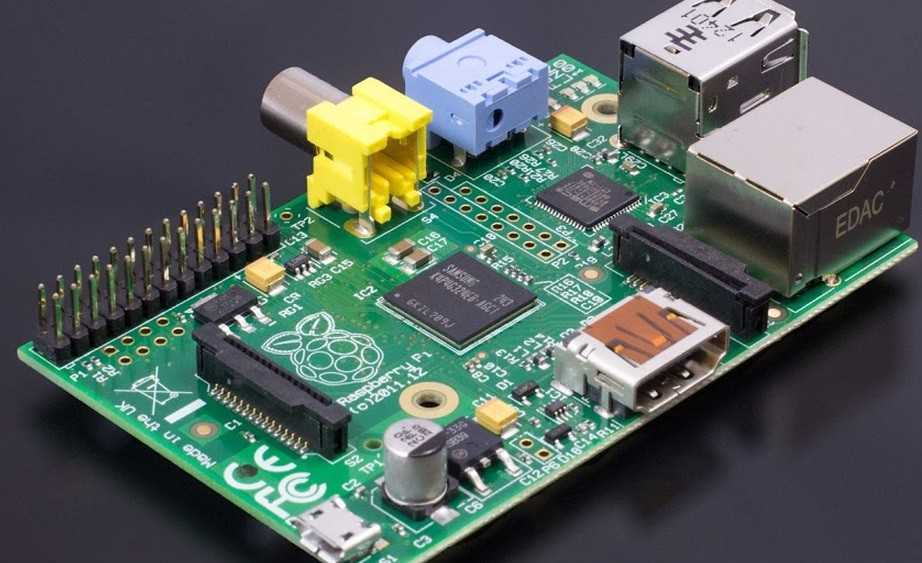
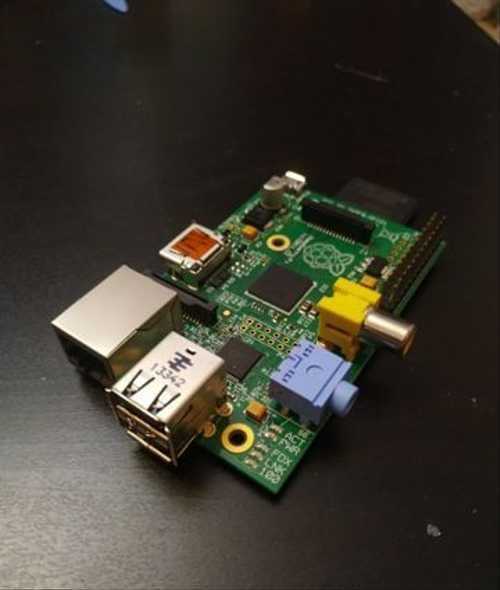
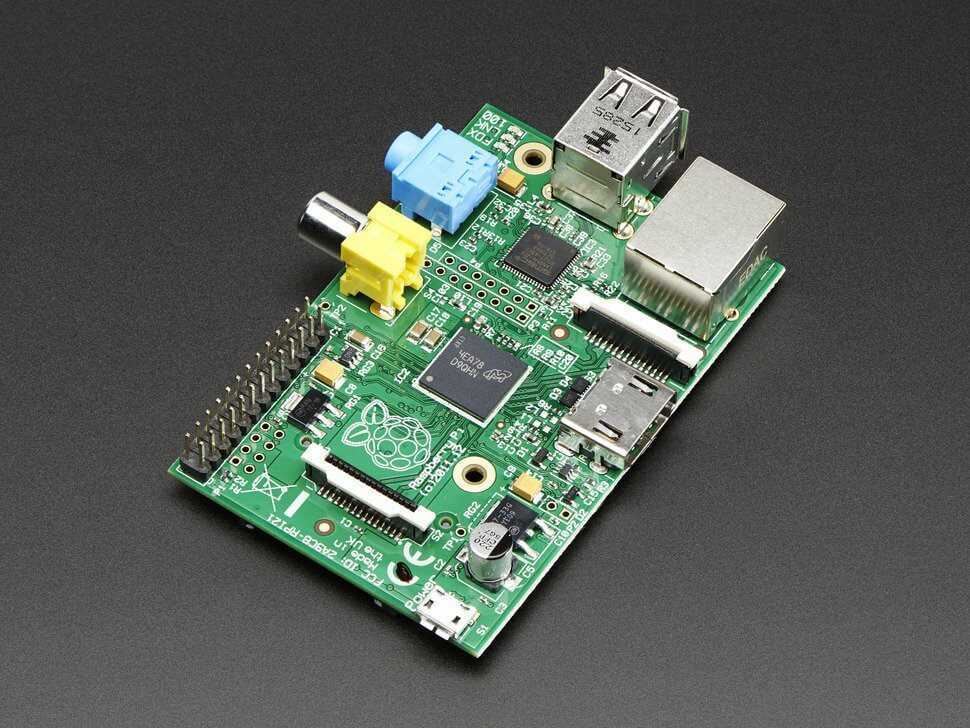
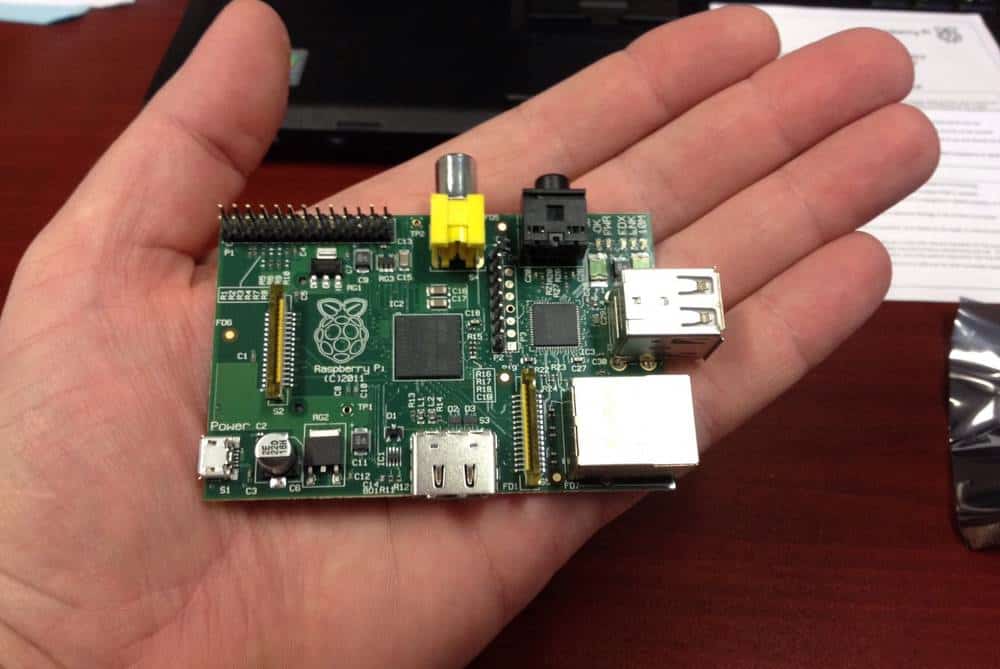
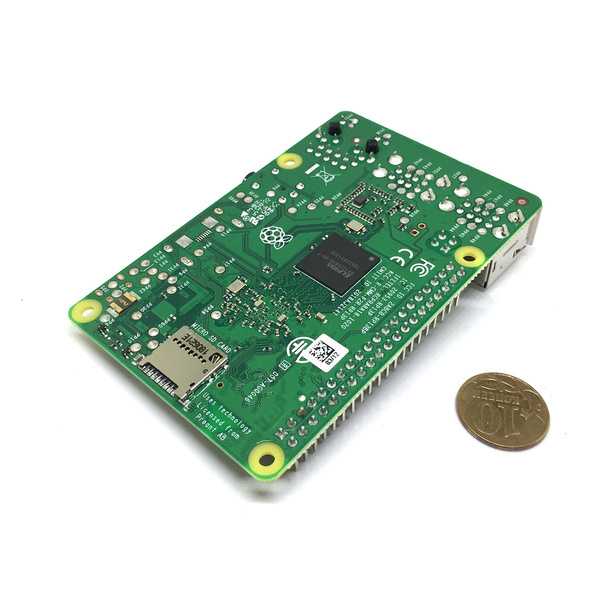
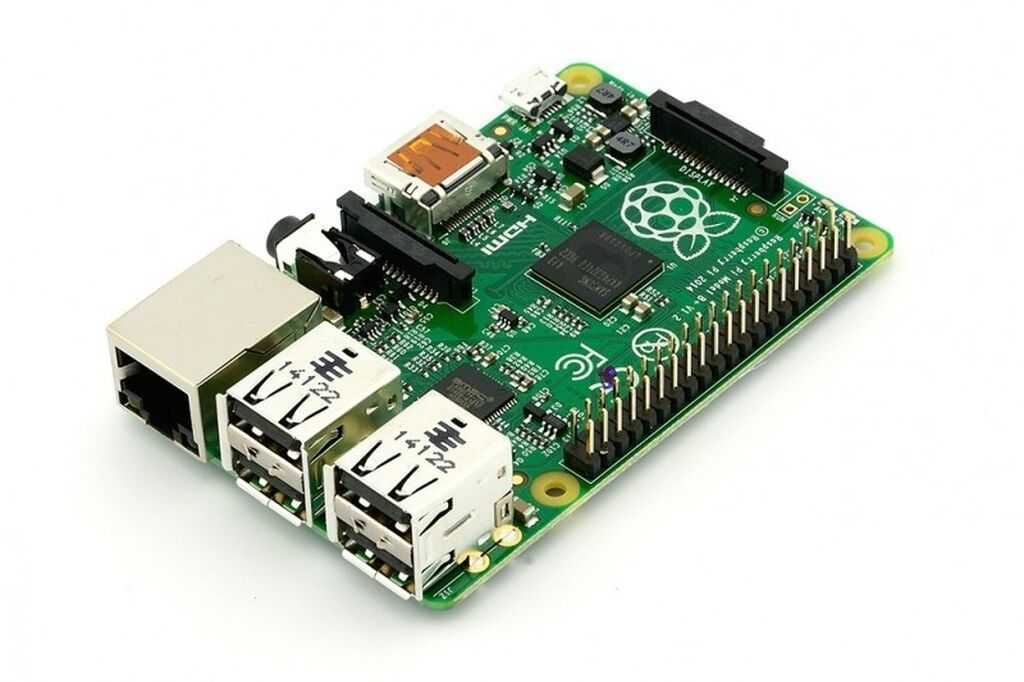
The Raspberry Pi comes ready to be connected to the internet; it has a built-in ethernet port, and it’s very easy to get a USB wifi dongle to give it wireless connectivity as well (you can see a very tiny one in the image below). This is one of the reasons why the Pi is the device of choice for things like personal web servers, printer servers, and VPNs.
The Arduino, on the other hand, doesn’t have any built-in capability for connectivity. If you want to connect it to the internet, you’ll need to add an extra piece of hardware that includes an ethernet port. If you want wifi connectivity, you’ll need a different piece of hardware again. Because the Arduino is meant for hardware projects instead of software ones, it needs a bit of tinkering to get it connected.
I/O Pins
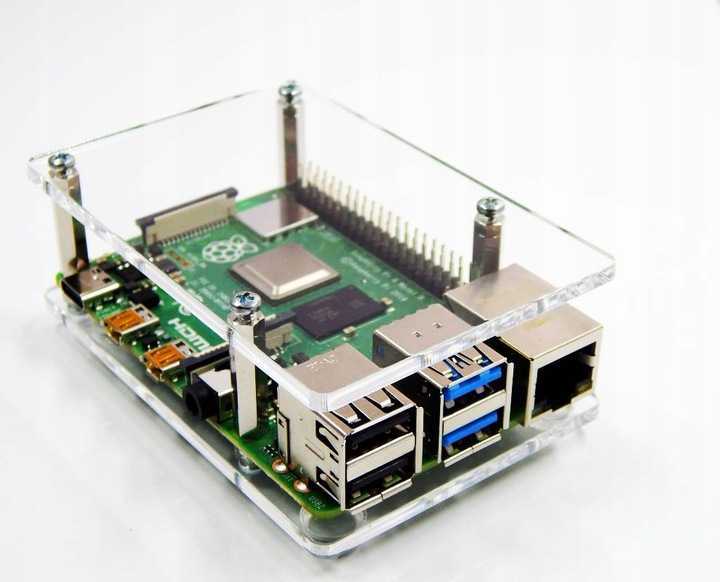
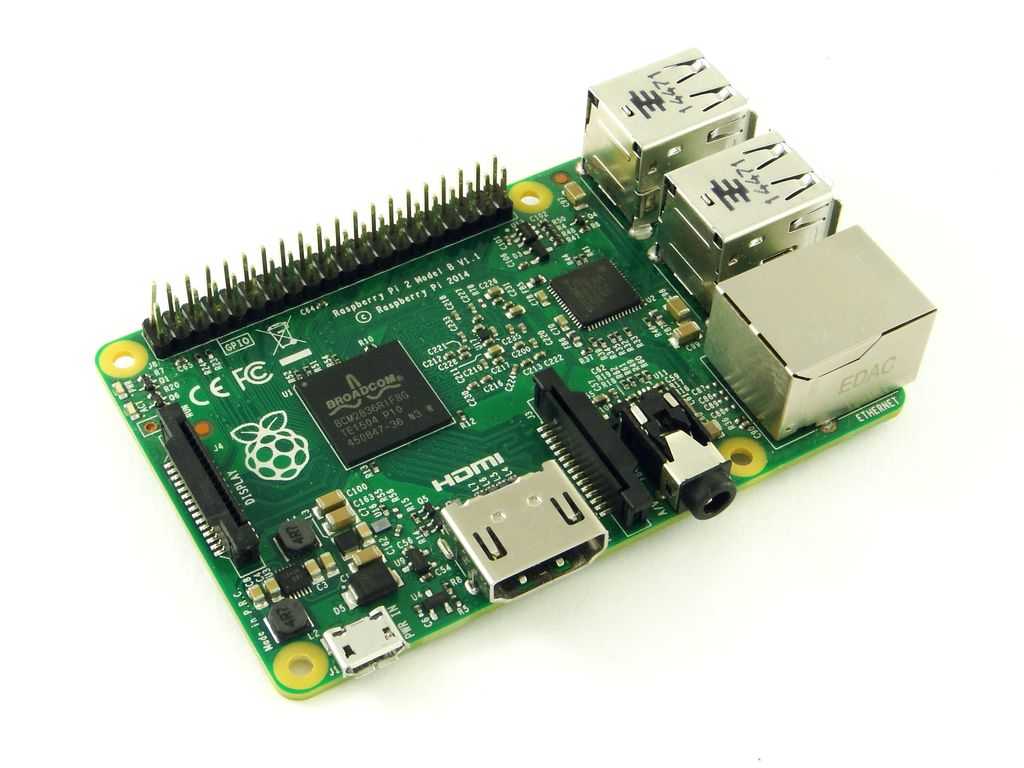
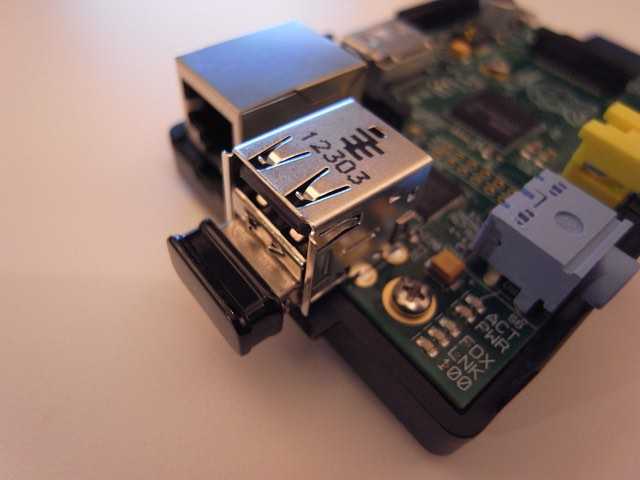
Input/output pins are what allow your single-board computer to talk to things that are connected to it. For example, your Raspberry Pi could light up an LED. Or your Arduino could activate a motor. If you’re looking for hardware connections, these pins are what you need. The Raspberry Pi 2 packs 17 of these pins, while the Arduino Uno offers 20; you can see a number of them being used in the image below.
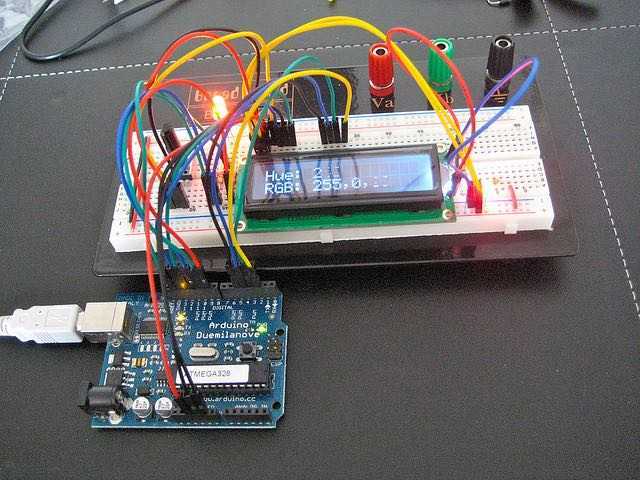
Another significant difference in the I/O pins between the two boards is the temporal resolution at which you can control them. Because the Raspberry Pi is a full computer, it has a number of things that are vying for CPU time, which means it can have some difficulty in getting timing down to small fractions of a second. And it needs software to properly interface with sensors and other devices. The Arduino, on the other hand, can change the output and monitor the input on its pins down to a very tiny amount of time.
Storage
The Arduino comes with 32 KB of onboard storage, which is just enough to store the code that provides instructions for its current program. You can’t use this storage for apps, videos, photos, or anything else. The Raspberry Pi, on the other hand, doesn’t come with any onboard storage, but it does have a micro SD port, so you can add as much storage as you’d like. Adding 32 GB of storage will only cost you around $12 with a SanDisk micro SD card, and you can easily add up to 128 or 256 GB if you need it.
USB
Because the Arduino isn’t meant to communicate with computers, it doesn’t come standard with any USB ports that you can use for this type of communication. A single port can be used to connect the Arduino to your computer via your computer’s USB port, but that’s it. The Raspberry Pi, on the other hand, has four USB ports that you can use to connect it to a router, a printer, an external hard drive, or a wide variety of other devices.
Программная составляющая
На старте продаж новый Rock 3A будет поддерживать только один дистрибутив Linux – Debian 10, адаптированный под процессоры Rockchip. Как пишет Liliputing, в будущем компьютер сможет работать и на других операционных системах семейства Linux.
Вероятность того, что на Rock 3A можно будет запустить и Windows 11, отлична от нуля. Эта система получила встроенную поддержку ARM-процессоров, хотя и лишь нескольких моделей.
Для тех, кто не хочет изучать Linux и ждать порта новой ОС Microsoft, Radxa еще в октябре 2020 г. выпустила одноплатный ПК Rock Pi X с поддержкой Windows 10. Он работает на процессоре Intel Atom x5-Z8350 шестилетней давности и в максимальной комплектации с 4 ГБ ОЗУ стоит $99 (7370 руб.).
Rock Pi X с поддержкой Windows 10
В теории, на нем можно будет запустить и Windows 11.
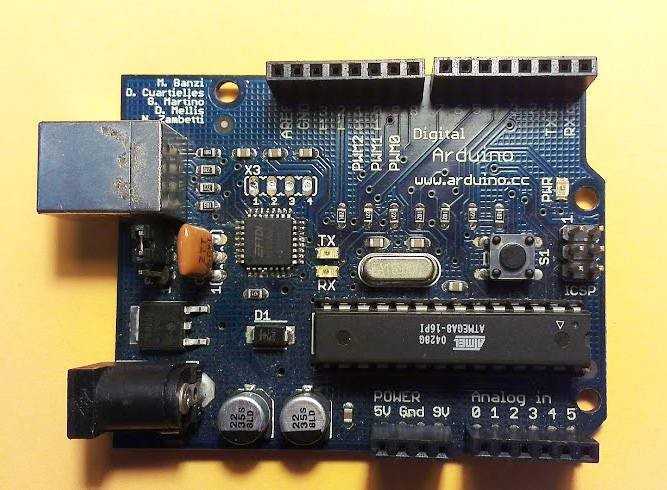
Meet Arduino
Unlike Raspberry Pi, Arduino boards are micro-controllers, not full computers. They don’t run an entire operating system but simply execute written code interpreted by their firmware. You lose access to the essential tools an operating system provides, but on the other hand, directly running simple code is more manageable and is accomplished with no operating system overhead.
Arduino Integrated Development Environment (IDE) is open-source software for writing code and uploading it to any Arduino board. The software runs on Windows 7 and newer, Linux, and MacOS 10.10 or newer — there’s a Windows 10 app, too.
Individual boards and kits are split into four groups: Entry Level ($11-$92), Enhanced Features ($20-$42), Internet of Things ($18-$72), and Education ($110 to $2,100). For instance, the Arduino UNO Rev3, which the current version of Arduino’s basic board, costs $23 and allows a USB connection between your PC and the board for easy use and programming.
The primary purpose of the Arduino board is to interface with sensors and devices, so it’s great for hardware projects in which you simply want things to respond to various sensor readings and manual input. That might not seem like a lot, but it’s a very sophisticated system that allows you to manage your devices better. It’s great for interfacing with other devices and actuators, where a full operating system would be overkill for handling simple read and response actions.
But because Arduino isn’t the “brain” of your project, solutions aren’t locked to a handful of boards. Instead, there are more than 40 solutions for entry-level products, advanced devices, Internet of Things projects, education, wearables, and 3D printing. They all have processors, memory, and in some cases, storage, but they’re primarily designed to serve as controllers, not miniature computers.
Great examples of Arduino projects can be found here. One project is the Arduino Servo Catapult that fires off a bowl full of food when a cat walks onto a pressure sensor mat seated under its dish. Another project transforms a Nerf Vulcan gun into a sentry turret that can track its enemies. Arduino devices can even do things like adding a fingerprint scanner onto a garage door opener. Many robot kits for kids you can buy on Amazon are based on the Arduino software and hardware platform.
Conclusion
Raspberry Pi and Arduino showcase some sparkling differences, which are both subtle and significant. Both boards have a considerably long list of pros and cons, but they will fit perfectly if the requirement is right. But no matter how different they may seem, there exists a scenario where they can work together to help maximize the output of the project. You can compare the Arduino board to the spinal cord of the body, which makes small-scale decisions such as lighting an LED or taking the temperature of a liquid, while the Raspberry Pi board is the brain, which takes the complex decisions, such as analysis of the past values and predicting the future values.
In the end, as we have discussed, the Arduino board is ideal for you if you are a beginner and wish to learn about electronics or someone who hails from an electronics background and wishes to take up simple projects. Raspberry Pi is perfect for you if you have Linux knowledge and want to build upon it by creating complex networking electronic projects.
Whichever board you choose, Hackr.io has community-curated tutorials and courses for both Arduino and Raspberry Pi:
- Arduino Tutorials and Courses
- Raspberry Pi tutorials and courses
People are also reading:
- Difference between Coding vs Programming
- How to make a chrome extension?
- What is Github Pack?
- How to become a DevOps Engineer?
- What is Procedural Programming?
- What is Functional Programming?
- Top Programming Terms for beginners
- How to Learn Programming?
What is Arduino?
If you are a beginner and don’t know about Arduino, here is a short description.
Arduino is an open-source electronics platform based on easy-to-use hardware and software.
Over the years Arduino has been the brain of thousands of projects, from everyday objects to complex scientific instruments.
There are many different types of Arduino microcontroller boards to choose from. Almost all the Arduino boards have ATmega microcontrollers as a control unit.
With Arduino’s easy-to-use IDE software for beginners, the Arduino is easier to learn to program as it uses a simplified version of C++ compared to other programming software. Arduino software runs on cross-platforms such as Linux, Windows, Macintosh OS, and other platforms.
Arduino
Because of this, you do lose access to basic tools that an OS would provide but you gain the flexibility of executing code directly with no OS overhead.
Advertisement
Arduino has no API and cannot provide user interactivity as there is no operating system. It basically runs code on ‘bare metal’.
Arduino is really better suited as an interface for sensors and other devices. In this capacity its brilliant for hardware projects where you want something to respond to sensor readings or other inputs.
At first glance, it might not seem too impressive but it’s actually a very sophisticated system that allows for excellent management of devices. For instance, it is superb for interfacing with other devices and actuators where a full OS would be overkill for relatively simple tasks.
 The first Arduino board, circa 2005. Source:
Arduino vs. Raspberry Pi: количество ядер и параметры ввода / вывода
Arduino
-
Похоже, нет никаких процессорных ядер, так как это не компьютер.
-
Имеет ограниченное количество вариантов ввода / вывода. Большинство из них просто цифровые выводы ввода / вывода.
-
Имеет 1 USB-соединение.
Raspberry Pi
-
Raspberry Pi 4 имеет четыре ядра обработки.
-
Имеет широкий выбор портов ввода-вывода и опций, аналогичных обычному компьютеру.
-
Имеет два порта micro-HDMI, которые могут поддерживать два дисплея 4K.
Обсуждая количество ядер, имеющихся на каждой плате, стоит помнить, что плата Arduino — это не компьютер, а плата микроконтроллера, и поэтому в ней нет ничего похожего на настоящее ядро обработки, подобное тому, которое может иметь процессор вашего ноутбука. А что касается ядер, у плат Arduino, похоже, их нет.
Raspberry Pi, с другой стороны, представляет собой компьютер, хотя и очень маленький. Согласно веб-сайту Raspberry Pi , Raspberry Pi 4 имеет 4 процессорных ядра.
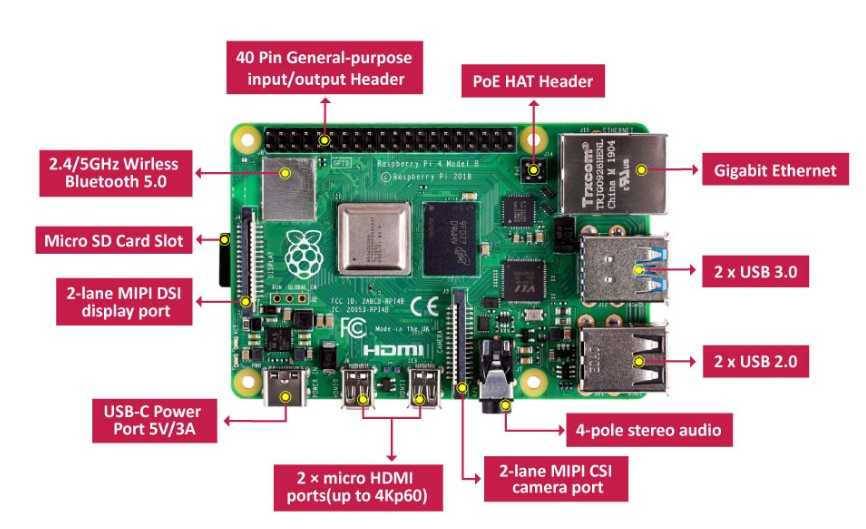
Что касается параметров ввода / вывода (I / O), Arduino Uno имеет 14 цифровых входов / выходов, 6 аналоговых входов, USB- соединение и разъем питания. Raspberry Pi 4 имеет широкий спектр портов и опций ввода / вывода, в том числе 2 порта USB 3.0 , 2 порта USB 2.0 , 2 порта micro- HDMI и слот для карты Micro SD, и это лишь некоторые из них. Два порта micro-HDMI могут поддерживать два дисплея 4K.
![Начало работы с raspberry pi: подключение и настройка [амперка / вики]](http://smartshop124.ru/wp-content/uploads/2/c/7/2c7078e95694e246c3bd48670753a9c2.jpeg)