
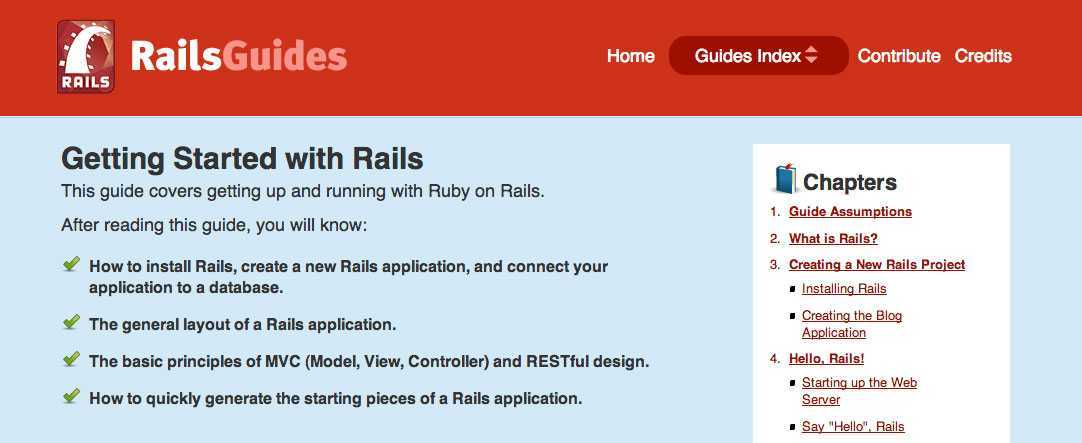
Знакомство с Rails[править]
Что входит в Rails?править
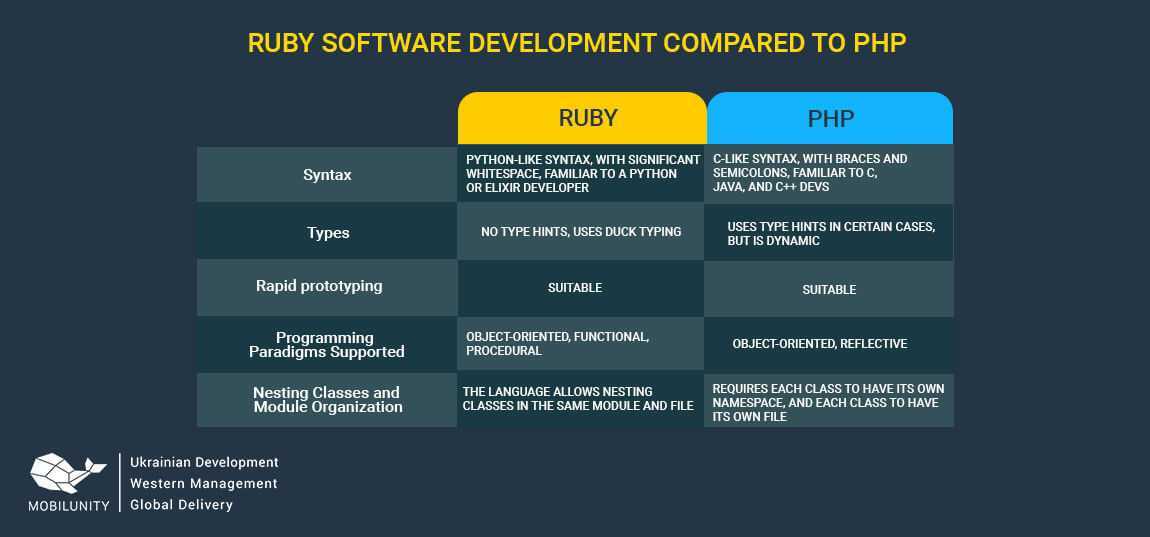
Rails — это полноценный, многоуровневый фреймворк для построения веб-приложений, использующих базы данных, который основан на архитектуре Модель-Представление-Контроллер (Model-View-Controller, MVC).
Динамичный AJAX-интерфейс, обработка запросов и выдача данных в контроллерах, предметная область, отраженная в базе данных, — для всего этого Rails предоставляет однородную среду разработки на Ruby. Все, что необходимо для начала — база данных и веб-сервер.
Кто пользуется Rails?править
Rails используют все — от стартапов и некоммерческих организаций до крупного бизнеса. Rails — это прежде всего инфраструктура, поэтому среда великолепно подходит для любого типа веб-приложений, будь это программы для организации совместной работы, поддержки сообществ, электронного бизнеса, управления содержанием, статистики, управления… Список можете продолжить сами.
Что еще нужно?править
Rails отлично работает со многими веб-серверами и СУБД. В качестве веб-сервера рекомендуется использовать Apache или nginx с модулем Phusion Passenger. Rails также можно разворачивать используя Unicorn, Thin, Mongrel или FastCGI. В качестве СУБД можно использовать MySQL, PostgreSQL, SQLite, Oracle, SQL Server, DB2 или Firebird. Использовать Rails можно на практически любой операционной системе, однако для развертывания мы рекомендуем системы семейства *nix.
Step 3 – Working with Gems
Gems are the way Ruby libraries are distributed. You use the command to manage these gems. We’ll use this command to install Rails.
When you install a gem, the installation process generates local documentation. This can add a significant amount of time to each gem’s installation process, so turn off local documentation generation by creating a file called which contains a configuration setting to turn off this feature:
Bundler is a tool that manages gem dependencies for projects. Install the Bundler gem next. as Rails depends on it.
You’ll see output like this:
You can use the command (the subcommand is short for ) to learn more about the environment and configuration of gems. You can see where gems are being installed by using the argument, like this:
You’ll see output similar to this:
Once you have gems set up, you can install Rails.
Подготовка виртуальной машины
Для работы с фреймворком Ruby on Rails вам потребуется операционная система на базе linux. Подойдет любой удобный для вас дистрибутив, желательно чтобы он был на базе Debian/Ubuntu. Установка системы может отнять довольно много времени, поэтому мы воспользуемся готовой сборкой виртуальной машины. Скачать ее можно с сайта http://virtualboxes.org/images/ubuntu/. Выбираем любой образ, например Ubuntu Linux 15.04 x86.
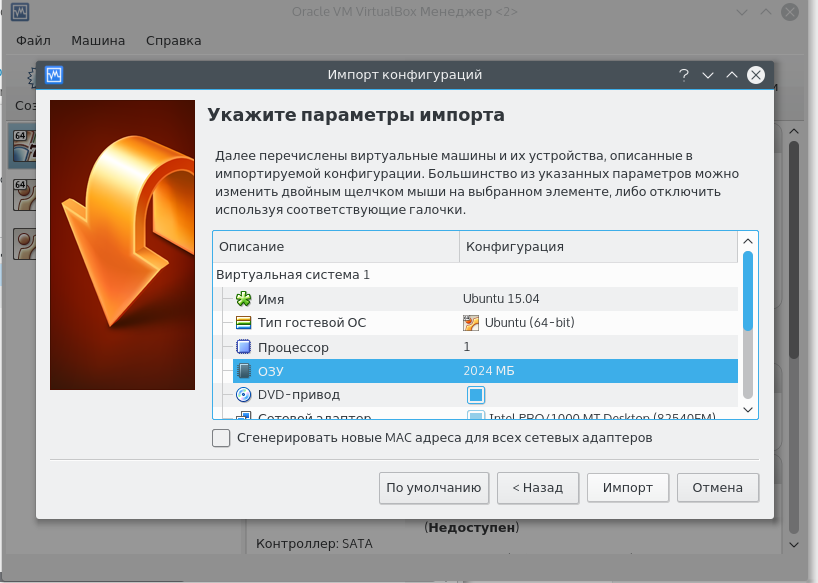
После того как торрент скачался, импортируйте образ машины, кликнув по нему 2 раза левой кнопкой мыши. Выбираем предлагаемые настройки, достаточно лишь изменить значение для оперативной памяти — 2024 мб.
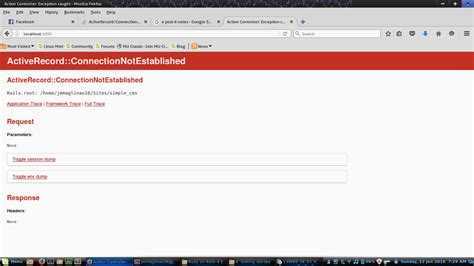
При первом запуске возможна такая ошибка.
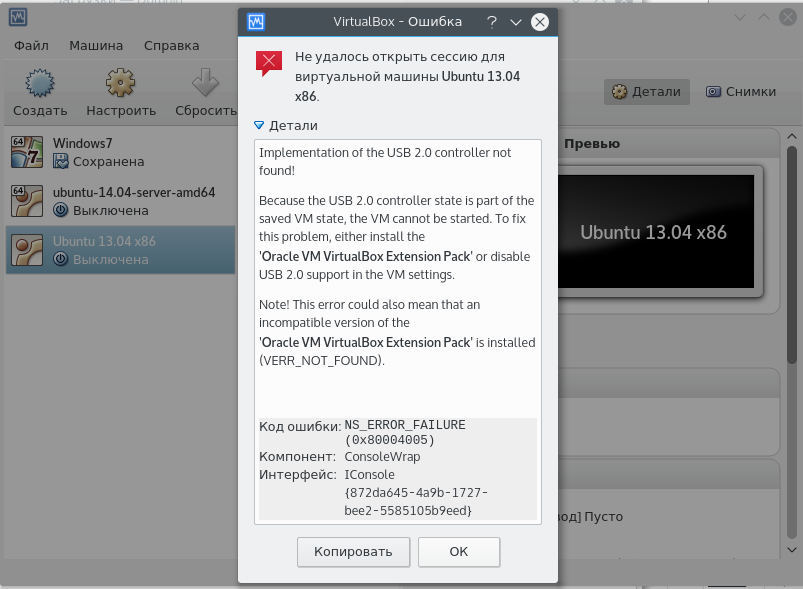
Это означает что VirtualBox требуется дополнительный плагин для работы с USB 2.0. Вы можете установить требуемый пакет, а можно просто отключить этот функционал для данной машины:
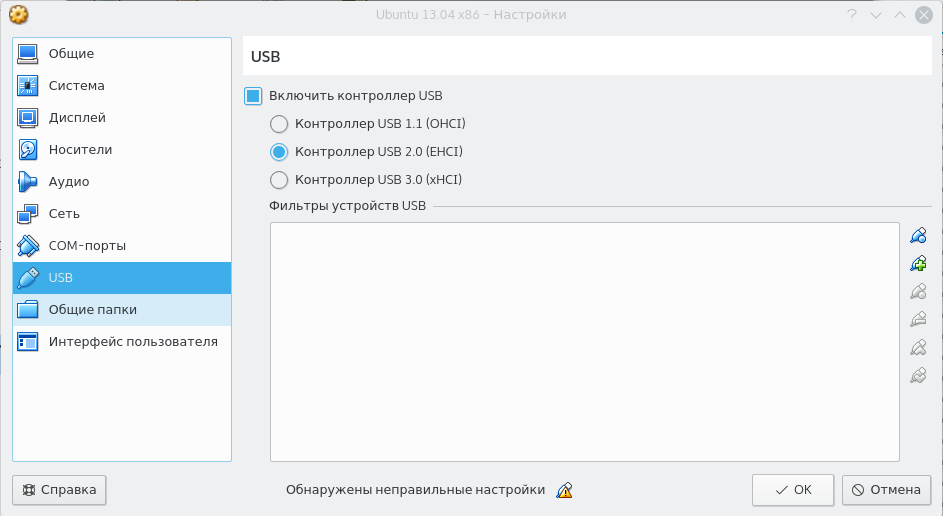
Просто переключите контроллер в режим USB 1.1
Задайте следующие настройки:

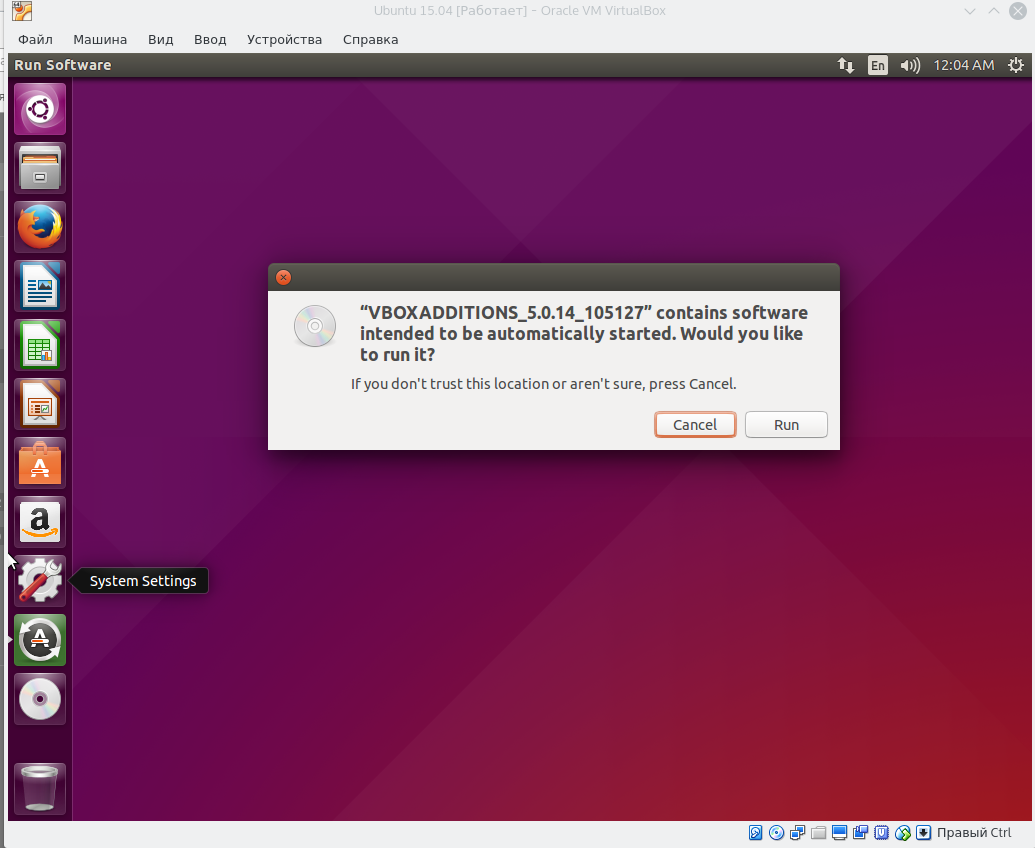
Это позволит вам копировать инструкции с хост-машины в виртуальную. Запускаем виртуалку. Логин и пароль вы можете найти на сайте, откуда скачивали виртуальную машину. В нашем случае, имя пользователя ubuntu пароль reverse.Установите дополнения гостевой ОС. В меню кликните Устройства -> Установить дополнения гостевой ОС.

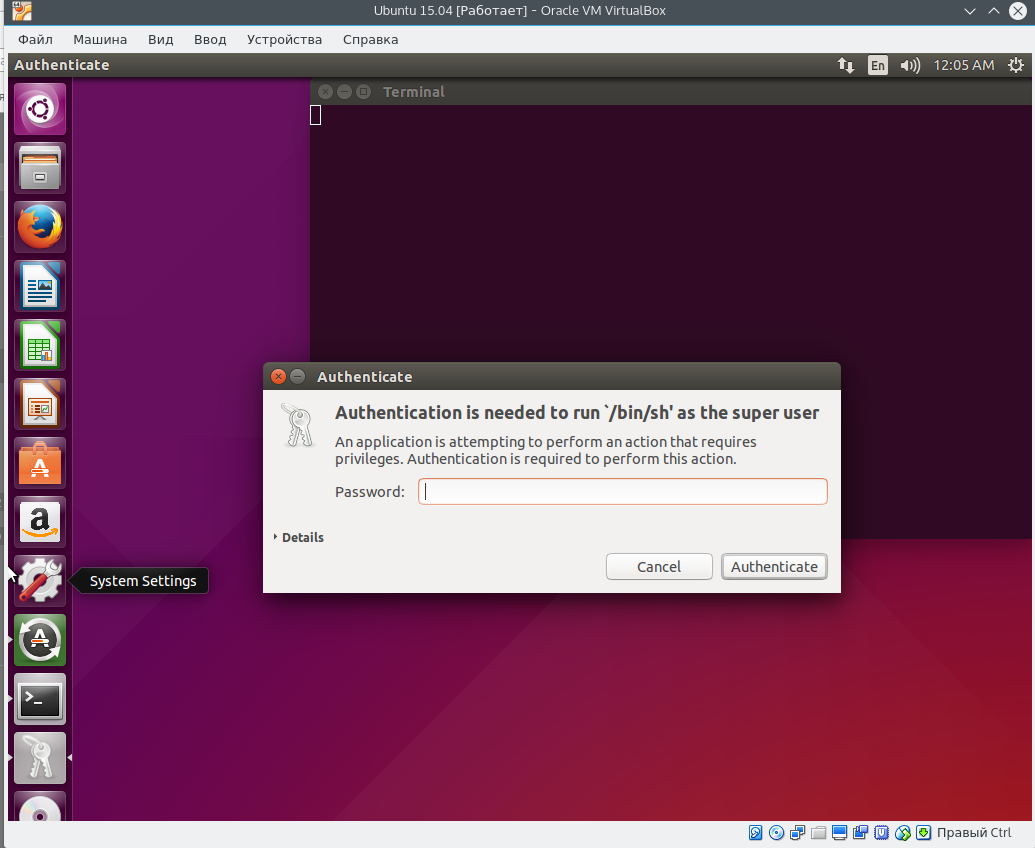
Далее в виртуальной машине кликаем Run
Пароль от sudo такой же как и у пользователя, под которым вы зашли в систему.
Перезагружаем виртуальную машину. Нажмите Shut Down, а затем Restart.
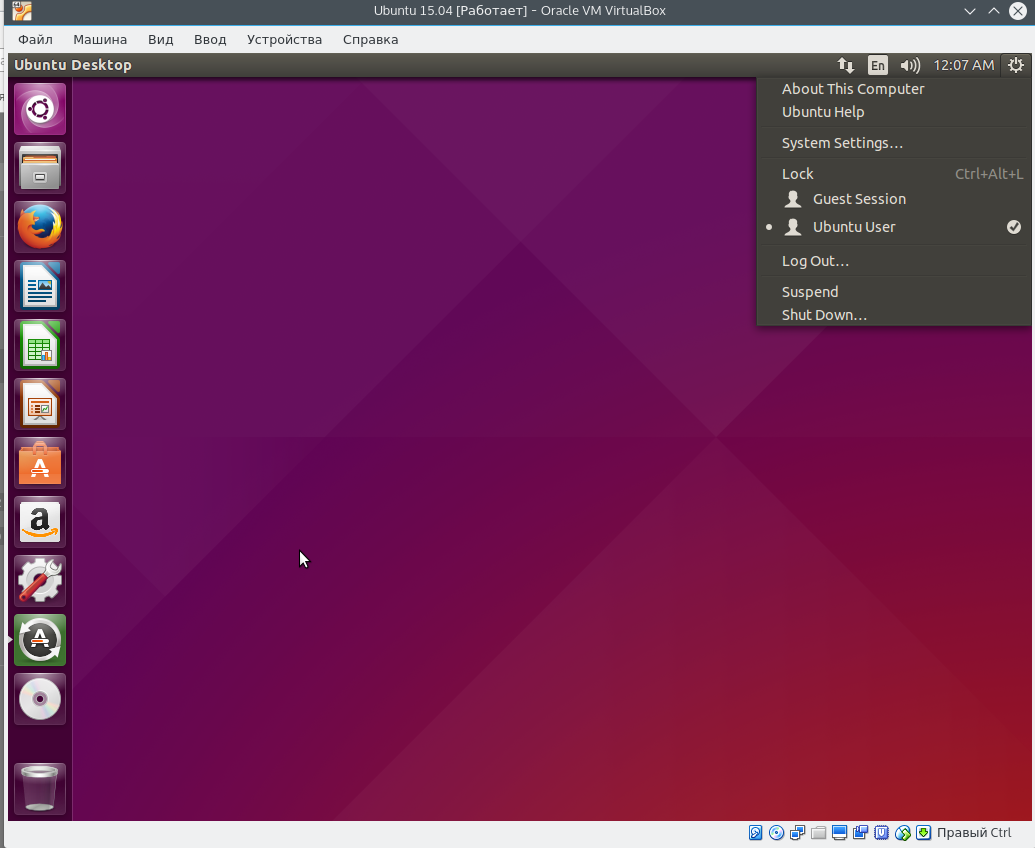
Отлично! Теперь наша виртуальная машина может подстраиваться под размеры физического экрана или под любой заданный размер окна VirtualBox.
Managers
Many Rubyists use Ruby managers to manage multiple Rubies. They allow
easy or even automatic switching between Ruby versions depending on the
project and other advantages but are not officially supported. You can
however find support within their respective communities.
asdf-vm
asdf-vm is an extendable version manager that can manage multiple
language runtime versions on a per-project basis. You will need the
asdf-ruby plugin (which in turn uses )
to install Ruby.

rbenv
allows you to manage multiple installations of Ruby.
While it can’t install Ruby by default, its
plugin can. Both tools are available for macOS, Linux, or other
UNIX-like operating systems.
RVM (“Ruby Version Manager”)
RVM allows you to install and manage multiple installations of
Ruby on your system. It can also manage different gemsets. It is
available for macOS, Linux, or other UNIX-like operating systems.
uru
Uru is a lightweight, multi-platform command line tool that helps you
to use multiple Rubies on macOS, Linux, or Windows systems.
Установка пакетов
Сначала нужно обновить GPG (GNU Privacy Guard) до последней версии, чтобы подключиться к серверу открытых ключей и запросить ключ, связанный с определенным ID.
Теперь нужно получить открытый ключ проекта RVM, который используется для подписи всех релизов. С помощью ключа RVM можно подтвердить подлинность загружаемого пакета.
Перейдите в каталог /tmp и загрузите сценарий RVM в файл:
С помощью команды curl загрузите установочный сценарий RVM с сайта проекта. Обратный слеш в начале команды запустит обычную команду curl, а не её алиас.
Флаг –s включает автоматический режим, -S переопределяет некоторые настройки системы, чтобы в случае ошибки команда curl смогла вывести сообщение. Флаг –L настраивает поддержку переадресации, а флаг –о перенаправляет стандартный вывод в файл.
Загрузив сценарий, просмотрите его содержимое:
Перенаправьте сценарий в bash, чтобы установить последнюю стабильную версию Rails, которая, в свою очередь, загрузит последнюю стабильную версию Ruby.
Во время установки будет запрошен пароль текущего системного пользователя. После установки нужно запустить команду source:
Теперь на сервере есть настроенное окружение Ruby on Rails.
Как установить конкретную версию Ruby и Rails с помощью RVM?
В некоторых случаях приложение требует определённой версии Ruby или Rails вместо последней стабильной версии. Такую установку тоже можно выполнить с помощью RVM.
Сначала нужно узнать, какие версии Ruby доступны:
Чтобы установить конкретную версию Ruby с помощью RVM, используйте такую команду:
Вместо ruby_version нужно указать версию Ruby (например, ruby-2.4.0 или просто 2.4.0).
После установки можно просмотреть список версий Ruby, установленных на данную машину.
Версии Ruby можно переключать:
Поскольку Rails является gem-ом, вы можете установить любую версию Rails с помощью команды gem. Чтобы просмотреть список валидных версий Rails, введите:
Чтобы установить выбранную версию Rails, введите:
Примечание: В этой команде нужно указать только номер версии, например, 5.1.6, а не rails_5.1.6.
С помощью gemset-ов можно использовать вместе разные версии Rails и Ruby. Чтобы создать gemset, введите.
Чтобы указать версию Ruby, которую нужно использовать в новом gemset-е, введите:
Gemset-ы позволяют создавать полнофункциональные окружения для gem-ов, а также настраивать неограниченное количество окружений для каждой версии Ruby.
Step 2 – Installing Ruby with ruby-build
With the plugin now installed, you can install versions of Ruby y may need through a simple command. First, let’s list all the available versions of Ruby:
The output of that command should be a long list of versions that you can choose to install.
Let’s install Ruby 2.5.1:
Installing Ruby can be a lengthy process, so be prepared for the installation to take some time to complete.
Once it’s done installing, set it as our default version of Ruby with the sub-command:
Verify that Ruby was properly installed by checking its version number:
If you installed version 2.5.1 of Ruby, your output to the above command should look something like this:

To install and use a different version of Ruby, run the commands with a different version number, as in and .
You now have at least one version of Ruby installed and have set your default Ruby version. Next, we will set up gems and Rails.
Configure PostgreSQL and Create Roles
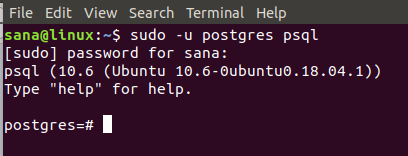
PostgreSQL applications can be created by user or roles. By default, a “postgres” user exists which is a superuser and it can create and migrate databases and also manage other user roles.
Initially, you can log in as sudo on PostgreSQL through the following command:
$ sudo -u postgres psql
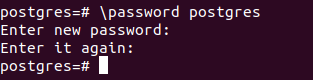
Here you can change the password of postgres as follows:
postgress=# \password postgres
Create a Role
A superuser can create a new user role through the following command:
$ create role “role_name” with createdb login password “‘password’”’ ;
Example:
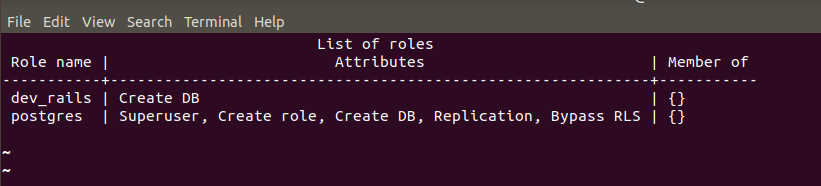
postgress=# create role dev_rails with createdb login password 'rockon123' ;
We are creating a role by the name of “dev_rails”. This is a user that will create a db for our first Rails application.

A superuser can view the list of roles existing on PostgreSQL as follows:
postgress=# \du
Use Ctrl+z to exit PostgreSQL.
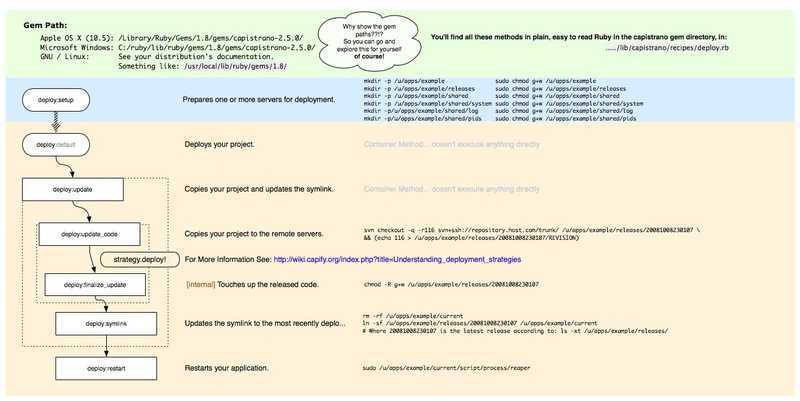
Развертывание[править]
Даже на этой ранней стадии мы собираемся развернуть наше (по прежнему пустое) Rails приложение к производству. Этот шаг является необязательным, но раннее развертывание часто позволяет уловить любые проблемы на этапе разработки. Альтернатива — развертывание только после трудоемких усилий запечатанное далеко в среде разработки, часто приводит к страшной головной боли интеграции, когда наступает время обеда.
Средства развертывания Ruby кода появились в течение нескольких прошедших лет, и сейчас для этого есть несколько замечательных функций. Они включают приложения для хостов или виртуальных частных серверов Phusion Passenger (модуль для Apache и Nginx), полный комплекс услуг развертывания таких компаний, как Engine Yard и Rails Machine, и облако развертывания услуг, таких как Engine Yard Cloud и Heroku.
Мой любимый способ развертывания Rails — опция Heroku, платформа, построенная специально для развертывания Rails и других веб Ruby applications. Heroku делает развертывание Rails приложений до смешного простым, используя для получения исходного кода систему управления версиями Git. (Это еще одна причина для последующей установки Git шаги в разделе 1.3, если вы еще не сделали этого.) Оставшаяся часть этого раздела посвящена развертыванию нашего первого приложения для Heroku.
Установка Herokuправить
После регистрации на Heroku, установите Heroku gem:
$ gem install heroku
Как и с GitHub, при использовании Heroku вам необходимо создать SSH ключи, если вы до сих пор это не сделали, и затем указать Heroku ваш public key, чтобы вы смогли использовать Git для загрузки ваших приложений на их сервера:
$ heroku keys:add
Наконец, используем команду Heroku для того чтобы создать место на серверах Heroku, чтобы наше приложение ожило:
Да, и это все. Heroku команда создает новый поддомен только для нашего приложения доступный для немедленного просмотра. Там пока что ничего нет, так что давайте займемся развертыванием.
Развертывание. Шаг первый.править
Для развертывания на Heroku, первый шаг заключается в использовании Git для загрузки приложении на Heroku:
$ git push heroku master
Развертывание. Шаг второй.править
Нет никакого второго шага! Мы уже все сделали! Чтобы увидеть готовое приложение, вы можете посетить адрес который вы видели когда вы запускали heroku create. Вы также можете использовать команду Heroku, которая автоматически сделает это:
$ heroku open
После того как вы успешно запустили ваше приложение, heroku обеспечивает красивый интерфейс для администрирования и настройки приложения.
Команды Herokuправить
Есть целая куча команд Heroku, и мы едва будем использовать их все в нашем учебнике. Давайте используем одну из них чтобы переименовать приложение:
$ heroku rename youname
Install NodeJS on Ubuntu 20.04
Rails requires Javascript runtime to build application so you need to install latest version of Node.js.
Run the following command to install NodeJS version 12 Repositories. If you want the latest version, you can install NodeJS version 14.
Execute following command to install Nodejs.
To check nodejs version, run the following command:
You will get the output as:
After installing nodejs, you need to install yarn package manager. Run the following command to add gpg key for yarn package manager.


Add repository for yarn package using following command:
Finally run following command to install yarn package manager .
Install Ruby on Rails
Finally, after installing all the prerequisites, we can now install Ruby on Rails on our system by following these steps:
Step1: Look up for the latest available version
The RubyGems website maintains all the versions of Ruby on Rails till date, on the following link:
Choose the latest version of Ruby on Rails that you would like to install. At the time of writing this article, the latest available version is 5.2.2
Step2: Install the latest Ruby on Rails version
You can install the latest version of Ruby on Rails through the gem command line tool as follows:
$ gem install rails -v 5.2.2
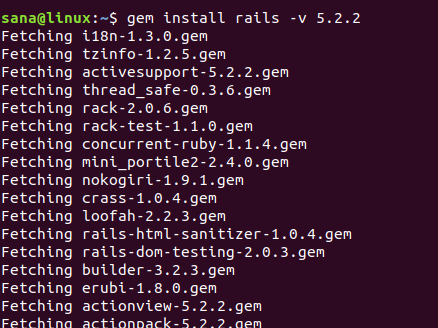
The installation process might take some time depending on your Internet connection.
After the installation is complete, run the following command to view the Rails version installed on your system.
$ rails -v
The command also verifies that Ruby on Rails is indeed installed on your system.
Install Ruby Version Manager (RVM)
The Ruby Version Manager helps us in managing Ruby installation and configuring multiple versions of Ruby on a single system. Follow these steps in order to install the RVM package through the installer script:
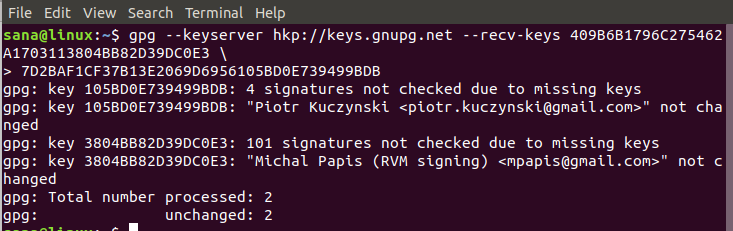
Step1: Add the RVM key to your system
Run the following command in order to add the RVM key; this key will be used when you install a stable version of RVM:
$ gpg --keyserver hkp://keys.gnupg.net --recv-keys 409B6B1796C275462A1703113804BB82D39DC0E3 \
7D2BAF1CF37B13E2069D6956105BD0E739499BDB
Step2: Install Curl
We will be installing RVM through Curl. Since it does not come by default with the latest versions of Ubuntu, we will need to install it through the following commands as sudo:
$ sudo apt install curl
Please note that only authorized users can add/remove and configure software on Ubuntu.
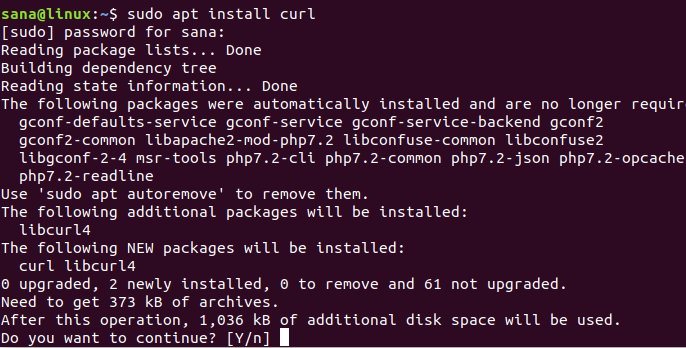
The system will prompt you with a Y/n option in order to confirm the installation. Please enter Y to continue, after which, Curl will be installed on your system.Advertisement
Step3: Install the RVM Stable version
Now run the following command in order to install the latest stable version of RVM.
$ curl -sSL https://get.rvm.io | bash -s stable --ruby
This command will also automatically install all the required packages needed to install RVM.
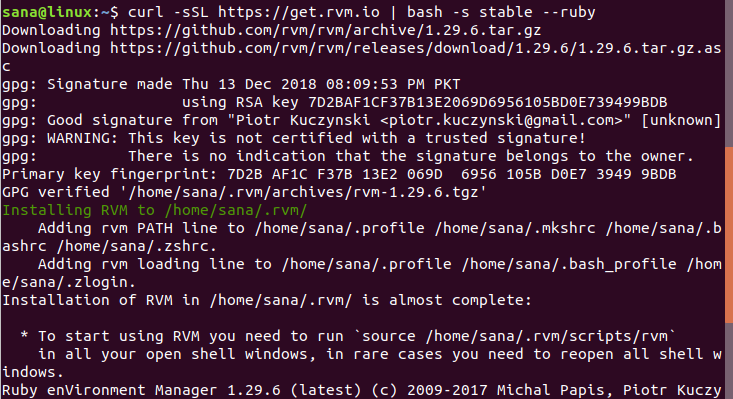
The process will take some time depending on your Internet speed, after which RVM will be installed on your system.
Step4: Setup RVM source folder
Please note that the last few lines of the RVM installation output suggest running the following command:
$ source /usr/local/rvm/scripts/rvm
This is used to set the source folder to the one mentioned in the output. You need to run this command in order to start using RVM.
You might get the following output when setting up the source:
![]()
In that case, run the following commands on your system:
$ source ~/.rvm/scripts/rvm
$ echo "source ~/.rvm/scripts/rvm" >> ~/.bashrc
$ source ~/.bashrc

Now the source for RVM is set. You can check the version number of RVM installed on your system through the following command:
$ rvm --version

This output also ensures that RVM is indeed installed on your system.
Your First Rails application
Now we will create our first Rails application with PostgreSQL as the default database. This involves the following steps:
Step1: Create a new Rails application
Create a new project by the name of “firstapp”, or any other name, through the following command and specify PostgreSQL as the database:
$ rails new firstapp -d postgresql
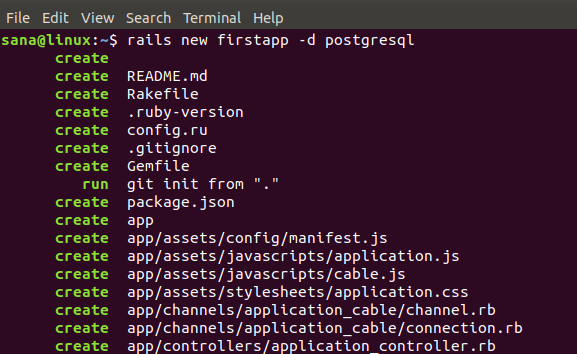
This will create a project folder in your home folder as follows:
$ ls

Step2: Configure your Rails project to incorporate the PostgreSQL user role
Now we want the user role we created in PostgreSQL to be able to create a database in the Rails application. For this, you need to edit the database.yml file located in your newly created application’s folder in the /config/ folder.


Move to your first application and then the config folder as follows:
$ cd /firstapp/config
Here you will see the database.yml file. You can edit this file through your favorite text editor. We will be doing so through the Nano editor by using the following command:
$ nano database.yml

In this file, you will be able to see mainly three sections:
- Development
- Test
- Production
We will need to configure the Development and Test sections of the file.
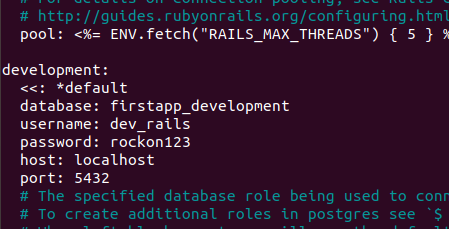
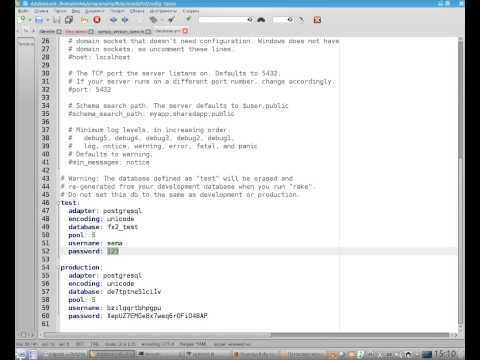
Make the following configurations in the Development section
| database: firstapp_development
username: dev_rails password: rockon123 host: localhost port: 5432 |
And, the following in the Test section:
| database: firstapp_test
username: dev_rails password: rockon123 host: localhost port: 5432 |
Note: Please make sure that the syntax is correct. Each line should be preceded by 2 spaces and NOT tabs.
Save the file by pressing Ctrl+X, then Y and then by hitting Enter.
Step3: Generate and then migrate the Database
Generate the database through the following rails command:
$ rails db:setup

Please make sure that there are no errors. Most errors are due to the wrong syntax in the database.yml file or the inconsistency in the username and password from the one you created in PostgreSQL.
After the successful generation, migrate the database through the following rails command:
$ rails db:migrate
![]()
Step4: Start the Puma Rails web server
After completing the application setup, please enter the following command in order to start the default Puma web server:
$ rails s -b localhost -p 8080
Or in our case,
$ rails s -b 127.0.0.1 -p 8080
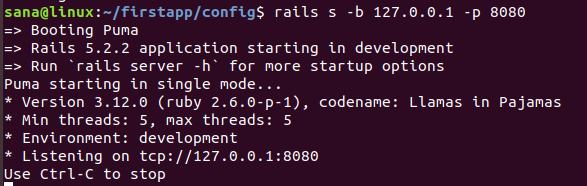
After this command, your first Rails application is running on the local host at port 8080.
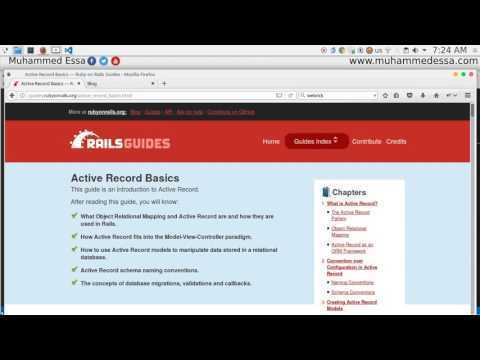
Step5: Open the default Rails Project Homepage
You can view your database successfully being hosted on the default Rails Project homepage by entering this URL in one of your web browsers:
http://localhost:8080/
You can also use your localhost IP, like us, in the above-mentioned URL:
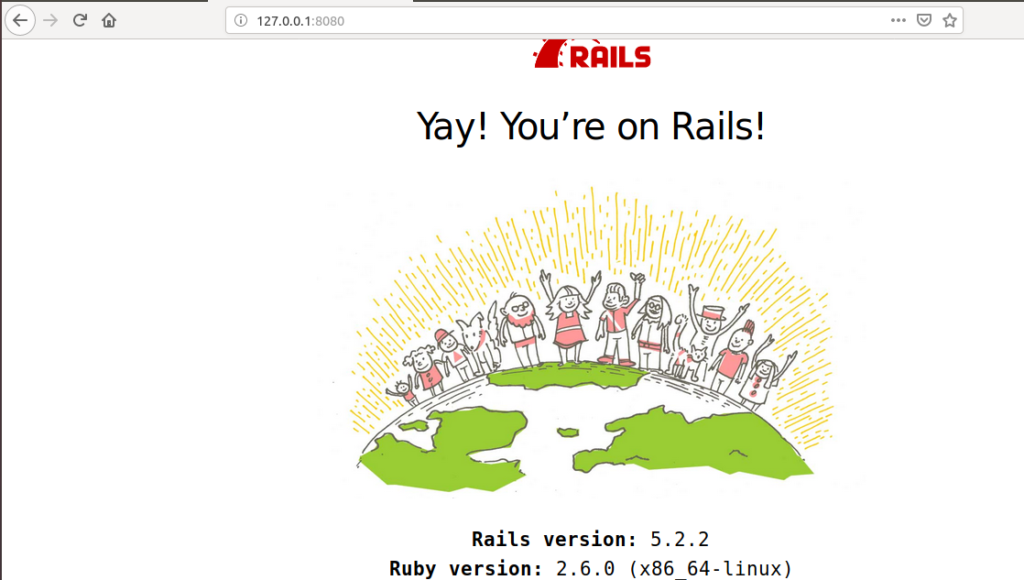
You can not perform any CRUD operation on this simple application. Follow the article some more in order to make your application a little more interactive.


Step 4 – Installing Rails
To install Rails, use the command along with the flag to specify the version. For this tutorial, we will use version :
The command installs the gem you specify, as well as every dependency. Rails is a complex web development framework and has many dependencies, so the process will take some time to complete. Eventually you’ll see a message stating that Rails is installed, along with its dependencies:
Note: If you would like to install a different version of Rails, you can list the valid versions of Rails by doing a search, which will output a long list of possible versions. We can then install a specific version, such as 4.2.7:
If you would like to install the latest version of Rails, run the command without a version specified:
rbenv works by creating a directory of shims, which point to the files used by the Ruby version that’s currently enabled. Through the sub-command, rbenv maintains shims in that directory to match every Ruby command across every installed version of Ruby on your server. Whenever you install a new version of Ruby or a gem that provides commands, like Rails does, you should run:
Verify that Rails has been installed properly by printing its version, with this command:
If it installed properly, you will see the version of Rails that was installed:
At this point, you can begin testing your Ruby on Rails installation and start to develop web applications. Let’s look at keeping rbenv up to date.
Скорость разработки
Основным преимуществом языка программирования Ruby и фреймворка Ruby on Rails считается скорость разработки. Практика показывает, что скорость разработки проектов на RoR увеличивается на 30–40 процентов по отношению к любому другому языку программирования или фреймворку. В первую очередь прирост скорости разработки определяется обширным набором готовых к работе штатных инструментов RoR, колоссальным набором готовых решений в сообществе, языку Ruby и простоте программирования на нем.
Одной из важнейших частей культуры RoR является социальность. Решил проблему, — помоги решить другим. Реализовал свой модуль, — поделись с сообществом. Таким образом, на данный момент в открытом доступе хранятся тысячи готовых решений тех или иных задач. Системы аутентификации, авторизации, комментирования, системы платежей, почтовые рассылки и многое другое (все то, что обычно разрабатывается «с нуля») внедряются реализованные кем–то другим, протестированные и рекомендованные многочисленным сообществом.
Conclusion
We have covered the basics of how to install RVM and Ruby on Rails here so that you can use multiple Ruby environments.
For your next steps, you can learn more about working with RVM and how to use RVM to manage your Ruby installations.
If you’re new to Ruby, you can learn about programming in Ruby by following our How To Code in Ruby tutorial series.
For more scalability, centralization, and control in your Ruby on Rails application, you may want to use it with PostgreSQL or MySQL rather than its default sqlite3 database. As your needs grow, you can also learn how to scale Ruby on Rails applications across multiple servers.
Опциональные действия
Чтобы улучшить установку Ruby on Rails, выполните рекомендации данного раздела.
Настройка Git
При кодировании приложения очень важно иметь под рукой надёжную систему контроля версий. Чтобы установить и настроить Git, читайте данную статью
Установка базы данных
По умолчанию Rails использует sqlite3, которая может не справиться с нагрузкой объёмного приложения. Чтобы избежать сбоев приложения, рекомендуется установить систему управления базами данных (СУБД) MySQL или PostgreSQL.
К примеру, чтобы установить MySQL, используйте:
Затем установите gem mysql2:
Теперь MySQL может взаимодействовать с приложением Rails. Не забудьте выполнить соответствующую настройку MySQL и Rails-приложения.


